Beer Ahoy

The Further Adventures of Attention-Surplus-Disorder Man

If you read my blog for a while you’ll come to understand that I have a pretty serious problem getting fixated on projects, whether it’s brewing, winemaking, cheese, marksmanship, motorcycles, gardening, powerlifting, whatever. It’s gotten particularly bad in recent years with brewing beer: when I find out about a new style or a beer I’ve never heard of, I have to research it and make it until I feel like I have a grasp of it. You may click here to learn more about our cellar cooling system. Or, contact Beer Cellar Coolers for additional guidance. You can also click here to find more options.

With that in mind, I was watching a travel show and the host hit a cafe in Northern Vietnam and sat around drinking something called Bia hơi. At first blush, it looks like a light industrial lager, common in hot countries. But then they poured it over ice and my ears perked up.
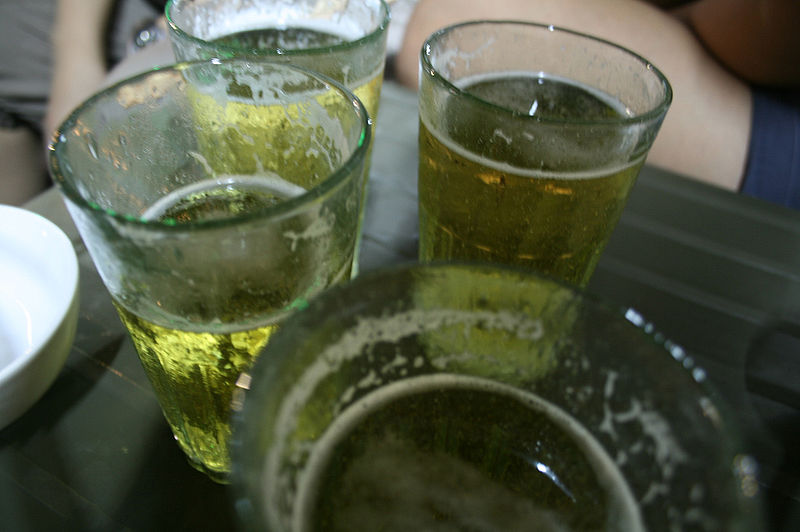
Icy cold! Photo from Wikimedia Commons
Street scene. I’m sweaty just looking at it.

It turns out this stuff is a sort of jackleg homebrew, brewed quickly and matured almost not at all, and delivered daily to bars and street-corner dispensing spots in jerry cans and kegs. Production is described as ‘informal’, with no government oversight or monitoring, and it’s meant to be drank absolutely ice cold, or even over ice, and the alcohol content is 3% ABV or less.

All of this makes perfect sense in Vietnam, which is not only incredibly hot but also terribly humid. You could drink rather a lot of beer like this and stay hydrated and refreshed without actually getting blotto, with the added bonus that it sells for something like 15 cents a glass.

After a bit of research on the interwebs, I asked around for people who’d actually been to Vietnam and tasted the beer. I lucked out in that a friend of mine who is a very discerning BJCP judge had been there a few years ago, and he was willing to share his opinion.

“Undrinkable swill full of acetaldehyde, sourness and mostly off-flavours. You’re an idiot if you want to make that.”

I get it: when you’re charging less than a buck a gallon for your beer, Quality Control is way down the list and you can’t throw a batch away just because it’s off–look, there’s a surly tourist, he’ll drink anything, get the bucket! It’s inevitable that the quality would be variable. I wanted to make my own, and I was pretty sure I could do a little better. It would have to be more expensive than fifteen cents a glass, but honestly, not that much more.

I flat-out pulled a recipe out of my butt. I chose to emulate a rice-adjunct lager with a starting gravity below 1.030 and hops around 15 IBU. I immediately ran into an issue: in order to get a moderate hop character I was going to have to either alter my regular brewing style (more on that below) or substantially decrease the amount of hops in the recipe: hop utilisation is affected by the density of the wort (yes, it’s lots more complicated, please don’t write me screeds about it) and a really low gravity beer like this is hard to make without over-bittering for style.

Another issue I contemplated was volume: if this stuff was good, and as low in alcohol as I was planning, I was probably going to enjoy more than one glass a night–it might replace most of my water intake. Making a single 19-litre keg would have me out of beer in ten days at most, and if it was really good, I would then become despondent until my next batch was ready. It’s summer here at Chaos manor, and it’s pretty warm for Canada.

It’s Canada: where’s the snow?

The answer to both quandries lay in the techniques of industrial brewing: high gravity. The beer we mostly see advertised on television is Industrial Lager. Megabreweries make a batch of beer at very high gravities (usually over 1.070 to start), finish fermenting, and then add water to hit their target alcohol content. It’s actually a very intelligent use of resources: you can ferment twice as much beer with the same amount of tanks. This sort of efficiency makes accountants very happy, and it’s not that far off of the parti-gyle brewing systems of olden times. My plan was to brew a 30 litre batch of beer at high gravity and water it back to two batches of 19 litres, then ferment each separately with a different yeast. Not only could I brew a lot of beer quickly, I could use the higher gravity wort to moderate hop utilisation. Or so was my plan . . . I whipped out Beersmith and loaded my Grainfather profile.
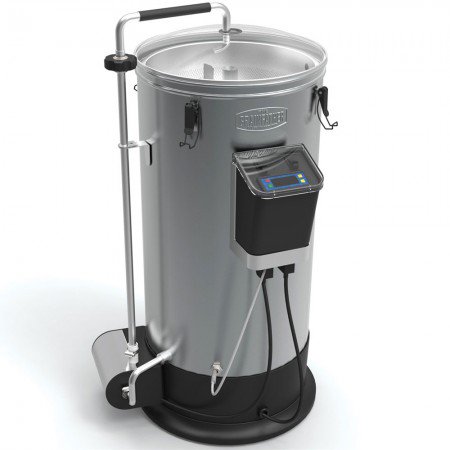
Pretty spritely for a Grainfather

If you’ve never used one, it’s an all-in-one mash/lauter/boil unit with a recirculating pump. I’ve had literally every system there is and I like this one because I can brew from home, in my kitchen, while I work at other things. It’s Bluetooth controlled, programmable for step mashes and has timers and such. It’s really pretty amazing.

Sadly, for what I wanted to do the Beersmith profile was a bit crap, so I back-of-the-enveloped it. I figured in Imperial units eight pounds of Pilsner malt, one pound of 10L Crystal malt, two pounds of rice, and two ounces of first wort hops and two ounces for a 20-minute whirlpool, to make around 5.5 gallons of finished wort to be watered back into two four-gallon batches to fill two kegs. If I wasn’t too screwy and my efficiency was low but okay, I should get an OG of 1.025-ish at pitching and get 22.-2.5% ABV and 15-ish IBU’s.

But there were a lot of departures in my plan. Most recipes would use flaked rice, but I wanted to do a cereal mash. That is, I wanted to take plain white rice and cook it to mush, and add that to my grain mash. Why? That’s the way the macro brewers do it, and I had planned on doing a three-step mash for maximum fermentability: 122 F then to 134 F and then to 149, using the boiling rice mush to drive temp to final mash.

You can see, I don’t like the easy way.

Onward to brew day. First step was to cook the rice. I got up early and put the rice on in a huge pot with three gallons of water on low.
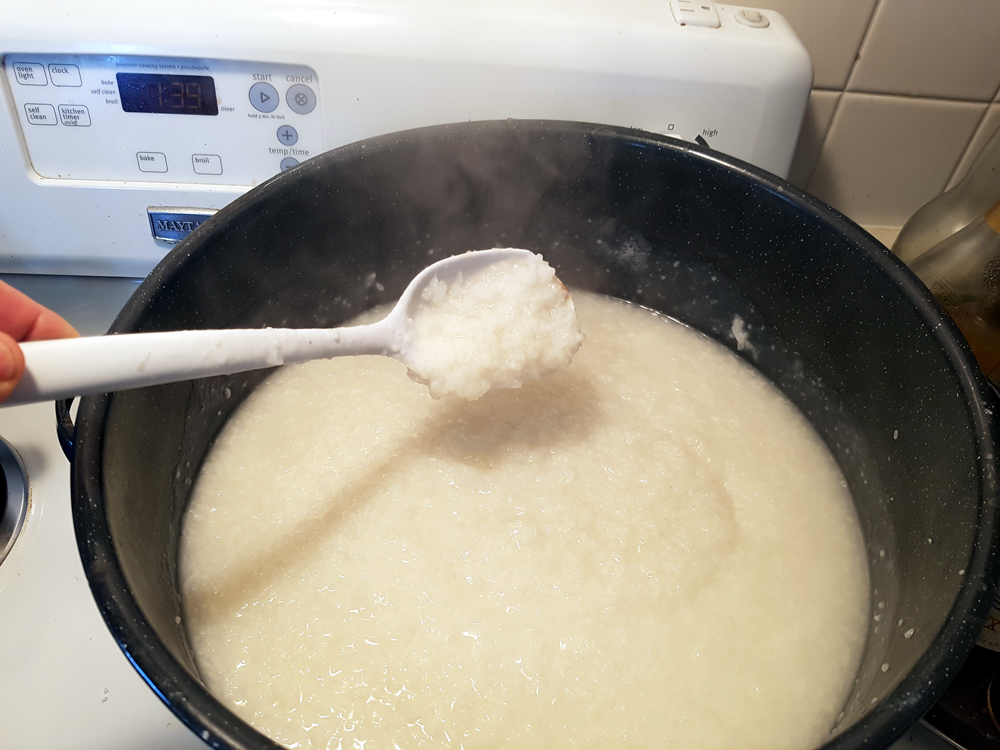
Looks like congee, but not as tasty

You have to be really careful wih this step: it’s very easy to scorch starch as it breaks down to moosh. Even the faintest hint of burnt character will completely ruin the beer, so you need way more water than you think you do, and you need to keep it low and slow, and stir frequently, and it’s going to take much, much longer than you think. I started the rice at 8 am and it was just ready for the pot by noon.

As it cooked I milled my grains.

It’s no monster, it’s just misunderstood

I have a three-roller Monster Mill and I can’t recommend it enough. Mine is set to 40 thousandths and it’s perfect as can be.
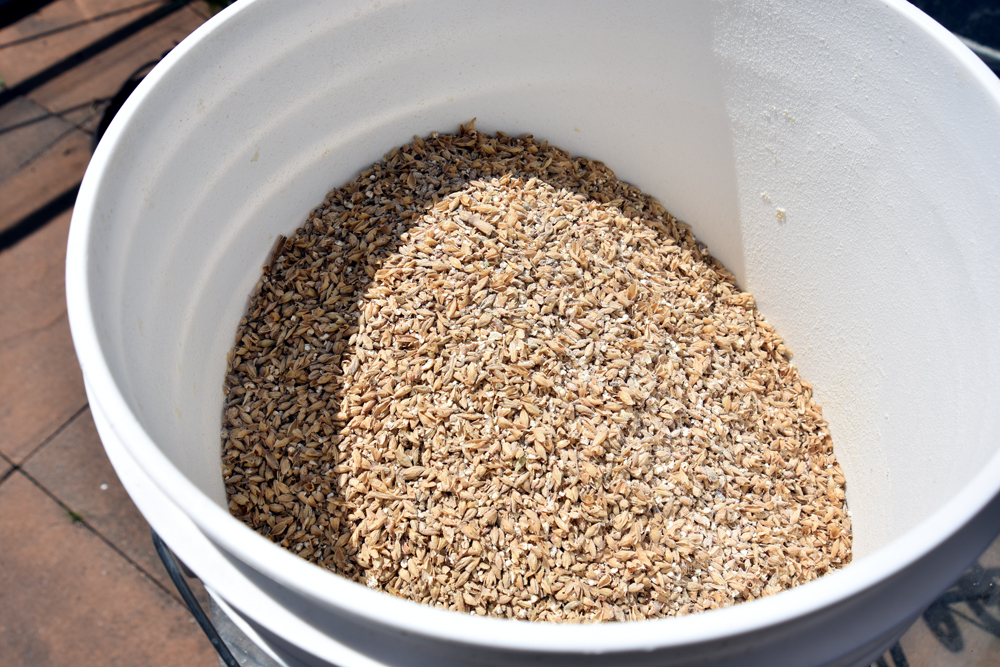
Perfect and utterly consistent. A good crusher makes a huge difference.

Next step was to set up my Grainfather. With my system, as with everything I do, I did not leave it unmodified. My first step was to throw away the trub/hop filter: it’s useless. In its place I put a Titan false bottom.
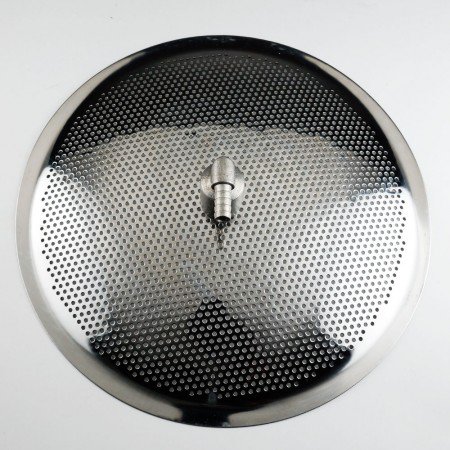
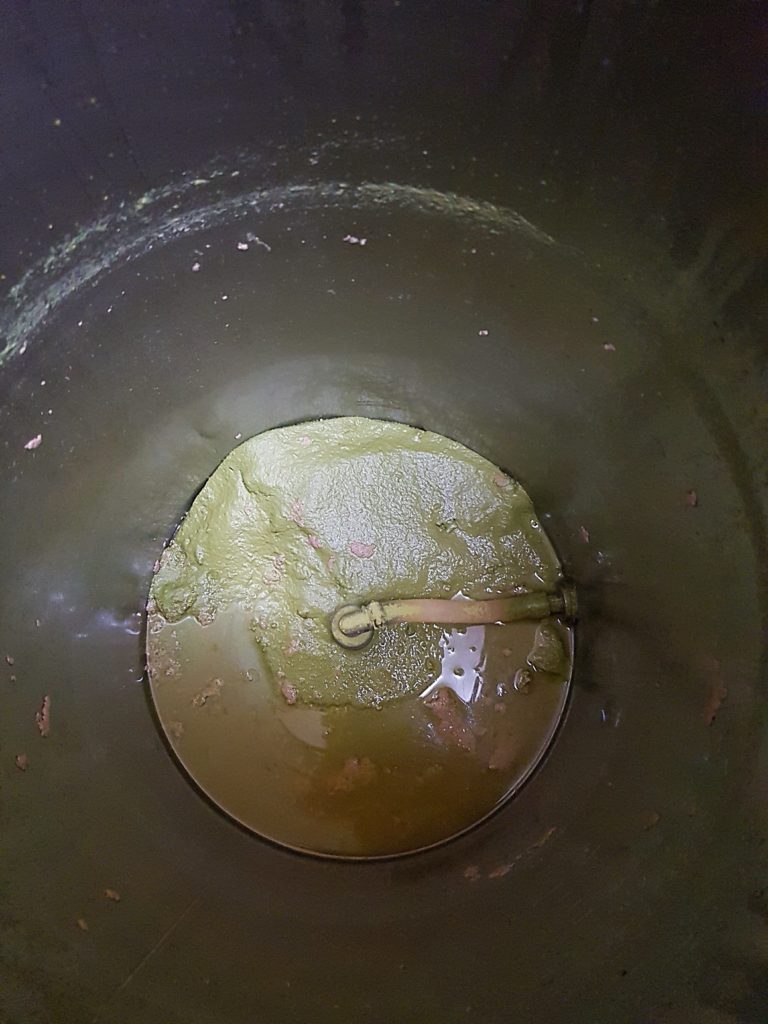
Mirror stainless, right angle bend, great engineering.
Nifty fit, too. This picture from a previous batch, thus all the hops and trub.

Not only does this catch goo better than the GF screen, it also has almost no dead space underneath–less than two cups of liquid escapes the pickup on the bottom. The build-up of hops makes the screen tighter and more efficient and the wort coming out is super-clear.

But you can’t use the grain basket from the GF with the false bottom in place unless you use some serious spacers. But, I had a different mod: a bag.

Spring clips work great to hold the bag in place

Yes, my Grainfather is now a Brew In A Bag False Bottom HERMS unit, running off of an Android phone over Bluetooth. 14-year-old me, with an old canning pot and a clapped-out electric stove would be awestruck and envious. (He’d also look at the size of me and ask, “Dude, just how much beer do you drink?”)

To make a long story short, I did my usual short and shoddy brewing methods: I doughed in at 122F, immediately ramped to 134 for twenty minutes, and then added my boiling rice goo to drive everything to 149. I mashed for 30 minutes–I usually do 20 because efficiency is for drones from Sector 7G, but I wanted to clear all of the rice starch. An Iodine test at 20 minutes was clear, so the extra ten was for luck, mostly. I did a bag sparge in another bucket with around 15 litres of water at 170F and topped the GF up and tossed in my first charge of hops as it heated to the boil.
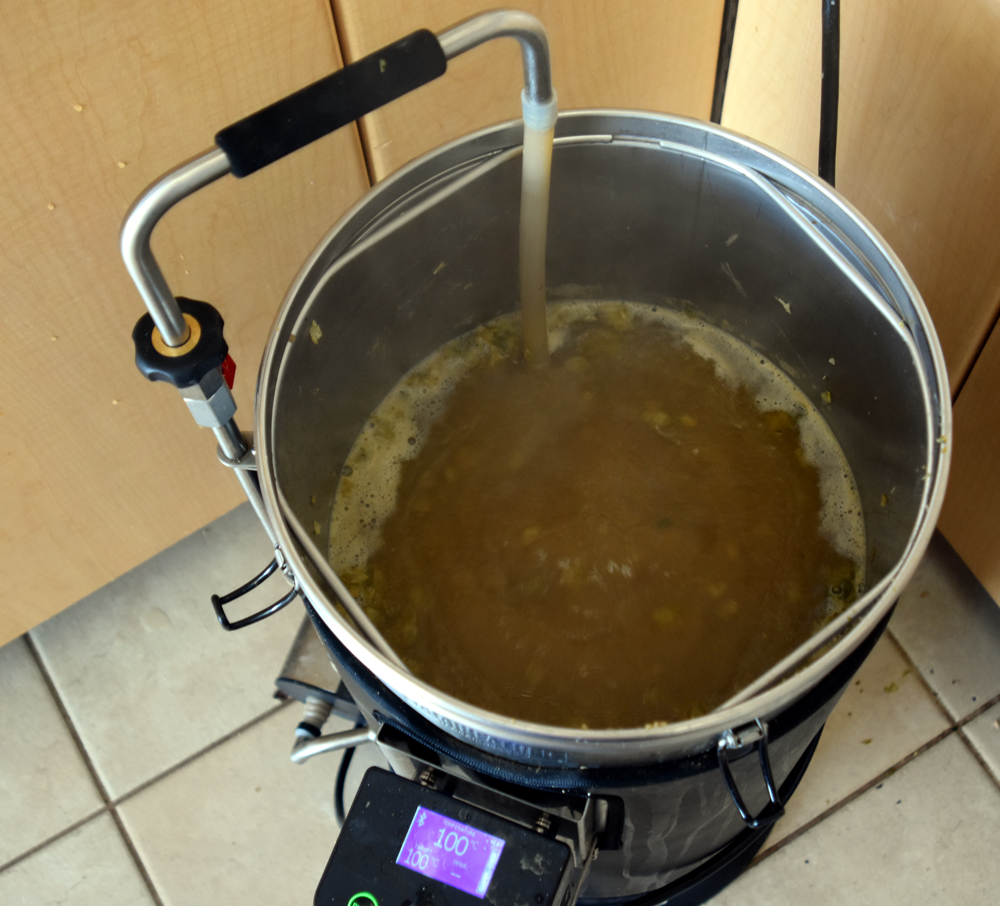
Shot before I topped up with bag sparge

After 20 minutes of vigorous boiling I shut off the, popped on the lid, threw on the heat exchanger and started cooling the wort, recirculating it back into the Grainfather.
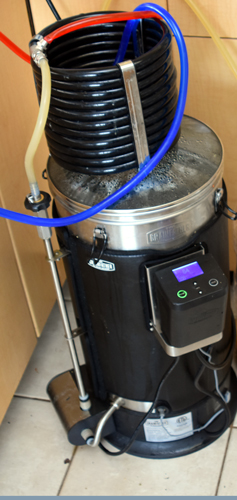
Counterflow chiller setup. Works very well, kind of surprisingly so.

When it got below 180F I tossed in the rest of the hops, shut off water to the chiller and left it to recirculate for 20 minutes. Then It was time to run it off to the primaries.
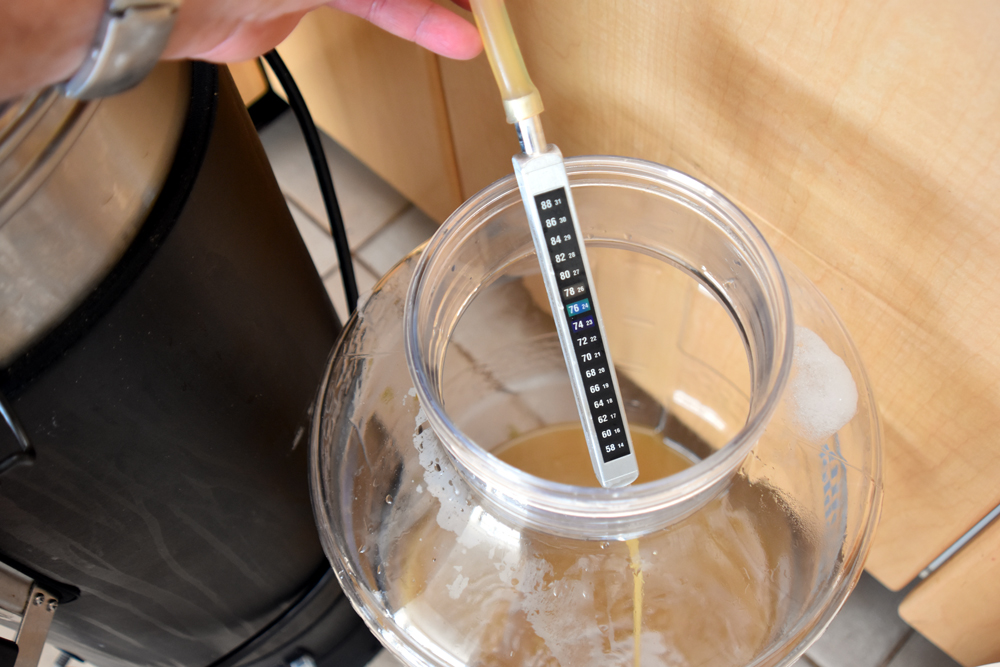
My groundwater is very cold, even in summer.

I took a gravity reading of the wort straight from the chiller.
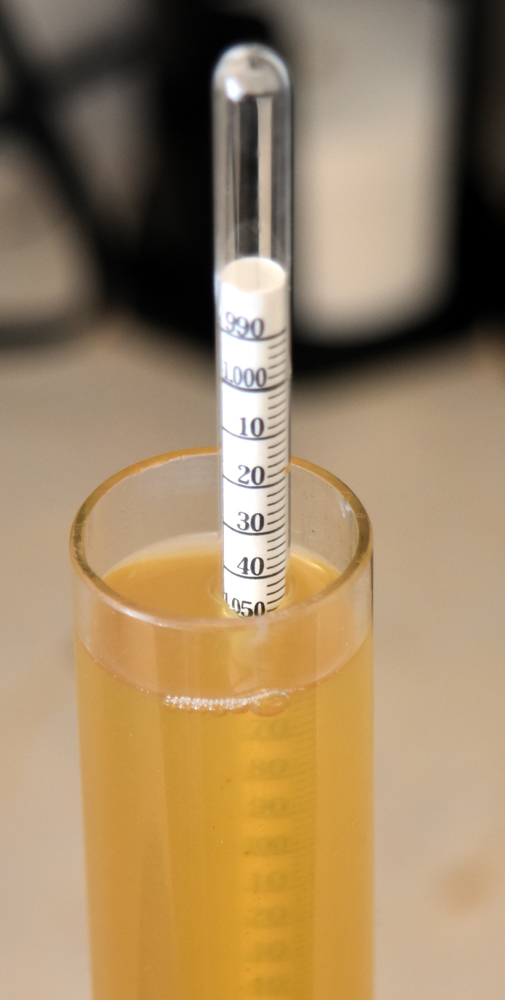
Temperature corrected to 1.050

I split it into two fermenters, yielding a little under three gallons each, and then topped up with treated water to 5.5 gallons. I treat it by adding metabisulphite powder to plain old tapwater, to bind out any chlorine that my municipality may have added. I have brilliant water–some of the best in the world, and it doesn’t need another thing. After it was topped up I noticed how much protein break I got. Good stuff!
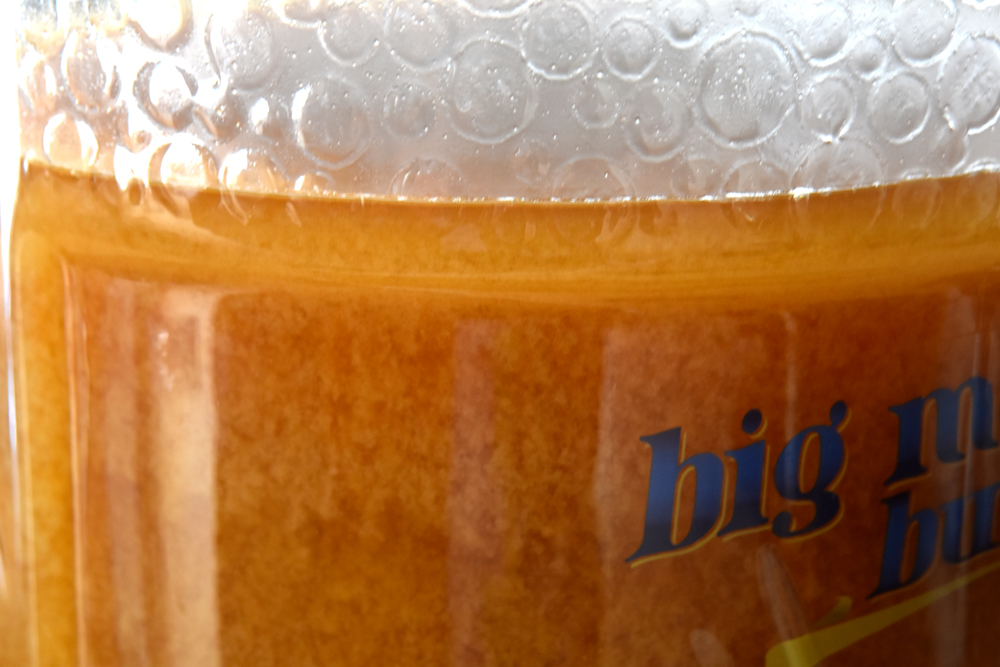
Lookit that break!

When it was divvied up I took it to my fermentation chamber, aka the second bathroom. I forgot to take a picture of the SG reading of the watered back batches, but it was 1.028
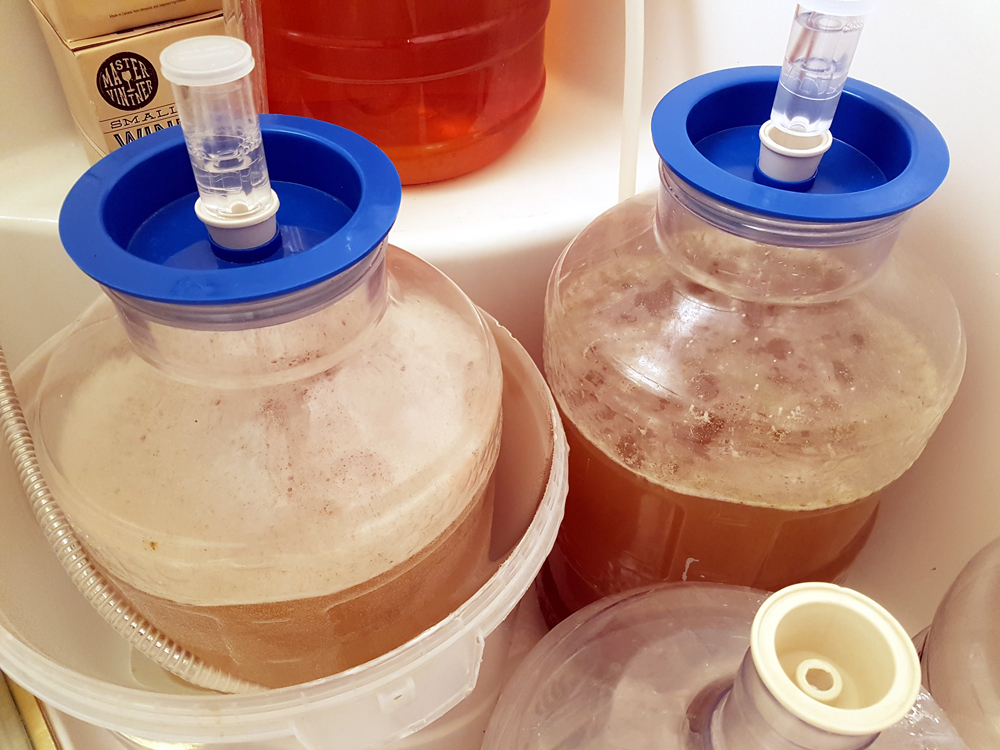
It’s a shower stall, very convenient for blow-offs and cleaning.

One of the beers I hit with US-05, and the other I chilled with my groundwater again, by virtue of letting the shower hose dribble into a bucket containing the fermenter run very slowly, getting it down to 62 F overnight, after which I pitched it with Safeale S-189.

Fermentation was vigorous in both, and completed after ten days.
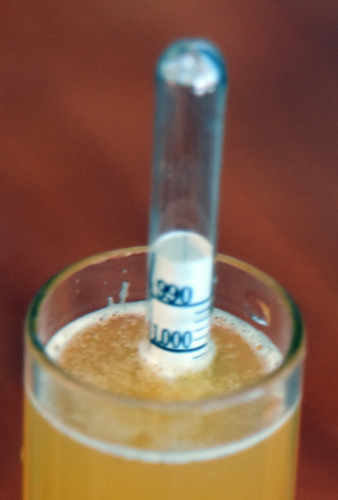
And that’s final.

I let the beers settle and racked them to kegs. I stoppped to take an SG reading and it was corrected to 1.004 This makes a start-finish difference of 18 points. Multiply that by the ABV conversion number and you get 2.36, just under 2.5% ABV, good enough for my purposes.

After they had both chilled to 38F I burst carbonated them and let them carb under pressure for a few days, then tasted them, and shared with some friends. How was it?

Poor man, that beer must be terrible. After two weeks the beer dropped star-bright, looking like it had been filtered.

The lager version is better than the US05, but only subtly so: both beers are incredibly light, have just enough hops to balance the grain character and the crystal malt fights the carbonic acid with great precision.

I drank most of a keg in two weeks, pretty much a record for me. It’s like fabulous Gatorade, refreshing and deliciously beery, and yet the alcohol is so low I can have a pint with my lunch and continue working.

I’ve always disdained macrobrew lagers. They have all kinds of off flavours and aromas and don’t satisfy me in any way. This is different: it’s beer-flavoured beer, and hits the spot without overwhelming. I dare say it’d be easy to screw up, because the style is so light that it would show flaws instantly. But when it works, it’s really great beer. And that is the beauty of homebrewing: I can do whatever I want

Next up, I’m going to make a Belgian Kinderbier, a dark ale at 2% ABV that should have enough roast and caramel to make it richer and more interesting, while still being suitable for lunching.

If you’re looking for the best beer delivery Pimlico London has to offer, check out Booze-Up. A great 24/7 alcohol delivery company that can bring your any alcoholic beverage you want anytime, anyday!

Hey, if you’re in Vanbrewers and were at the June meeting you may have tried an early version of this recipe without the 10L crystal and with different yeast. That stuff was okay, but this is the bomb, I swear. There won’t be any of this to share at future meetings though, until I work out a brewing schedule that can compensate for me drinking a whole keg every two weeks. 

Master Vintner Small Batch Part 5: Bottling Day

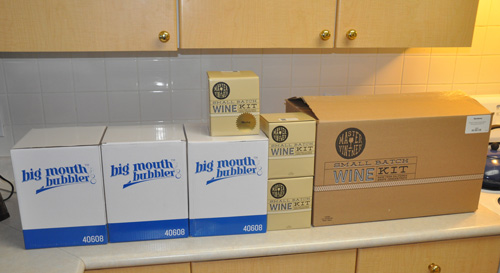
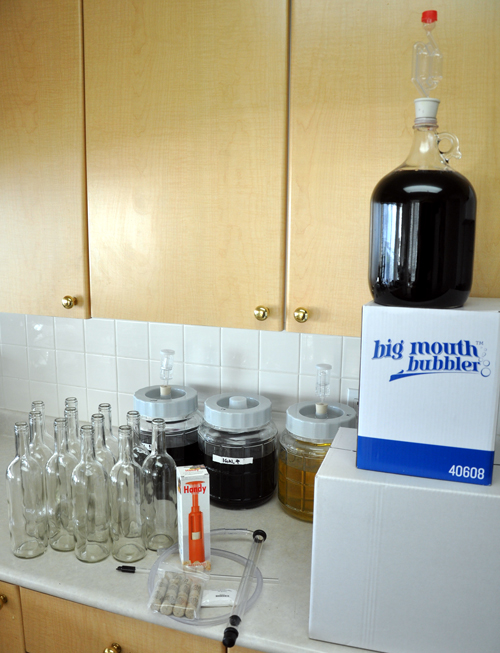
One full equipment kit, three extra Big Mouth Bubblers and three extra wine kits!
Where it all started

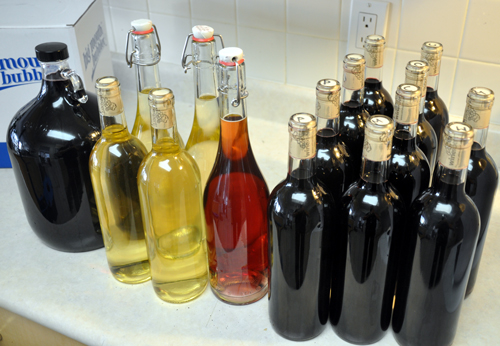
It’s finally here! After starting my Master Vintner wines, racking them from the primary fermenter, and doing the fining/stabilising steps, bottling day has arrived, and I’m all about getting my Cabernet Sauvignon, Merlot, Pinot Noir and Chardonnay into the bottles–well, almost all of it into bottles, along with a little of it into a secret project . . . more on that in a minute.

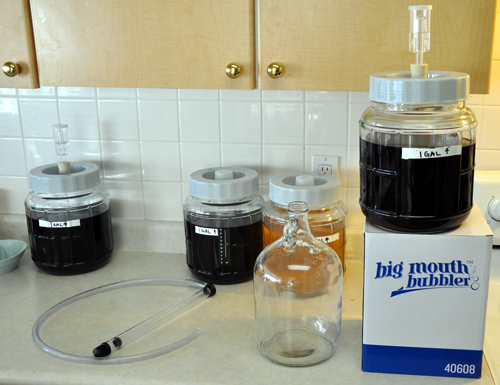
rack-setup
Time to rack off the sediment.

My first step was to clean and sanitise all of the equipment I’d be using, including my autosiphon, bottle filler, jugs and such–as always, cleanliness is next to goodliness in winemaking.

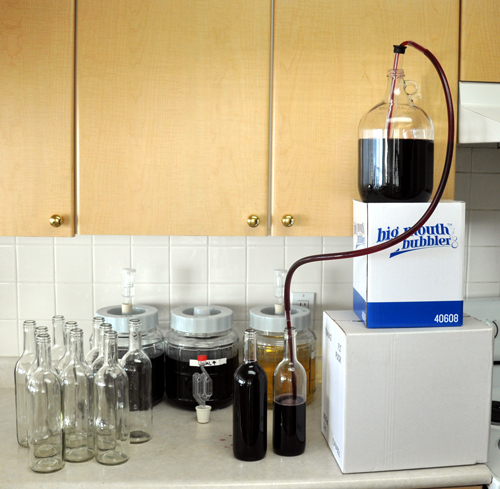
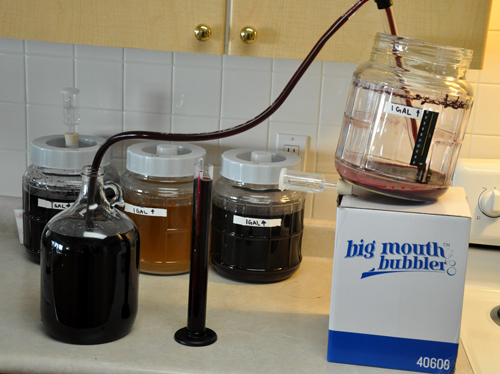
Next, I set up my racking station by the simple expedient of lifting my Little Big Mouth Bubbler on top of a convenient box on my counter. If you haven’t used one of the Master Vintner Small Batch kits yet, it’s hard to convey just what a joy this is. I’m old-school in many ways, having started off making wine in lots anywhere between 23 litres (6 US gallons) and 650 litres (three 60-US gallon barrels) at a time. With truly huge amounts you need a pump to move the wine around. A standard kit wine batch of 23 litres isn’t nearly as demanding, but lifting full carboys from one shelf to another, or putting them up on a high place so you can rack the wine down into a clean carboy on the floor (which then needs to be lifted back into the winemaking area!) starts to wear on the lower back after a few thousand batches. At only a single gallon, you can easily lift the Small Batch kits onto a convenient box or shelf above your kitchen counter, just as easy as getting a gallon of milk out of the refrigerator!

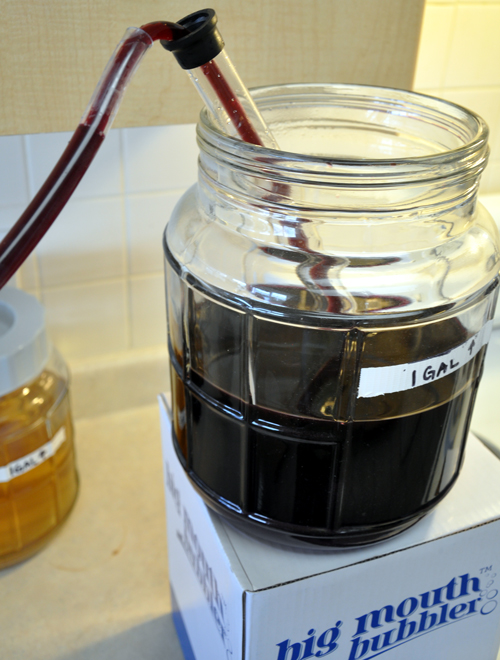
Once the fermenter was in place I racked the wine off of the sediment. Doing this is really helpful, since there’s a decent chance that the siphon will disturb sediment from the bottom of the carboy while your moving the hose from bottle to bottle. Rather than risk getting cloudy wine, it’s better to move all of the clear wine into a new vessel in one go, and then you can relax from there.

rack-from
Note the siphon rod carefully placed on the far side of the fermenter–this will be important as we get to the bottom.

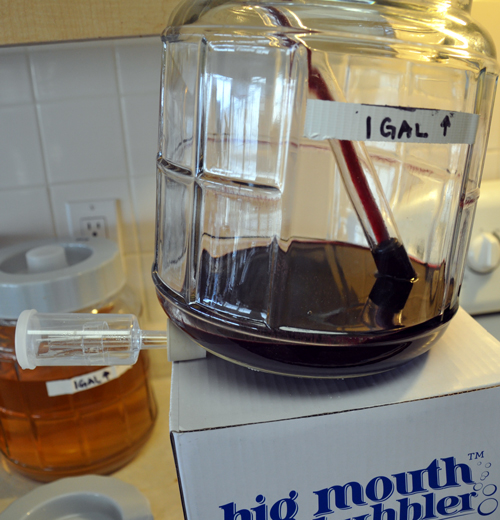
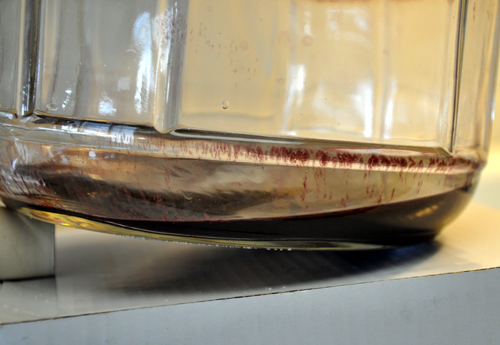
When the wine gets down to the bottom, the level of sediment needs to be carefully monitored. Remember, the point of racking is to get 100% of the clear wine and leave the muck behind, so don’t leave any of that delicious grape nectar behind.

A careful tilt keeps the end of the autosiphon in the wine.

To get and keep that tilt hands-free I usually improvise some kind of prop or wedge. Because I was making wine in my kitchen (another thing Small Batch Kits makes easy!) my carboy wedge wasn’t around. No matter: I just popped a bung under the front of the carboy and watched the levels as they dropped.

Never leave a man, uh, a drop of wine behind.

Just to make sure I was being completely efficient in my racking, I measured the amount of sediment left in the bottom of the Little Big Mouth Bubbler after it racked over. It came to just over couple of tablespoons all in all–which meant I was going to get a total of about 3.75 litres out of my US gallon (3.78 litre) batch, meaning I could fill five bottles, which is exactly what I wanted.

The wine was exceptionally clear on racking.

Limpid and gorgeous.

I could have bottled it right there, but since this was an actual test batch for quality assurance and proof of concept purposes, I pulled out my Buon Vino Minjet filter. Filtering doesn’t actually clear a wine: that’s what fining agents are for. Clearing polishes a wine so that it sparkles with a brilliance like diamonds. A former colleague had the best analogy for wine filtering: it’s the difference between a freshly washed car and a freshly waxed car. Both look great, but your eyes can instantly tell which car was waxed and polished because it glows. Same with wine.

Now that's shiny!
Now that’s shiny!

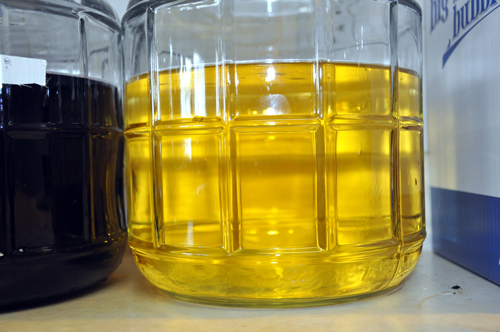
It’s easy to see this in white wines: you could read the fine print of an EULA through that Chardonnay!

I got all four batches of wine through a single set of Buon Vino #3 pads in about 20 minutes, including sanitising and prep, going from the Chardonnay to the Pinot Noir, then the Merlot and finishing with the Cabernet Sauvignon. Yet another bonus feature of the Small Batch kits: you can make four of them and only need the tiny, convenient BV mini, rather than a much larger filter.

Rest, little filter: you've done a man's work today.
Rest, little filter: you’ve done a man’s work today.

While larger filter systems need a washtub or a laundry sink for cleanup, the Minijet is kitchen sink-friendly for cleanup. Note that the colour you see on those filter pads isn’t anthcyanins (grape pigment) stripped from the wine. It’s suspended material from the wine itself, stained by those pigments. That suspended material, principally yeast cells and colloids, would eventually settle out of the wine on its own. Even though the unfiltered wine was perfectly clear to the eye, after a year or two in the bottle a bit of colour would deposit out on the side or bottom of the bottle. Hurrah for filtering!

Next up, time to fill my wine bottles. I had a mixture of standard wine bottles in Flint (clear) and some swing-tops, also in clear. I like using swing tops for wine that’s going to be analysed and/or destroyed in testing–not because of any technical superiority of swing tops, but because I can never seem to find a dang corkscrew when I’m in the wine lab.

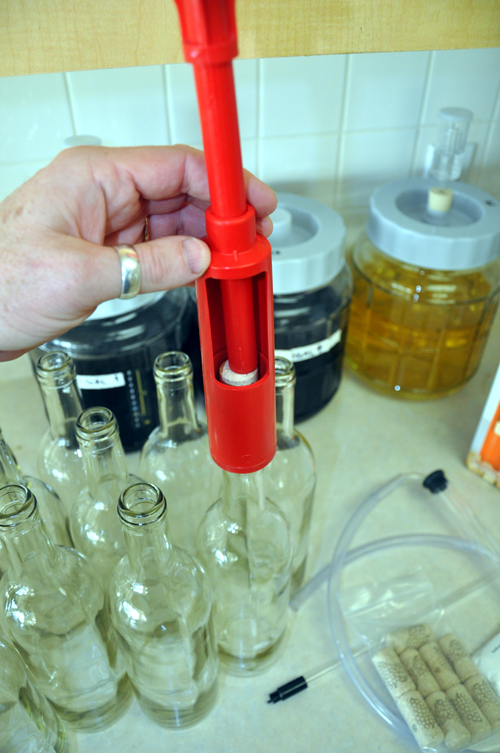
Bottles, autosiphon, siphon tip, impact corker, corks.
Bottles, autosiphon, siphon tip, impact corker, corks and sulphite for sanitising the bottles.
Also shown in the picture above is the Handy corker. It uses a plunger and a compression sleeve to press-fit the corks into the bottles.
Takes a little oomph, but works great.

Because of the forces involved, it’s a good idea to use the (included) #8-sized corks and soak them in a bit of warm water before use. While I’ve used the Handy and it’s a fine unit, I had another plan in mind for my bottles. But first, I had to fill them.

Fast, clean and efficient--now that's good winemaking!
Fast, clean and efficient–now that’s good winemaking!

Getting the bottles filed without splashing, spilling or endlessly fiddling to get the right fill level (very bottom of the neck, to leave the width of two fingers below the bottom of the cork) used to be a drag, but a siphon filler (included in your equipment kit!) makes it a snap.


The one-way needle valve on the tip of the rod stops the flow of wine as soon as you pull it up, while the volume of the rod displaces exactly the right amount of wine–when you fill the bottle to the top and then pull the rod out, the level of wine is perfect to accommodate a cork!

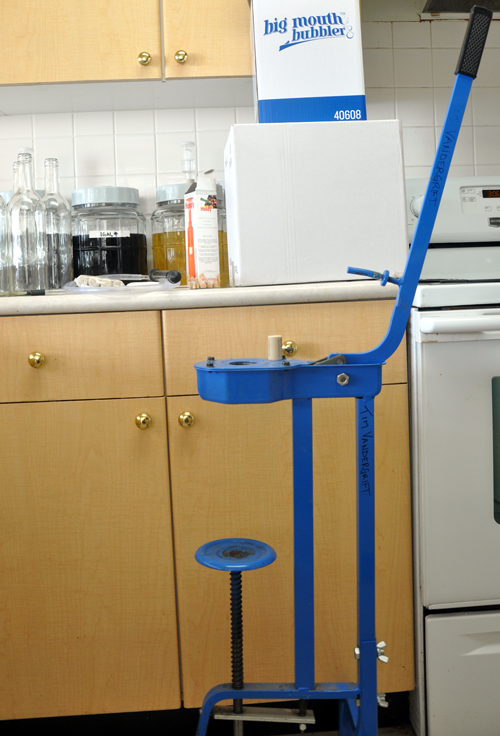
With the bottles filled, it was time to put corks in. My alternate scheme was to use my Italian bronze-jawed floor corker. This mighty beast has been my faithful companion for 25 years and tens of thousands of bottles of wine.

Industrial Age technology at its finest.

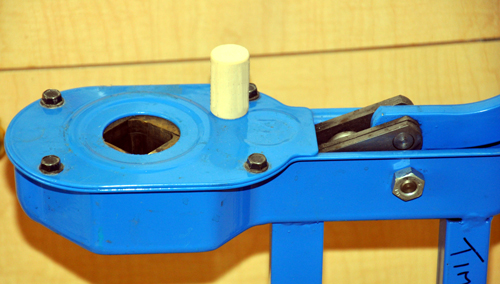
The key to how well this thing works is in the amount of leverage it can bring to bear, and how cleverly it compresses and inserts the cork into the bottles. The heart of the matter is the set of bronze jaws. Not brass–brass is too soft, and corks would wear it away in a short time, and this bronze is the same stuff they make steamship propellers out of.

You're in for a squeezy time, Mr. Cork.
You’re in for a squeezy time, Mr. Cork.

The jaws move as the corking arm is pulled, squeezing the cork down to just slightly larger than the size of a pencil. When it’s at is tiniest, the cork finger comes down. pokes it into the bottle and you’re done.


It’s as easy as that, every time.

After only a few minutes all of the bottles were filled, corked and swing-capped.

snu
Say, what’s with that pink wine?

Astute observers will notice that there are 15 bottles, a gallon jug and one bottle of pink wine, which doesn’t match up that well with the whole four batches of five bottles each motif I started with. The gallon jug is a blend of Cabernet Sauvignon and Merlot. I blended it at a rate of 3:2, Cabernet to Merlot, after a few benchtop trials. I’m going to let it marry in the jug for a month or so and taste it before bottling.

The pink wine is slightly notional on my part–it’s my job to do the weird stuff so you don’t have to. Or, more accurately, so I can explain it when you do it without my knowledge! It’s a blend of 4% Pinot Noir into the Chardonnay. That kind of blending is a standard technique in commercial winemaking, and I was curious to see how it would marry up with a little time in the bottle.

How does it taste? Even though it’s very young, it’s everything I’d hoped: good fruit, varietal character, smooth tannin, balanced acid and a long finish, especially for a wine just in the bottle. I’m going to do a more formal taste-test in another three weeks, and then once a month after that to see how it’s progressing.

I’ve already ordered another four kits–I’ve never made wine with so little effort or mess, and I’m going to keep production up. Heck, it’s no more work than keeping a vase of flowers on the counter, with the added bonus, it’s wine!

Master Vintner Part Two: Racking Day

Small package? Good thing!
Mmmmerlot!

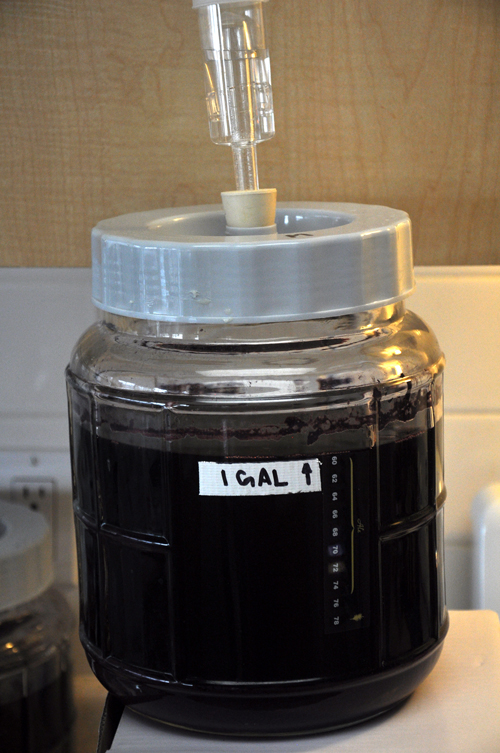
More Master Vintner! I got my Master Vintner equipment and kits going last week and now it’s time to rack them out of primary fermentation and into the I gallon jug.

Oh Little Big Mouth, you so tiny!
US Oh Little Big Mouth, you so tiny! Shmutz around the jug is yeast residue.

One of the cool things about the Master Vintner Small Batch kit is the size. Compared to lugging 6 US-gallon (23 litre) carboys around, the Little Big Mouth fermenter is a breeze. I’m a big, strong brute, but even I get twinges in my lower back when I have four or five full-sized carboys to lift up for racking.

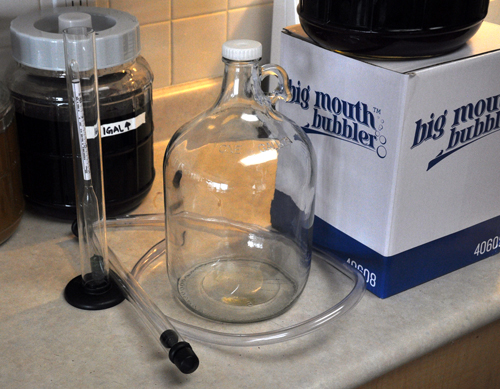
Autosiphon with tubing, hydrometer and test jar, 1 gallon jug and cap.

First things first: I assembled my equipment and double-checked the instructions. Yes, I wrote them, but I’ve become slightly obsessive about double-checking them for accuracy. I’m the only guy I know who can argue with himself about following instructions that he wrote!

Next up I cleaned and sanitised the equipment and jug, following the same procedure with Oxygen wash, rinsing and sulphiting that  I did on day one. Once it was all clean, it was time to rack it over.

Upsy-daisy
Upsy-daisy

Not only are the Small Batch kits easy to lift, you can also place them just about anywhere. Rather than having to rack from a primary fermenter sitting on the counter to a carboy down to the floor, I popped the LBM onto a box on my countertop and put the jug beside it. I love working at counter height! Honestly, this has got to be one of the killer sell features of this kit: light weight, ease-of-use and dead simple, too.

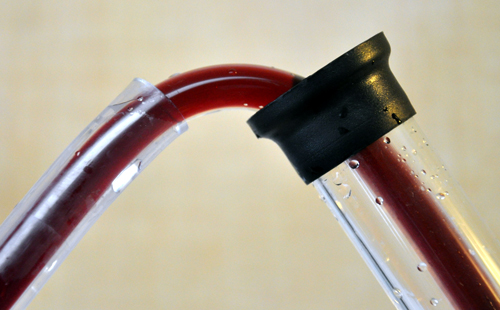
If you’ve never seen an Autosyphon in action, the small version that came with the kit is a great piece of hardware. Plain syphons work fine, but you have to start them either by filling them with water, covering both ends and simultaneously plunging the pick-up rod into the wine and the hose into a bucket to catch the extra water, and then swap when the wine comes through, or by sticking them into the wine and sucking on the hose like you’re stealing gasoline from a car–which is a little unsettling, but sometimes an opportunity to ‘accidentally’ drink from the hose (wine, not gasoline).

Check out the Autosyphon action:

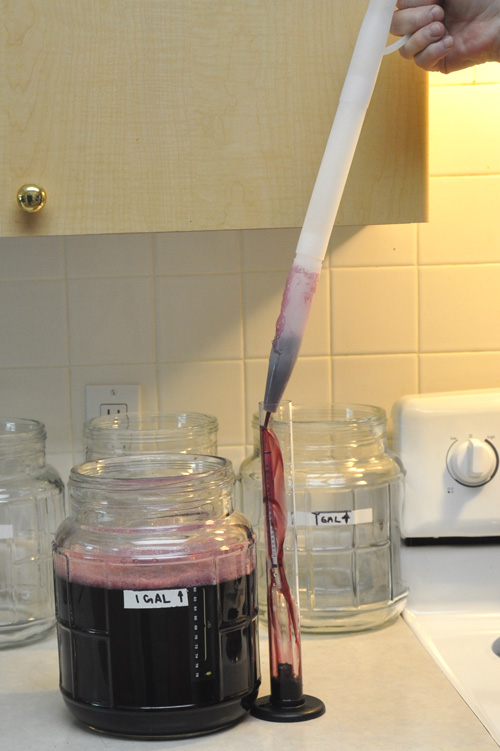
While the Autosyphon took care of racking the wine into the gallon jug, I did two more things. First, I deftly filled my hydrometer jar with wine so I could check the specific gravity, and second, I tilted the Little Big Mouth back towards the side of the jug that the syphon tip was in. Tilting it would allow me to get all of the liquid out of the jug, while the anti-sediment tip on the syphon prevented any yeast-goo from going into the jug.

Rack, because that's how we roll.
Rack, because that’s how we roll.

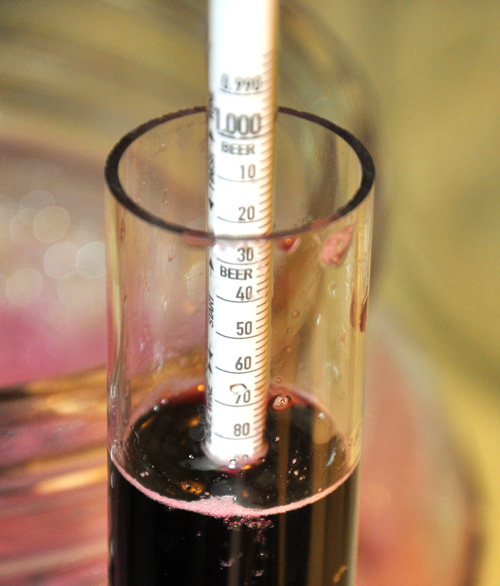
Checking the hydrometer reading, I saw that it was good.

Remember, look across the surface of the wine, not the edge where it touches the glass.

The reading was 0.992–my wine was finished fermenting. Time to look at the instructions, where I wrote down the gravity from day one.

Every word, poetry.
Every word, poetry.

We started at 1.090 and finished at 0.992. With a little math, we subtract the finishing gravity from the beginning, multiply by 131 and we get 1.090 – .992 = 0.98 and 0.98 x 131 = 12.838, or just shy of 13% alcohol, perfect for our Merlot.

Of course there was also the necessity for a quality control test.

The moment of truth . . .

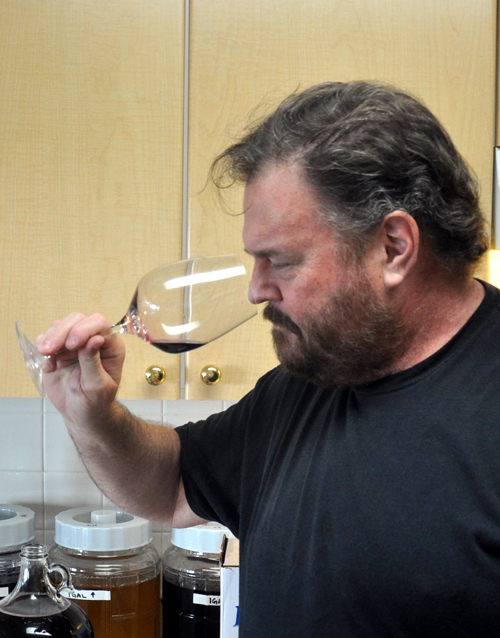
Smelled young, but very good, with nice dark cherry notes. As for the taste . . .

I'd say he's happy. Or getting tasered. One of the two.
I’d say he’s happy. Or getting tasered. One of the two.

The taste was impressive for such a young sample–it’s going to be pretty good!

The last thing to do was to put the cap an airlock onto the jug and clean up all the equipment I used–well, after I finished racking the other three wines!

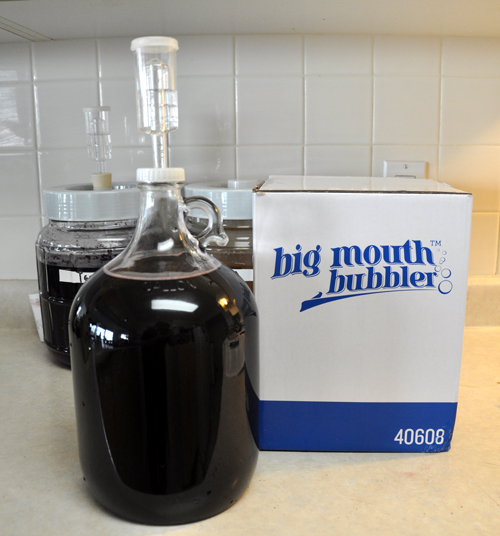
Oh little wine jug how I love thee!
Oh little wine jug how I love thee! Note the small amount of fizz–that’s CO2 gassing off, not fermentation.

I’m sold. It’s one thing to develop a kit in the laboratory and taste bench samples, but it’s another (and completely necessary) thing to do it right in your own kitchen, among the cats and cabbage rolls to see how it’s going to work in the real world. I’m happier with this kit than with anything I’ve done in a long time, and in 12 days I’m going to get it stabilising and cleared and then it’s off to bottling. Hurrah!

Master Vintner, Your Personal Wine

The day I was waiting for finally came: my shiny new Master Vintner Small Batch winemaking supplies arrived!

One full equipment kit, three extra Big Mouth Bubblers and three extra wine kits!

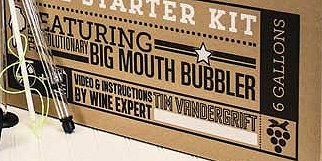
How happy am I? I’m ecstatic! How proud am I of the Master Vintner project? So proud that I put my name right on the box!

My mother is so proud
My mother is so proud!

I’ve been working with my friends at Northern Brewer for the last year to make this happen. It’s been an amazing time, and a lot of fun working with the crew there. Designing a new wine kit might seem easy at first blush. After all it’s just a matter of putting some stuff in a box and a bag of grape juice and away you go.

Only not really: there’s a lot of logistical and technical issues that need to be solved. Ordering grape materials has to precede the harvest by months in order to ensure you get the best of the vineyard. Then you need to formulate, get the juices cold stabilised and ready to blend, make and test blends (like all wineries, kit manufacturers blend for character and consistency) and then test your packaging protocols to make sure they will arrive to customers in good condition.

Beyond that, it’s a whole new world of equipment, specific to the 1 US-gallon size, that needs to be integrated to make sure it works well together and makes the best wine possible. Lucky for me there’s a great team doing the sourcing and manufacturing, making me look good!

It's like a treasure chest for winemakers
It’s like a treasure chest for winemakers

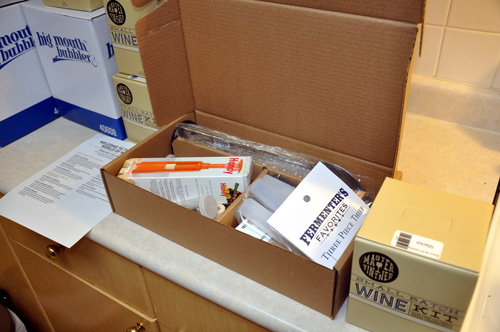
My Master Vintner equipment and supplies arrived this week and I got cracking right away. Step one, unbox and check the contents.

box-contents
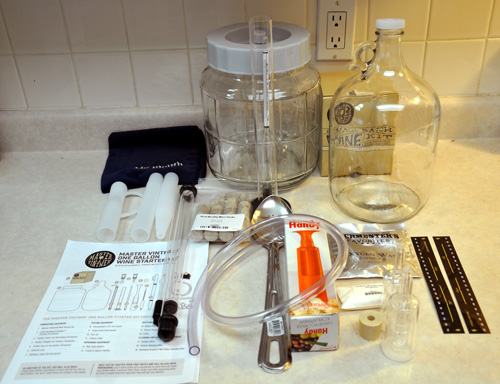
All present and accounted for!

The equipment kit contains almost everything you need to make a one US-gallon (5-bottle) batch of wine. You’ll have to supply the wine bottles, which can be saved from the recycling (hurrah environment!) and labels, which are fun to make for yourself.

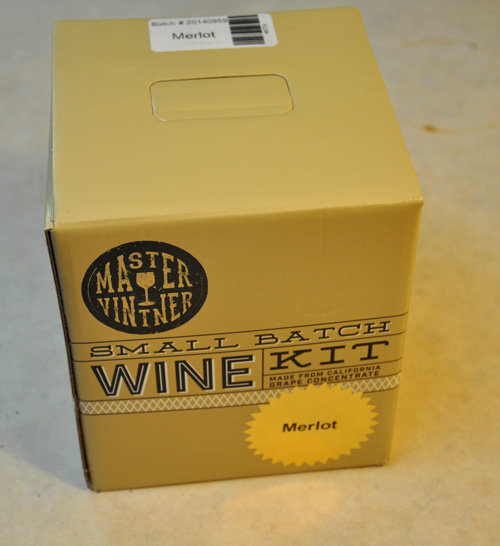
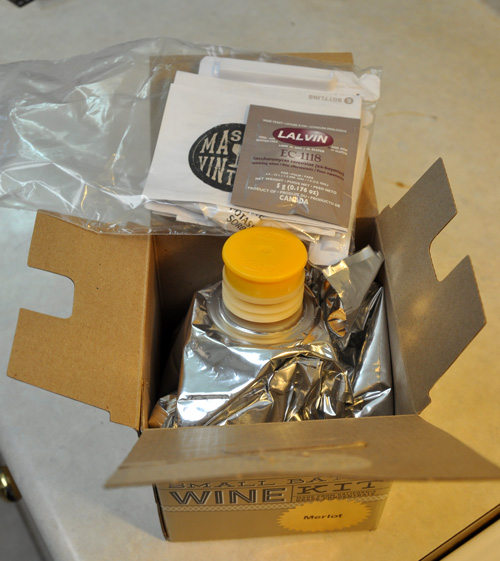
The first step is to read the equipment list, make sure everything is there–pretty much a sure thing from Northern Brewer. Next, we need to pull out our wine kit and check out that puppy. The first one I laid hands on was a Merlot.

Small package? Good thing!

California Merlot is going to be rich and soft, with warm berry and dark cherry fruit and supple tannins. Mmm!

Next, let’s take a look at the ingredients, and most especially the instructions.

The good stuff
The good stuff

The wine kit has yeast, finings, stabilisers and a fabulous set of well-written and lucid instructions (yes, I wrote them).

Hi-yo Mylar! It's shiny, but I'm more interested in those brilliant instructions
Hi-yo Mylar! It’s shiny, but I’m more interested in those brilliant instructions

I dove into making the kit immediately, but that’s only because I wrote (and re-wrote, and edited and re-wrote) the instructions myself. Everyone else should immediately put everything back in the box, seal it up and sit down and carefully and slowly read the instructions from beginning to end–if you’re not sure of anything, don’t start until you get it straight!

But don’t worry about that too much: ultimately, if you can make a cup of coffee or a bowl of cereal, you’re qualified to make your first batch of wine without any problem–I promise.

After reading the instructions, the first step is to mark off Little Big Mouth at the one-gallon line. LBM’s aren’t pre-marked because it’s a tricky process, and some folk’s jugs might not be completely standard, or the markings might get altered in shipping and handling. Better to do it in your own winemaking area so you’re confident you’ve got it right.

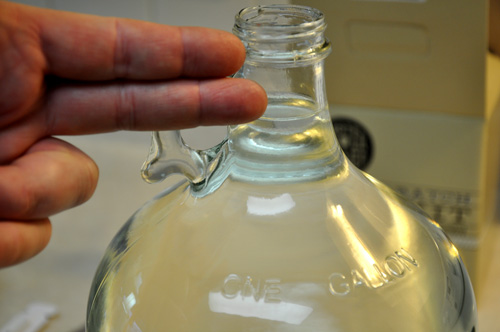
The best way to do it is to fill your gallon jug right up to  the neck, about two fingers below the tippy-top.

Any fingers will do: mine are fat, but skinny fingers work equally well.

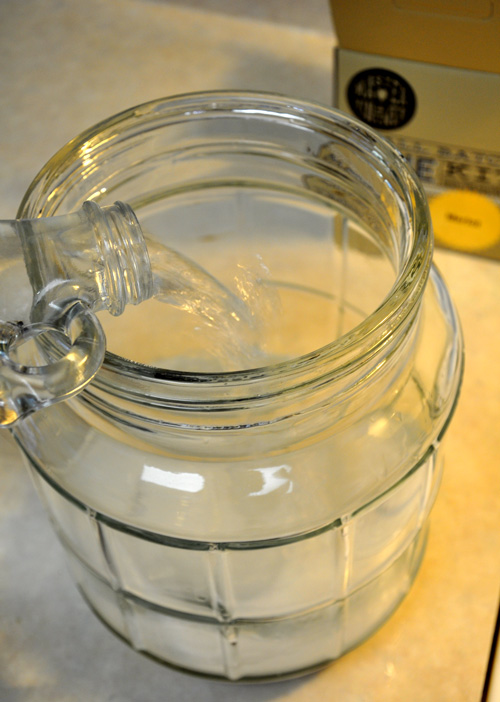
You then pour the jug into your LBM.

Note the water mixing with Oxygen Cleanser in the bottom of the LBM.

Because the next step is to get things clean and sanitised (cleanliness is next to goodliness for winemaking), I put my winemaking cleaner right into the LBM, to save a step.  The Oxygen Cleanser included in the equipment kit a great product–you can’t use home cleaners because they have too much perfume and other weird chemicals, which can leach into the wine and leave strange flavours.

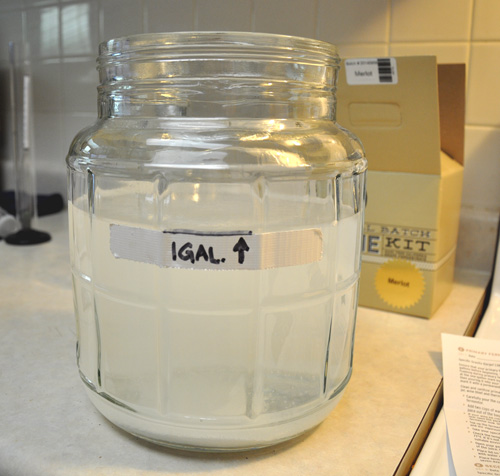
Next step is to mark off the 1-gallon level. I used some white Duct Tape and a permanent marker.

That's the spot.
That’s the spot.

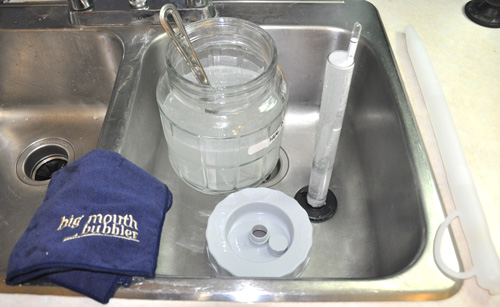
And then it’s into the sink with the other items needed for day one: hydrometer and test jar, wine thief, lid, spoon, bung and airlock.

Scrubbing and soaking, the Tim Vandergrift way

While the equipment comes brand-new, so it’s not stained or dirty, it’s still a good idea to give it a very good cleaning before you use it–just like you would any new plates, glasses or cups you brought into your kitchen.

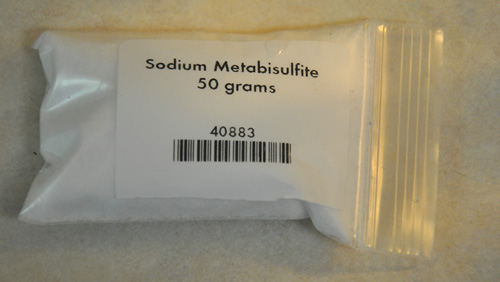
After a 20 minute soak and a scrub to remove all surface debris, I rinsed everything thoroughly and then sanitised with a metabisulphite solution.

Now that's a product shot
Now that’s a product shot

Metabisulphite solutions are the second part of cleaning and sanitising. While Oxygen Cleanser leaves your equipment clean enough to eat off of, it’s not ready to use for winemaking. For that you need to treat the surfaces with a solution that will suppress bacterial activity, and in winemaking the easiest stuff to use is a solution of three tablespoons (50 grams) of crystalline sulphite powder in 4 litres (one gallon) of water. Note that absolute accuracy isn’t crucial here, because you’re shooting for a solution that will yield 1250 Parts Per Million of free sulphite and the difference between one gallon and 4 litres or three tablespoons and 50 grams won’t move it more than a few dozen PPM.

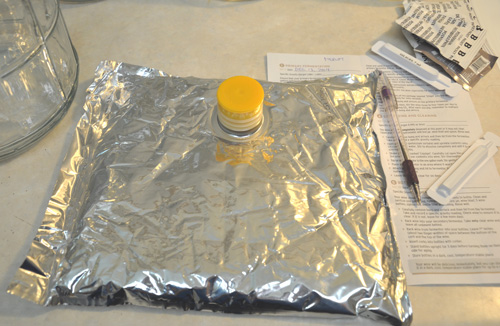
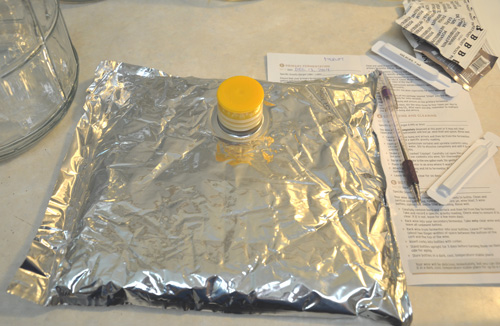
I didn’t take any pictures of sulphiting the equipment because a) I didn’t know how to make that look exciting, and b) I always have a spray bottle of the stuff under the counter and I just grabbed it and sluiced everything down, waited 5 minutes and rinsed. By the time I remembered I was photoblogging I had already started the wine. Whoopsie. In any case, I went on to the next step, grabbing the bag of winemaking concentrate.

juice-bag
Grey and wrinkled, but still has a sparkle, like the winemaker

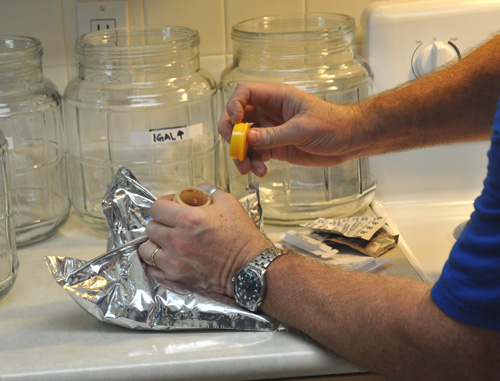
The caps on these bags fit extremely tight–they have to to exclude oxygen and spoilage organisms. If you’ve got long fingernails, or issues with grip strength (which is to say, if you’re not built like an ogre like me) you can pry them up with the edge of a butter knife (nothing sharp, please!) or use a bottle opener on the edge (works like a charm) or invest in a bag decapper. This doohickey fits exactly over the standard cap and levers it off in a jiffy.

Works like a charm, and saves that manicure

Fortunately for me, I am built like an economy-version ogre, so I just pull it straight off. I am also good with opening pickle jars and other applications of brute-force and ignorance.

Yoink!
Yoink!

Careful, though: the juice is very high in sugar and red varietals can really stain fabrics–easy does it.

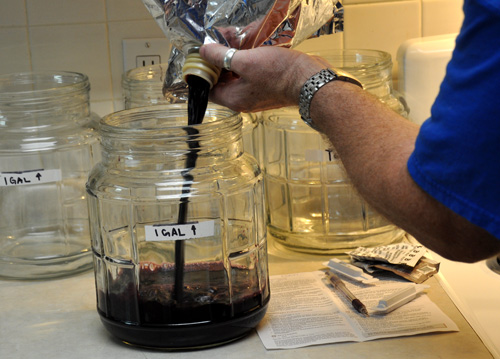
Next, pour the bag contents into the LBM.

Smells fantastic
Smells fantastic.

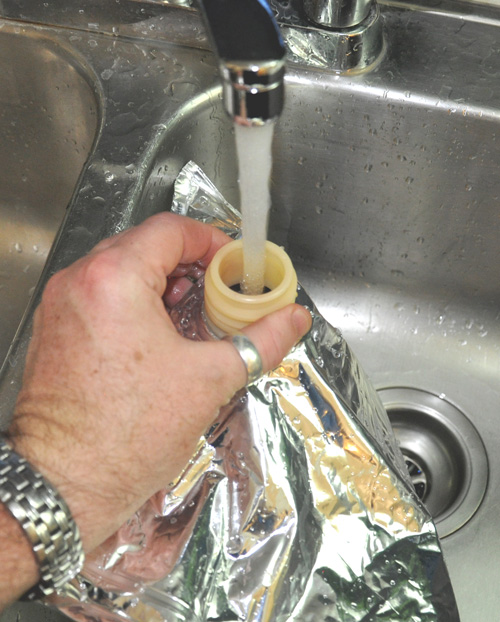
Rinse the bag out with two cups of lukewarm water and add it to the LBM as well.

Good to the last drop.

An important word on temperature: the kit has to be between 72°F and 77°F (22°C and 25°C for non-Americans). This is crucial for the success of the kit, because the yeast need to get fermenting quickly so your wine can stay on schedule. That means a bit of management: if the kit is coming in from a cold garage you’ll need a bit warmer water to make it up. If you’re in a heat wave in Florida, you’ll need to cool that water down a bit.

But it’s not terribly tricky. To hit my target temperature I ran the water in my sink for a minute until it hit 77°F and topped up the fermenter to the 1 gallon mark with that. When it was at the right level, it was time to stir.

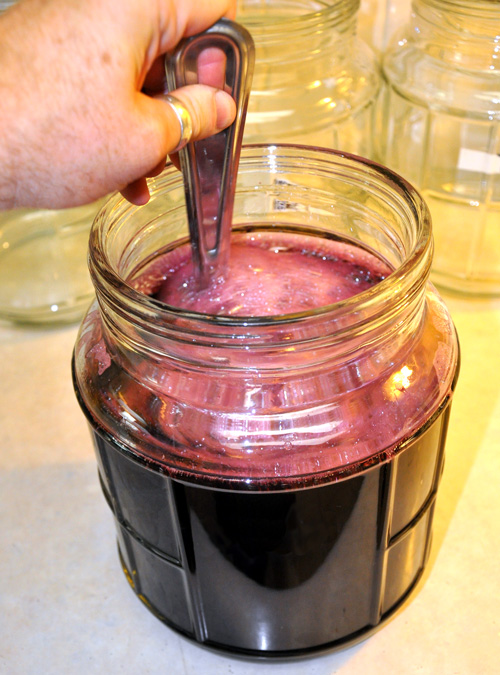
Stir like it's 1999.
Stir like it’s 1999.

You have to stir hard. Pouring the water into the juice makes it look like everything is well mixed, but that’s an illusion: concentrate and water have very different coefficients of viscosity and left to themselves, they’ll settle out. I gave it a darn good whipping with the shiny stainless steel spoon that came with the kit.

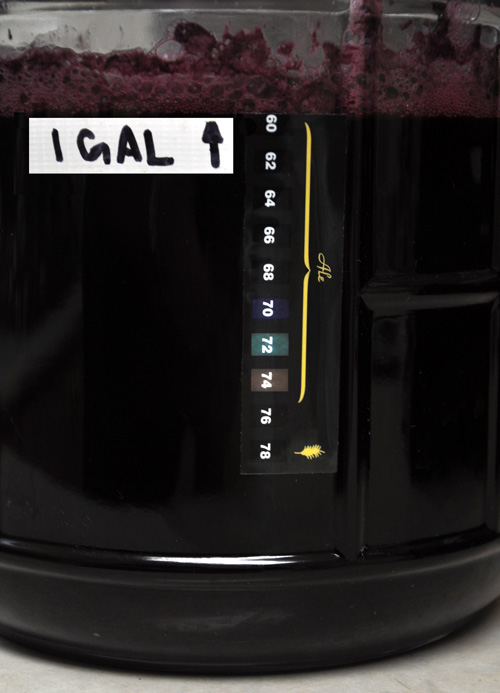
Next up, some measurements. First, the temperature check. I pasted on the Fermometer on the LMB and had a look.

Looking good!
Looking good!

With the temperature well in hand, it was time to check the specific gravity. I assembled the three piece wine thief and used it to fill the test jar.

Fill 'er up.
Fill ‘er up.

With the level of the wine relatively low, it takes about three trips with the thief to fill the test jar. When it was full enough to float the hydrometer I popped it in and checked it.

Sight along the surface of the wine--that's where the reading is accurate.
Sight along the surface of the wine–that’s where the reading is accurate.

If you’ve never read a hydrometer before, there’s a trick to it: don’t look at the wine where it meets the hydrometer. Surface tension will pull it up the glass tube and give a false reading. Instead, look across the surface of the juice and draw an imaginary line from that surface across the hydrometer markings. In this case it was a solid reading at 1.090–perfect.

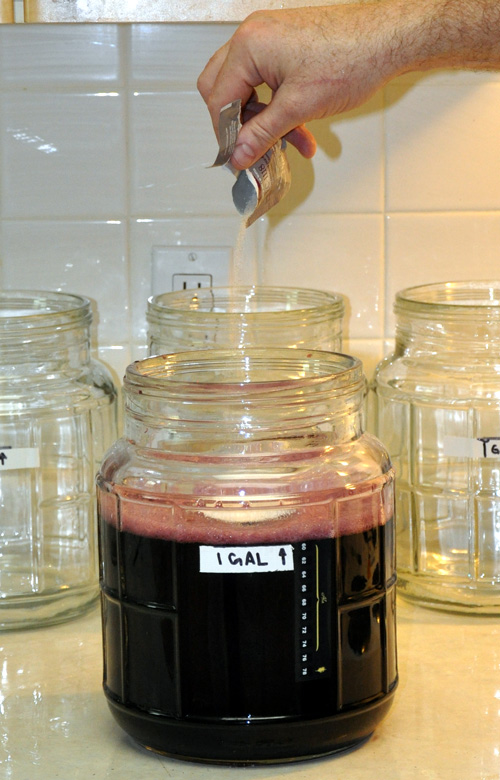
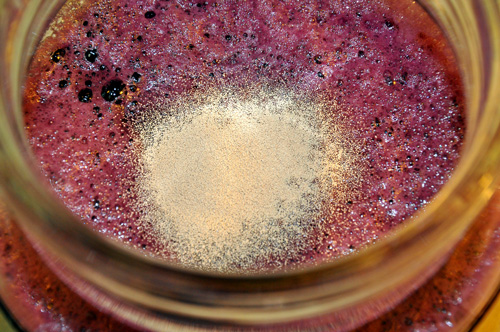
Next up, time to pitch the yeast. There’s a lot of information out there about rehydrating yeast and stirring it in and suchlike. For the Master Vintner wine kit, follow the instructions and just rip the package open and pour the yeast onto the surface of the juice.

As soon as the yeast goes in, the juice is considered to have become wine.
Go my little yeasts! Be fruitful and multiply and make wine.

And that’s it for day one. The only thing left to do is to wait 8 days for the next step.

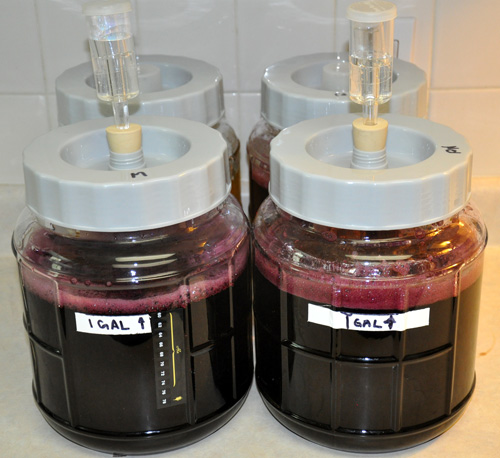
Well, not quite. I had three more kits to make up!

So beautiful.
So beautiful, each in their own ways

I’ll update when it’s time to rack the wine from the LBM’s to the jugs. In the meantime they’re bubbling away merrily, making alcohol and smelling better every day. Yum!

Tim Vandergrift: Master Vintner and Midwest Supplies

midwest-announcement
I can’t remember why I was so mad at that wine glass . . .

The big news is finally here! Midwest Supplies and Tim Vandergrift are working together! I’m really happy with the fit between us and excited to introduce new products and to work on advancing home winemaking. I became an independent consultant early in 2014. My biggest concern about my new career was where I could apply myself to make a difference in the consumer-produced beverage industry (aka Homebrewing and Winemaking).

midwest-logo

While I connected with many small clients and really love the interaction I have with them, I looked around and realised that one of the most dynamic and exciting places in the industry was right in front of me, Midwest Supplies. I’ve worked with them for more than a decade on behalf of Winexpert and always loved how they ‘got’ the industry, understood home beer and winemakers, and generally felt they were my kind of folks. Of course, this didn’t keep me from thinking that they could probably use a guiding hand on the wine side, but I always had other priorities. Now that I’m their Technical Winemaking Advisor I feel incredibly fortunate to have the opportunity to work with them to introduce some new ideas to home winemaking and do educational and promotional activities as well. I’ve even got a couple of videos up to start, one on the benefits of using a floor corker,

And one on the savage joy of using a three-pronged stirring whip! The Great! Big! Deal! that I’m really happy about is some of the new products we’ll be bringing out in the future. No hints just yet, but I’m pretty stoked about sharing them, and won’t hide that light under a bushel. If you’re already a Midwest customer, thanks! If you’re not yet, check ‘em out, and check out My Ten Favorite Wine Kits—nine of which are on sale for a limited time! Use the secret coupon code (hint: it’s WINEGURU) at checkout and you’ll save 15%. How’s that for a hello? Lots more to come, and so much to do, and I couldn’t be happier or more proud.