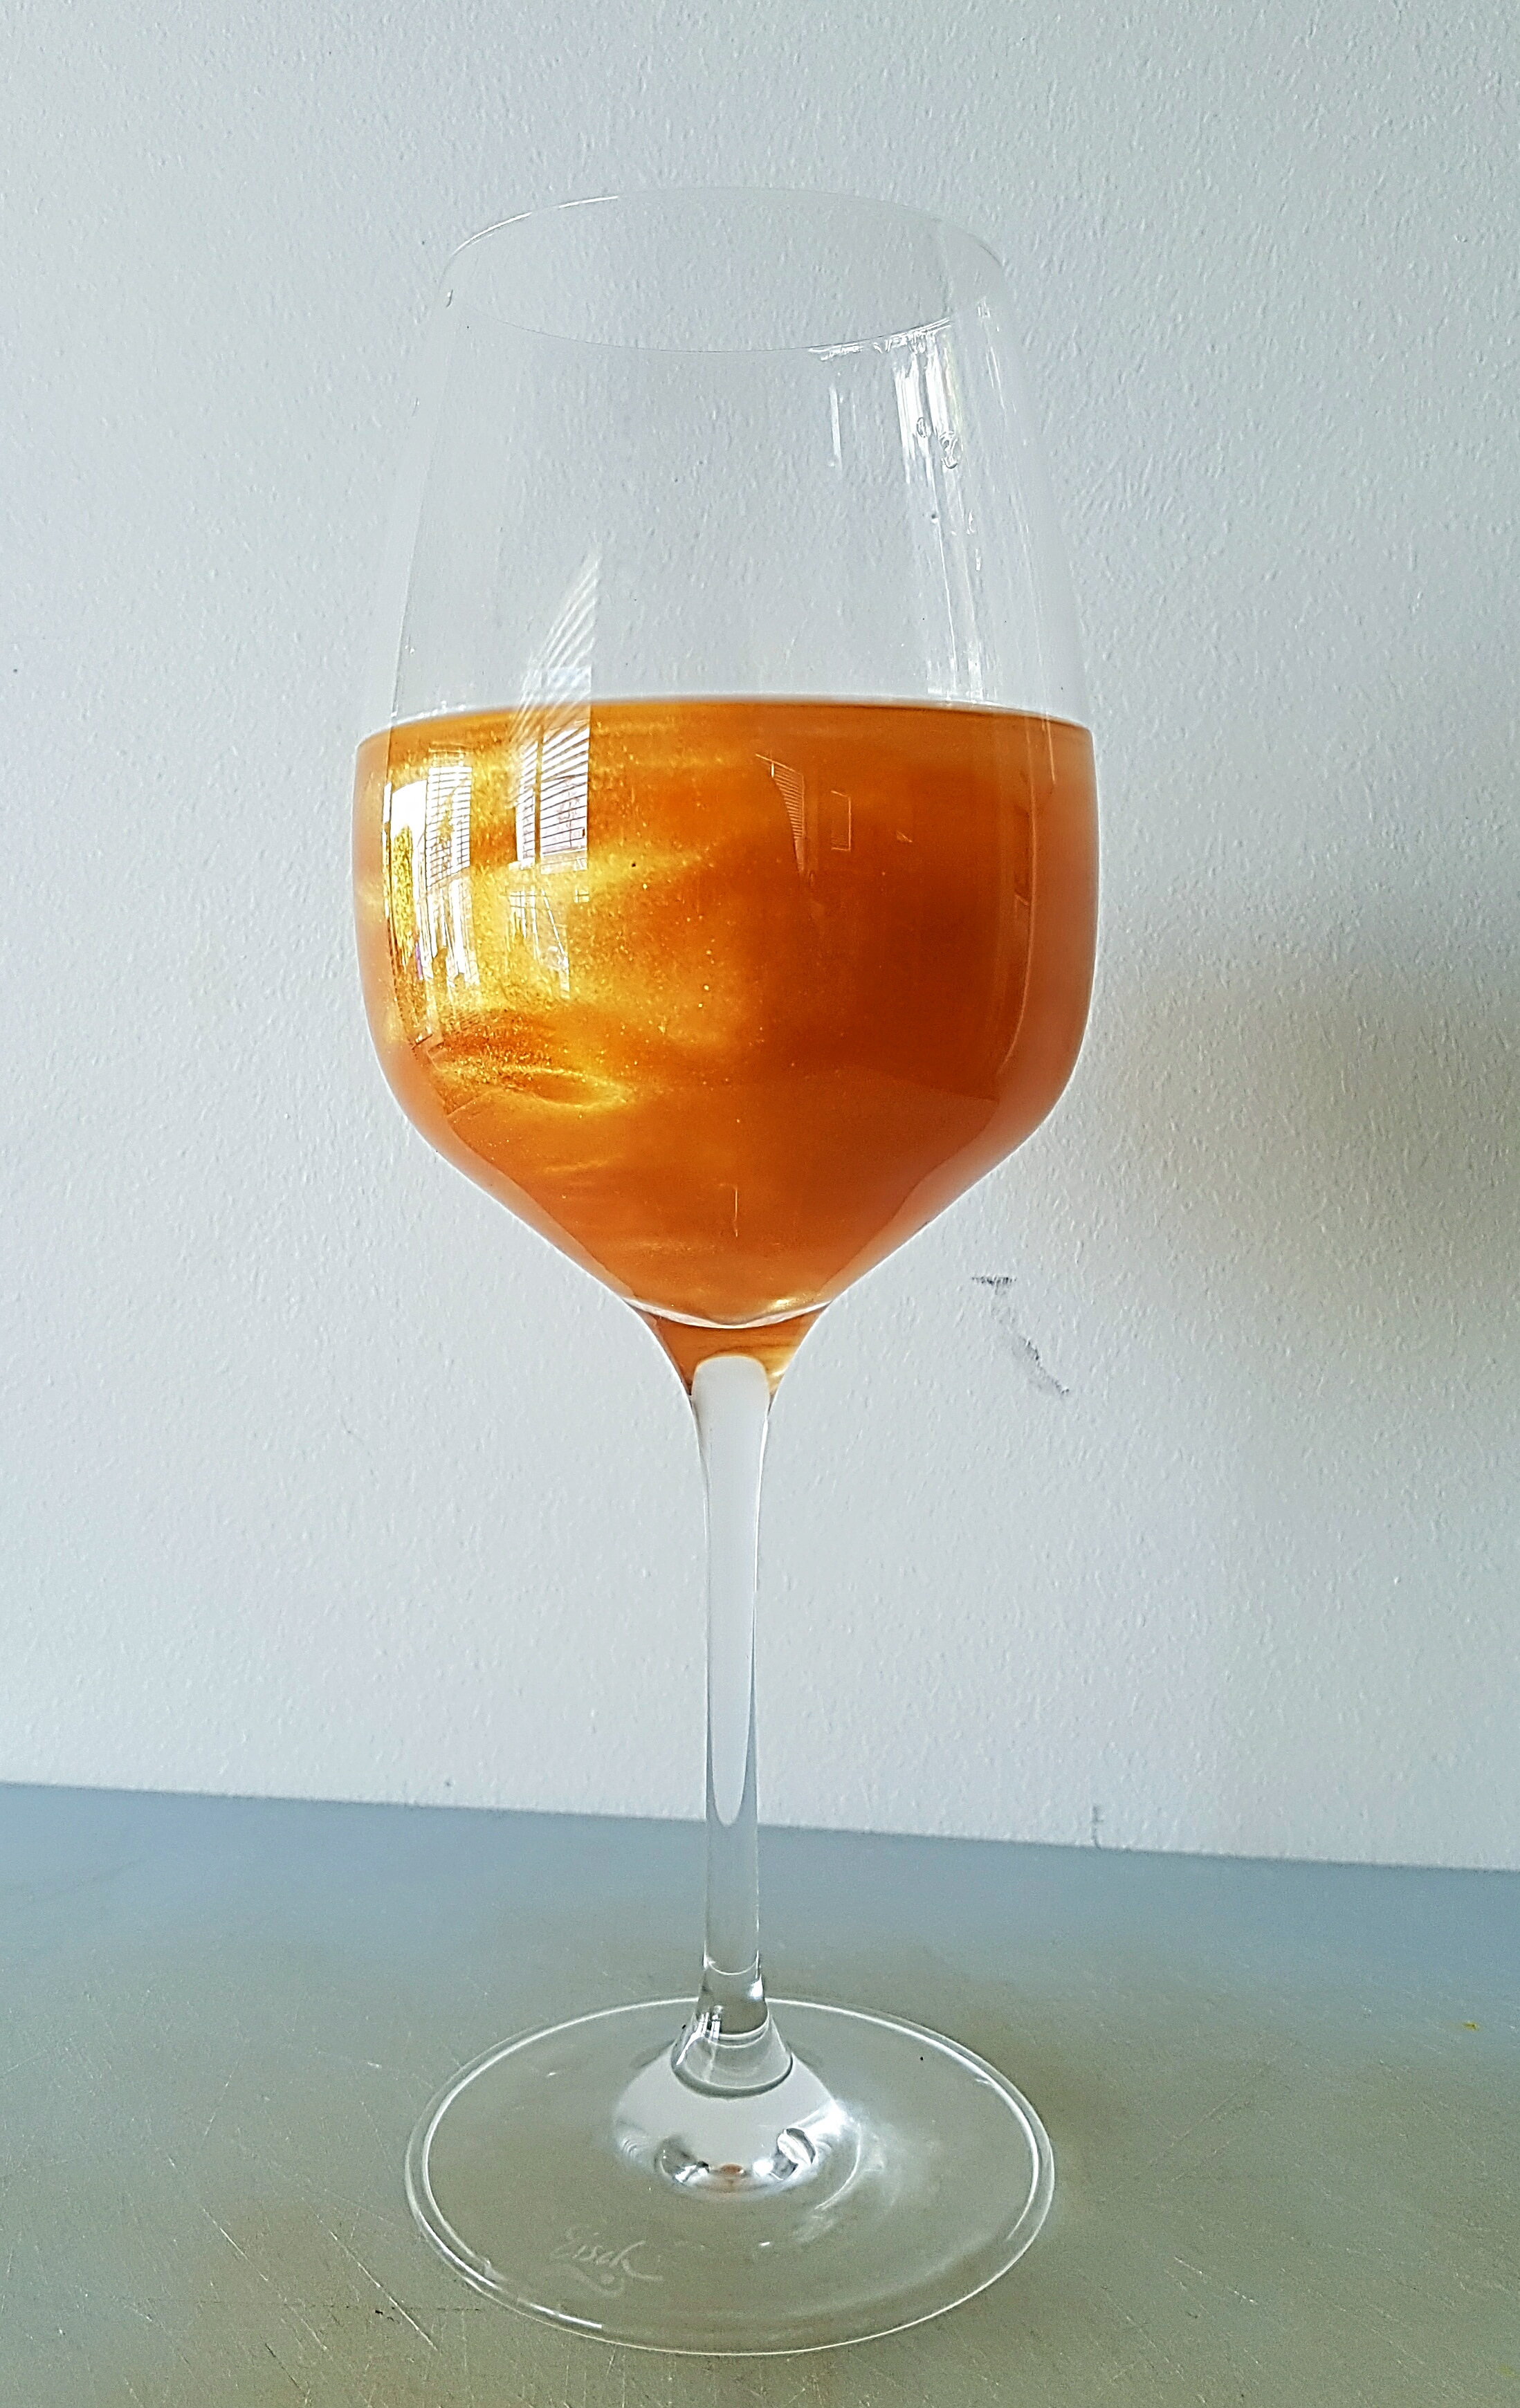
The grape variety is a cross between Sauvignon Blanc and another non-grape fruit, Pollia Condensata, commonly called the Marble Berry.
The metallic colour of the fruit comes from quantum effects rather than pigment
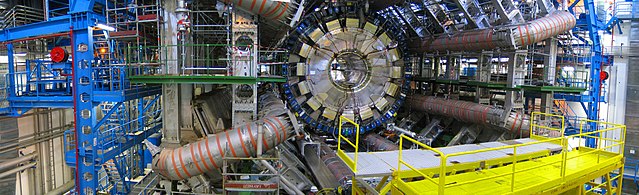
Back in 2008, Conjectural Technologies’ lead scientist, Professor Corey Irwin was looking at the reflectivity of wine grapes when he accidentally included a sample of the tropical plant in his magnetic resonance cylcotron.
The world’s only Magnetic Resonance Cyclotron
“Frankly,” says Professor Corey, “They were part of a table arrangement in my office that caught in the sleeve of my lab coat. I didn’t notice them because the berries are tiny and the colour is so strong that they don’t actually look like real fruit, more like crazy ball-bearings.”
But the results from the test showed otherwise, and the fruit’s surface reflects nearly 50% of the light that hits it–vitis vinifera grapes reflect between one and two percent–due to the surface composition of the skin. “It’s as though the fruit is composed of nothing but tiny little mirrors, all over it!” explains the Professor.
Sensing the potential for a revolution in the appearance of wine, the team at Conjectural Technologies launched into a genetic cross-breeding program, using Crispr-Cas 9 genome editing technology. With CRISPR (Clustered Regularly Interspaced Short Palindromic Repeats) “spacer” sequences are transcribed into short RNA sequences capable of guiding the system to matching sequences of DNA. When the target DNA is found, Cas9 binds to the DNA and cuts it, activating the targeted gene.
Chief Disruption Officer and Lead winemaker at TVCC-Kitworld, Tim Vandergrift is delighted with the results.
CDO Tim Vandergrift, looking over his experimental vineyard
“This is a real game changer. For thousands of years wine has been red, white or pink. Well, brown too, if you forget and leave the top of the fermenter open. But now we have the ability to change its colour, not with dyes or pigments, but with the harnessed power of quantum physics and Genetically Modified Organisms!. By using gene editing and forcing together the sequences of pollia with Sauvignon Blanc and certain key sequences of hagfish and African land snails we were able to produce a grape that not only reflects more light, but has the viscosity to hold the reflectivity in suspension, so it doesn’t just fall out during fining, or settle on the bottom of the glass.”
Vandergrift admits that the wine is slightly different from standard grape wines, including a textural change. “The hagfish and snail genes are there to provide a colloidal gel that keeps the reflective particles from binding to anything else. It does make the wine viscous, but it’s not too gooey–it has exactly the same viscosity as transmission fluid, and once you get used to it, it’s really nice.”
The new wine, tentatively called ‘Quantum White’ will be available for commercial release on April 1, 2019. Expect it to be in high demand, as in addition to providing a pleasing flavour and aroma, it is expected to be an excellent substitute for Dexron III transmission fluid.
The Further Adventures of Attention-Surplus-Disorder Man
If you read my blog for a while you’ll come to understand that I have a pretty serious problem getting fixated on projects, whether it’s brewing, winemaking, cheese, marksmanship, motorcycles, gardening, powerlifting, whatever. It’s gotten particularly bad in recent years with brewing beer: when I find out about a new style or a beer I’ve never heard of, I have to research it and make it until I feel like I have a grasp of it. You may click here to learn more about our cellar cooling system. Or, contact Beer Cellar Coolers for additional guidance. You can also click here to find more options.
With that in mind, I was watching a travel show and the host hit a cafe in Northern Vietnam and sat around drinking something called Bia hơi. At first blush, it looks like a light industrial lager, common in hot countries. But then they poured it over ice and my ears perked up.
Icy cold! Photo from Wikimedia CommonsStreet scene. I’m sweaty just looking at it.
It turns out this stuff is a sort of jackleg homebrew, brewed quickly and matured almost not at all, and delivered daily to bars and street-corner dispensing spots in jerry cans and kegs. Production is described as ‘informal’, with no government oversight or monitoring, and it’s meant to be drank absolutely ice cold, or even over ice, and the alcohol content is 3% ABV or less.
All of this makes perfect sense in Vietnam, which is not only incredibly hot but also terribly humid. You could drink rather a lot of beer like this and stay hydrated and refreshed without actually getting blotto, with the added bonus that it sells for something like 15 cents a glass.
After a bit of research on the interwebs, I asked around for people who’d actually been to Vietnam and tasted the beer. I lucked out in that a friend of mine who is a very discerning BJCP judge had been there a few years ago, and he was willing to share his opinion.
“Undrinkable swill full of acetaldehyde, sourness and mostly off-flavours. You’re an idiot if you want to make that.”
I get it: when you’re charging less than a buck a gallon for your beer, Quality Control is way down the list and you can’t throw a batch away just because it’s off–look, there’s a surly tourist, he’ll drink anything, get the bucket! It’s inevitable that the quality would be variable. I wanted to make my own, and I was pretty sure I could do a little better. It would have to be more expensive than fifteen cents a glass, but honestly, not that much more.
I flat-out pulled a recipe out of my butt. I chose to emulate a rice-adjunct lager with a starting gravity below 1.030 and hops around 15 IBU. I immediately ran into an issue: in order to get a moderate hop character I was going to have to either alter my regular brewing style (more on that below) or substantially decrease the amount of hops in the recipe: hop utilisation is affected by the density of the wort (yes, it’s lots more complicated, please don’t write me screeds about it) and a really low gravity beer like this is hard to make without over-bittering for style.
Another issue I contemplated was volume: if this stuff was good, and as low in alcohol as I was planning, I was probably going to enjoy more than one glass a night–it might replace most of my water intake. Making a single 19-litre keg would have me out of beer in ten days at most, and if it was really good, I would then become despondent until my next batch was ready. It’s summer here at Chaos manor, and it’s pretty warm for Canada.
It’s Canada: where’s the snow?
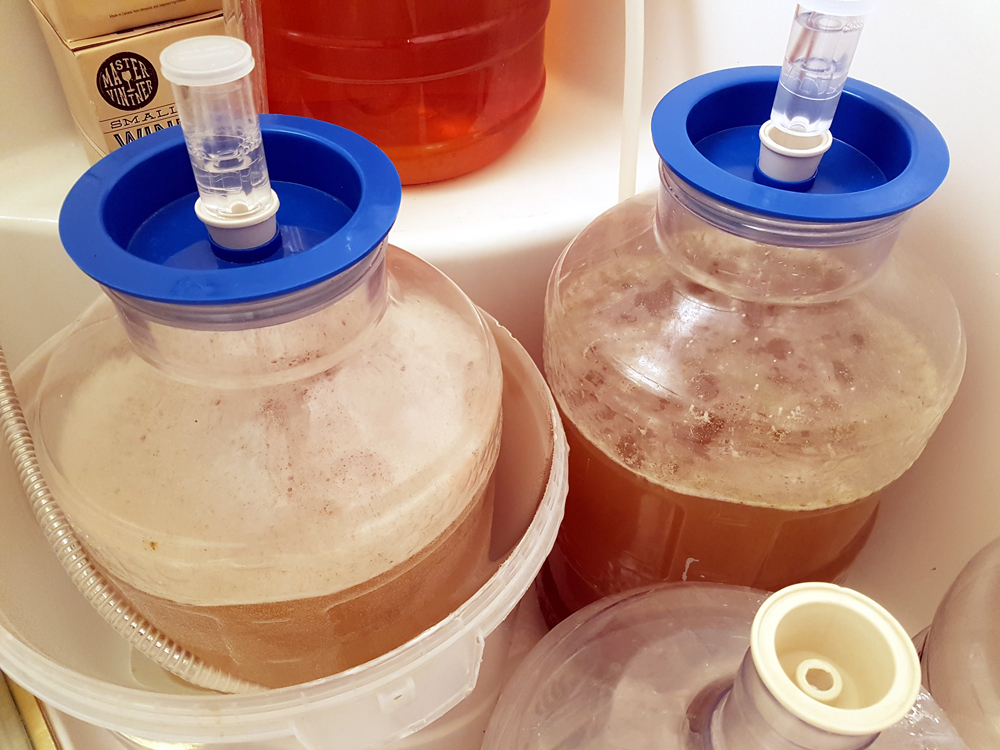
The answer to both quandries lay in the techniques of industrial brewing: high gravity. The beer we mostly see advertised on television is Industrial Lager. Megabreweries make a batch of beer at very high gravities (usually over 1.070 to start), finish fermenting, and then add water to hit their target alcohol content. It’s actually a very intelligent use of resources: you can ferment twice as much beer with the same amount of tanks. This sort of efficiency makes accountants very happy, and it’s not that far off of the parti-gyle brewing systems of olden times. My plan was to brew a 30 litre batch of beer at high gravity and water it back to two batches of 19 litres, then ferment each separately with a different yeast. Not only could I brew a lot of beer quickly, I could use the higher gravity wort to moderate hop utilisation. Or so was my plan . . . I whipped out Beersmith and loaded my Grainfather profile.
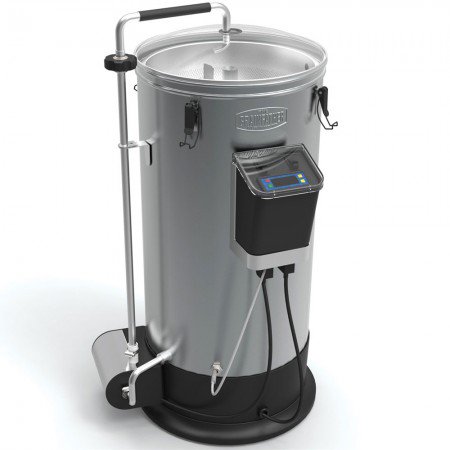
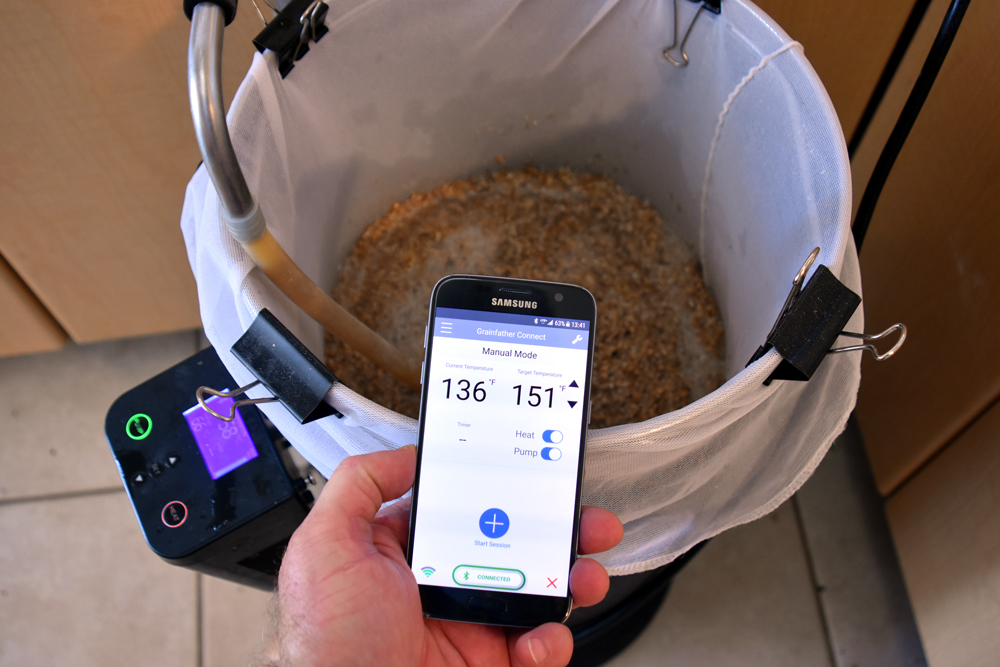
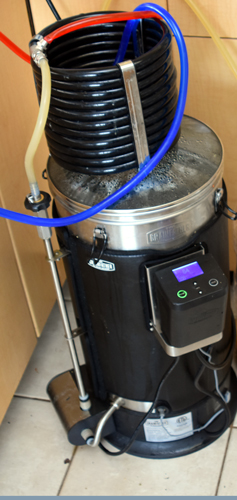
Pretty spritely for a Grainfather
If you’ve never used one, it’s an all-in-one mash/lauter/boil unit with a recirculating pump. I’ve had literally every system there is and I like this one because I can brew from home, in my kitchen, while I work at other things. It’s Bluetooth controlled, programmable for step mashes and has timers and such. It’s really pretty amazing.
Sadly, for what I wanted to do the Beersmith profile was a bit crap, so I back-of-the-enveloped it. I figured in Imperial units eight pounds of Pilsner malt, one pound of 10L Crystal malt, two pounds of rice, and two ounces of first wort hops and two ounces for a 20-minute whirlpool, to make around 5.5 gallons of finished wort to be watered back into two four-gallon batches to fill two kegs. If I wasn’t too screwy and my efficiency was low but okay, I should get an OG of 1.025-ish at pitching and get 22.-2.5% ABV and 15-ish IBU’s.
But there were a lot of departures in my plan. Most recipes would use flaked rice, but I wanted to do a cereal mash. That is, I wanted to take plain white rice and cook it to mush, and add that to my grain mash. Why? That’s the way the macro brewers do it, and I had planned on doing a three-step mash for maximum fermentability: 122 F then to 134 F and then to 149, using the boiling rice mush to drive temp to final mash.
You can see, I don’t like the easy way.
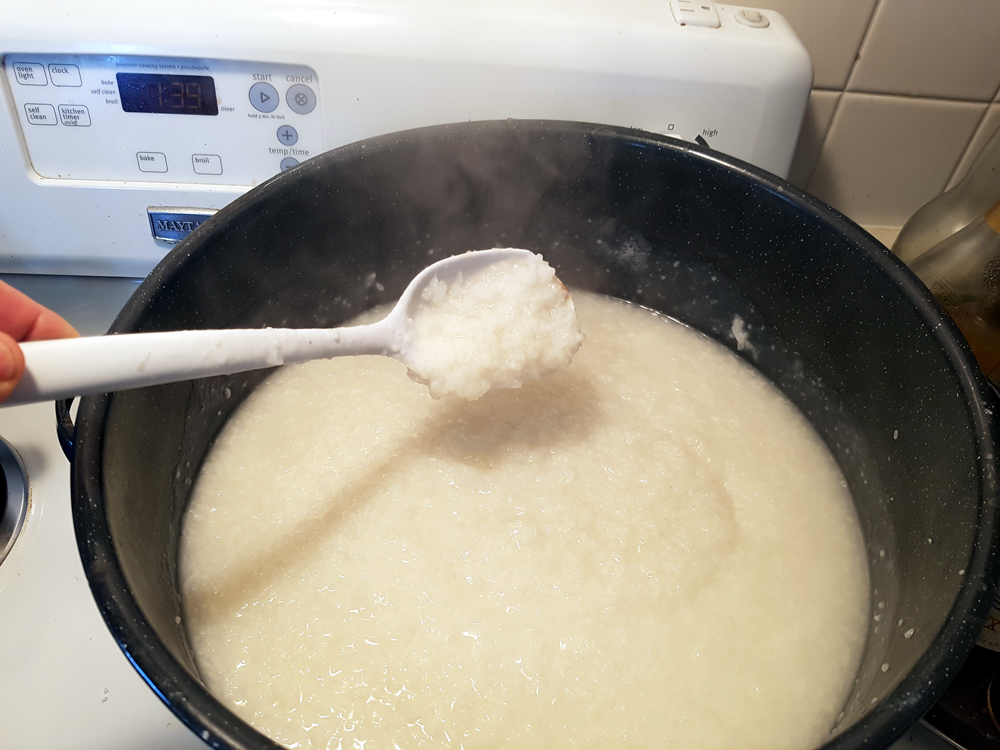
Onward to brew day. First step was to cook the rice. I got up early and put the rice on in a huge pot with three gallons of water on low.
Looks like congee, but not as tasty
You have to be really careful wih this step: it’s very easy to scorch starch as it breaks down to moosh. Even the faintest hint of burnt character will completely ruin the beer, so you need way more water than you think you do, and you need to keep it low and slow, and stir frequently, and it’s going to take much, much longer than you think. I started the rice at 8 am and it was just ready for the pot by noon.
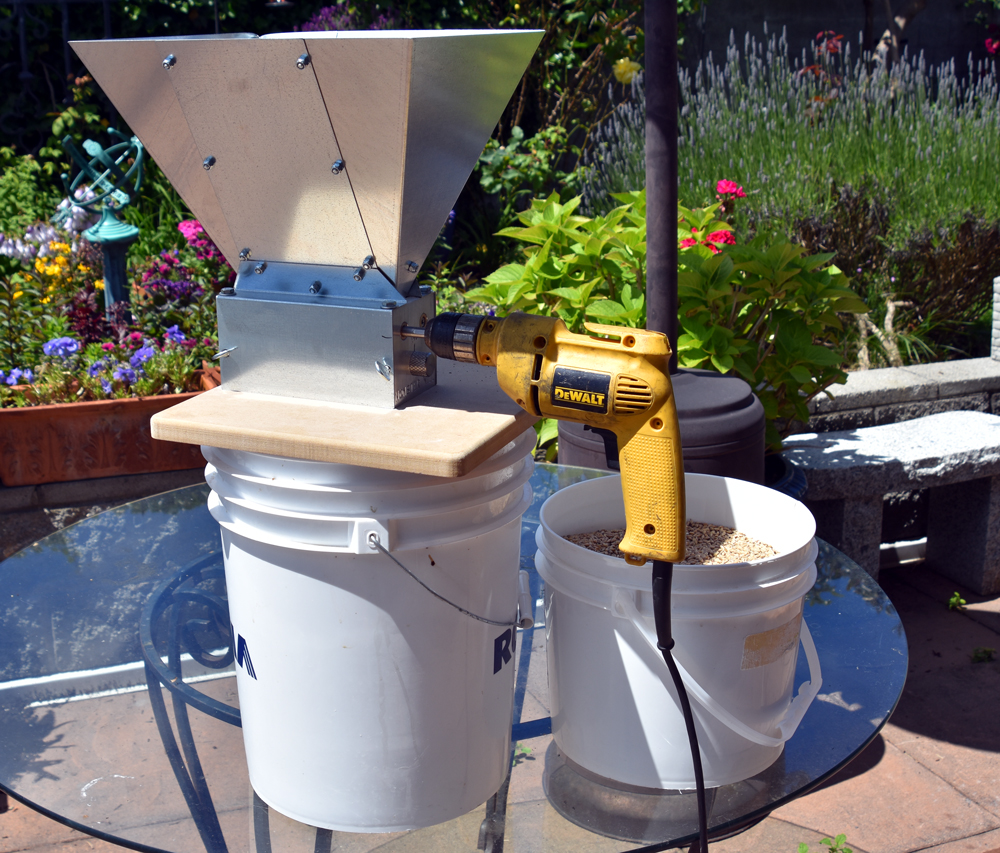
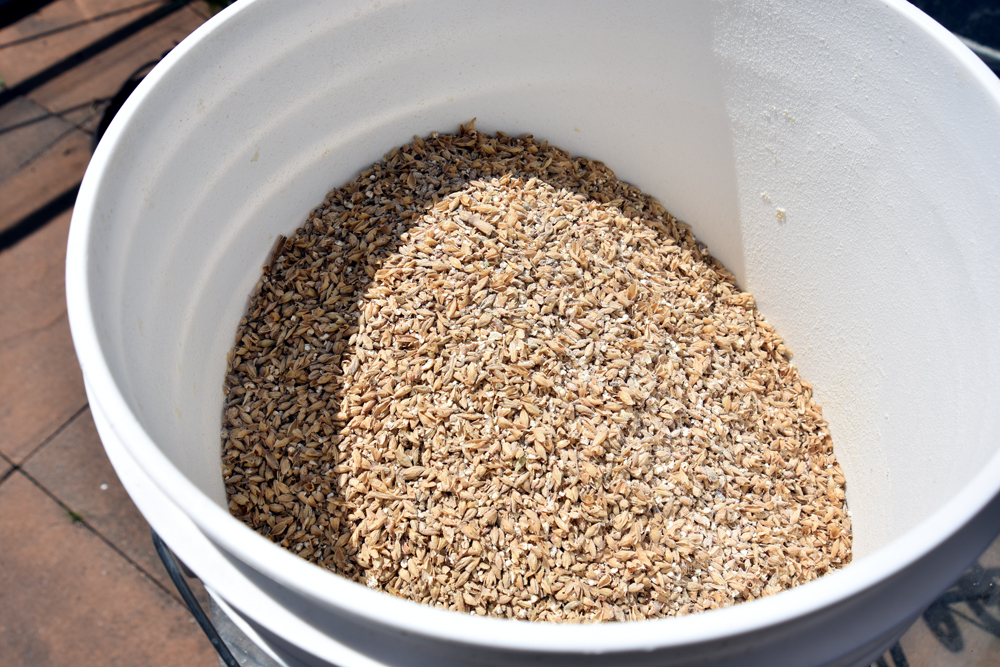
As it cooked I milled my grains.
It’s no monster, it’s just misunderstood
I have a three-roller Monster Mill and I can’t recommend it enough. Mine is set to 40 thousandths and it’s perfect as can be.
Perfect and utterly consistent. A good crusher makes a huge difference.
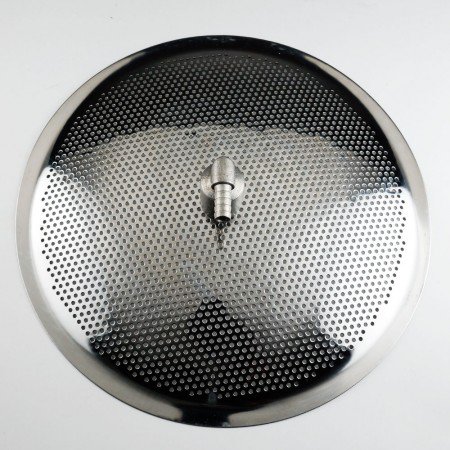
Next step was to set up my Grainfather. With my system, as with everything I do, I did not leave it unmodified. My first step was to throw away the trub/hop filter: it’s useless. In its place I put a Titan false bottom.
Mirror stainless, right angle bend, great engineering.Nifty fit, too. This picture from a previous batch, thus all the hops and trub.
Not only does this catch goo better than the GF screen, it also has almost no dead space underneath–less than two cups of liquid escapes the pickup on the bottom. The build-up of hops makes the screen tighter and more efficient and the wort coming out is super-clear.
But you can’t use the grain basket from the GF with the false bottom in place unless you use some serious spacers. But, I had a different mod: a bag.
Spring clips work great to hold the bag in place
Yes, my Grainfather is now a Brew In A Bag False Bottom HERMS unit, running off of an Android phone over Bluetooth. 14-year-old me, with an old canning pot and a clapped-out electric stove would be awestruck and envious. (He’d also look at the size of me and ask, “Dude, just how much beer do you drink?”)
To make a long story short, I did my usual short and shoddy brewing methods: I doughed in at 122F, immediately ramped to 134 for twenty minutes, and then added my boiling rice goo to drive everything to 149. I mashed for 30 minutes–I usually do 20 because efficiency is for drones from Sector 7G, but I wanted to clear all of the rice starch. An Iodine test at 20 minutes was clear, so the extra ten was for luck, mostly. I did a bag sparge in another bucket with around 15 litres of water at 170F and topped the GF up and tossed in my first charge of hops as it heated to the boil.
Shot before I topped up with bag sparge
After 20 minutes of vigorous boiling I shut off the, popped on the lid, threw on the heat exchanger and started cooling the wort, recirculating it back into the Grainfather.
Counterflow chiller setup. Works very well, kind of surprisingly so.
When it got below 180F I tossed in the rest of the hops, shut off water to the chiller and left it to recirculate for 20 minutes. Then It was time to run it off to the primaries.
My groundwater is very cold, even in summer.
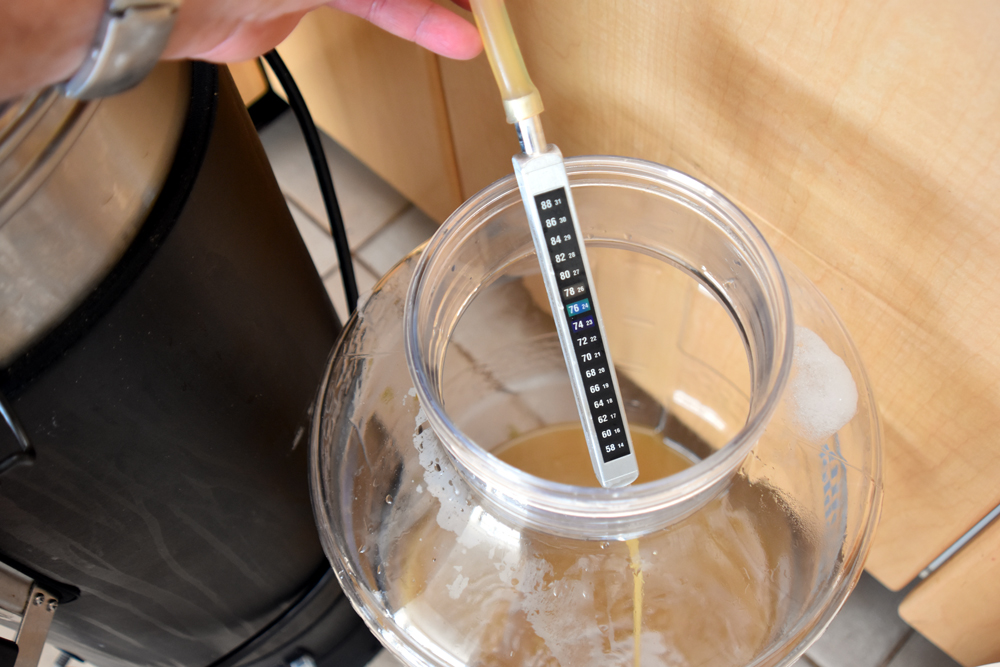
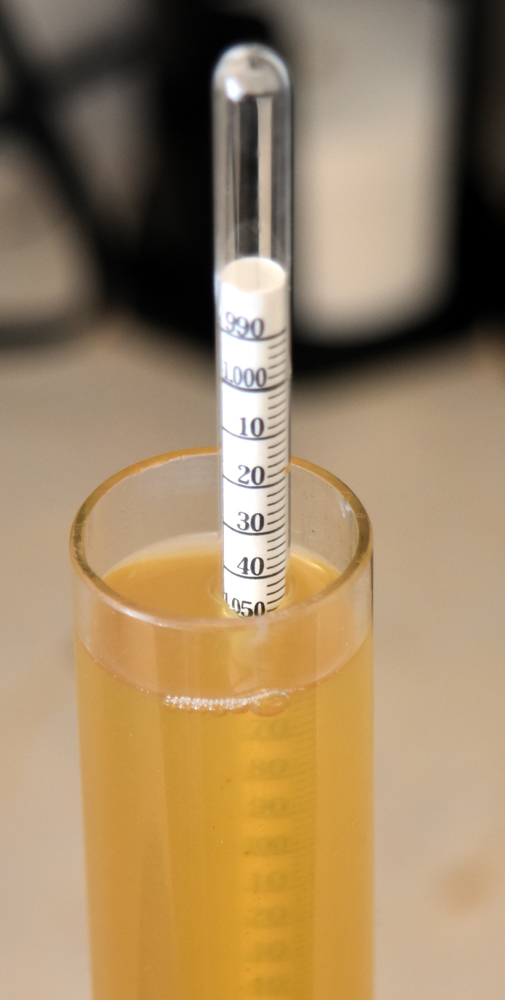
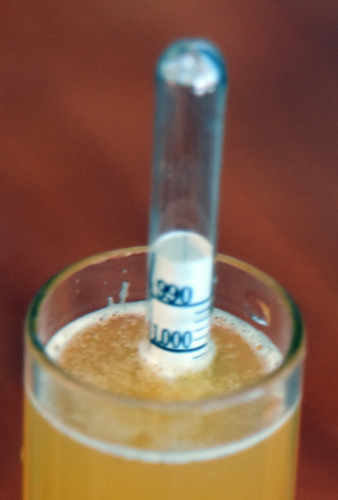
I took a gravity reading of the wort straight from the chiller.
Temperature corrected to 1.050
I split it into two fermenters, yielding a little under three gallons each, and then topped up with treated water to 5.5 gallons. I treat it by adding metabisulphite powder to plain old tapwater, to bind out any chlorine that my municipality may have added. I have brilliant water–some of the best in the world, and it doesn’t need another thing. After it was topped up I noticed how much protein break I got. Good stuff!
Lookit that break!
When it was divvied up I took it to my fermentation chamber, aka the second bathroom. I forgot to take a picture of the SG reading of the watered back batches, but it was 1.028
It’s a shower stall, very convenient for blow-offs and cleaning.
One of the beers I hit with US-05, and the other I chilled with my groundwater again, by virtue of letting the shower hose dribble into a bucket containing the fermenter run very slowly, getting it down to 62 F overnight, after which I pitched it with Safeale S-189.
Fermentation was vigorous in both, and completed after ten days.
And that’s final.
I let the beers settle and racked them to kegs. I stoppped to take an SG reading and it was corrected to 1.004 This makes a start-finish difference of 18 points. Multiply that by the ABV conversion number and you get 2.36, just under 2.5% ABV, good enough for my purposes.
After they had both chilled to 38F I burst carbonated them and let them carb under pressure for a few days, then tasted them, and shared with some friends. How was it?
Poor man, that beer must be terrible. After two weeks the beer dropped star-bright, looking like it had been filtered.
The lager version is better than the US05, but only subtly so: both beers are incredibly light, have just enough hops to balance the grain character and the crystal malt fights the carbonic acid with great precision.
I drank most of a keg in two weeks, pretty much a record for me. It’s like fabulous Gatorade, refreshing and deliciously beery, and yet the alcohol is so low I can have a pint with my lunch and continue working.
I’ve always disdained macrobrew lagers. They have all kinds of off flavours and aromas and don’t satisfy me in any way. This is different: it’s beer-flavoured beer, and hits the spot without overwhelming. I dare say it’d be easy to screw up, because the style is so light that it would show flaws instantly. But when it works, it’s really great beer. And that is the beauty of homebrewing: I can do whatever I want
Next up, I’m going to make a Belgian Kinderbier, a dark ale at 2% ABV that should have enough roast and caramel to make it richer and more interesting, while still being suitable for lunching.
If you’re looking for the best beer delivery Pimlico London has to offer, check out Booze-Up. A great 24/7 alcohol delivery company that can bring your any alcoholic beverage you want anytime, anyday!
Hey, if you’re in Vanbrewers and were at the June meeting you may have tried an early version of this recipe without the 10L crystal and with different yeast. That stuff was okay, but this is the bomb, I swear. There won’t be any of this to share at future meetings though, until I work out a brewing schedule that can compensate for me drinking a whole keg every two weeks.
Since 2015 I’ve been working on the Master Vintner project for Northern Brewer/Midwest Supplies. As Technical Winemaking Advisor I’ve been incredibly happy putting my skills to good use, bringing out the first new kit introduced into the home winemaking in more than a decade. First we launched our Small Batch kits, along with Winemaker’s Reserve and Tropical Bliss, and now we’ve added Limited Edition and Sommelier Select.
After 25 years in the wine business, it’s immensely gratifying to be in a position where I don’t have compromise on anything. The vineyards I work with, the grapes I get, the winemakers who do the blending and packaging for me, they’re all the product of a process that has one straightforward goal–help people make great wine, every time.
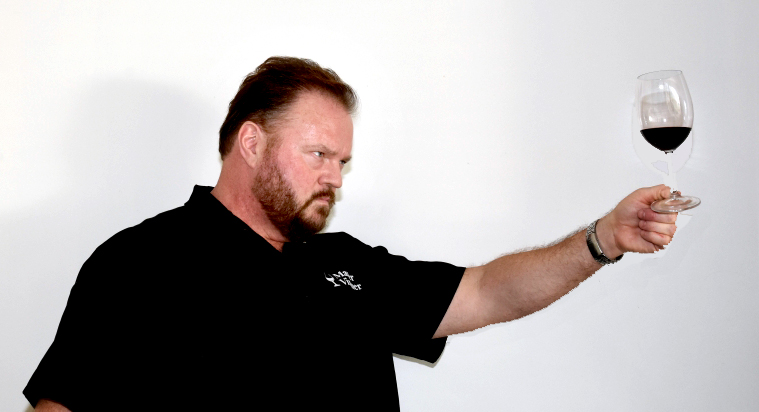
It’s important to assert dominance.
Throw in a customer service team that really, truly gets what it’s all about (one bad experience and people never come back, so do your best always, and fix everything, every time) and I’ve been in pretty much a state of work-related bliss. Heck, I’ve only worn a suit three times since I’ve been with the team–that’s bliss in itself. Plus, I now get to actually get back to beer, something that I couldn’t do for over 15 years. Oh beer, I’m sorry I was gone so long: I’ll never leave you again!
New Things
But there’s something coming. Something big, cool, exciting and wonderful: Northern Brewer Canada.
Putting the North into Northern Brewer
NB Canada is a full-service home beer and winemaking supply site. Soon we’ll have most of Northern Brewer USA‘s wonderful content and products, along with Master Vintner winemaking supplies and some special additions as well (mainly me!)
Will There Be a Local Shop?
Notice I said ‘site’: we’re mostly internetting it. Northern Brewer USA has some very nice brick and mortar stores, but they grew organically from local shops. Here we’re starting fresh and e-commerce is the goal.
But that doesn’t mean we’re an interwebs discount house. A lot of people in the industry who own consumer wine and beer making shops will have heard my lecture: “Don’t discount: a race to the bottom on prices hurts you, your business, your employees and ultimately your consumer when you can’t afford to expand or improve your selection and service.” (Actually, I usually said it a lot more colourfully, and with more emphasis.)
Not only do I stand by those words as staunchly as ever, so does Northern Brewer. From their company philosophy:
The future of homebrewing
We didn’t open six months ago to make a quick buck off a hobby that’s trendy right now; we are interested in the long-term health of homebrewing (. . .) . We dedicate a significant percentage of our profits to give back to the community and to create new homebrewers. When you shop with Northern Brewer, you are helping to make an investment in the future of homebrewing.
Fair prices
Northern Brewer has been serving homebrewers and winemakers for over 22 years, and we aren’t going anywhere. Rock-bottom, fire-sale price structures are unsustainable and create an uneven playing field that ultimately hurts the industry, hobby, and the community. Our price structure is competitive but built around sustainability, because our goal is to grow homebrewing as a hobby and industry, which will benefit the consumer by sustainable lower prices and improved selection through increased demand.
You can see how that suits the criteria of my value system. I know a lot of people in the industry, I helped quite a number of them open their stores, others I’ve simply enjoyed as peers and friends. I’m pleased to be in the boat with them, and not as a discounter just out to grab market share.
What’s Next
Yep, that’s how happy I get when I have beer. Unless I get happier.
Next, we get Northern Brewer Canada fully stocked. We keep adding products and content and give you great service and excellent value on innovative products. After that, you let me know: we’ve got a Limited Edition program, we’ll be bringing in some kick-butt clone recipe kits for beer (how do you feel about having a Pliny the Elder clone as your house beer?)
I’m looking forward to a great time bringing Northern Brewer to Canada and keeping Master Vintner hopping as well. Check out the Master Vintner blog and tune into our Instagram (@Nbrewcanada) and Facebook page https://www.facebook.com/northernbrewercanada/
The first beer worked out well, but with the very low levels of dextrins even the small amount of hops I put in have it out of balance. It’s not bad (in fact it tastes exactly like most of the IPA’s I used to brew!) but I corrected that in the next batch, and also managed to execute my double-brew strategy, incorporating the used grains from the NE batch to make an imperial version of the same recipe.
I have two traits that cross over hard in my life. One is a love of DIY, particularly if it’s to do with food or beverages. I brew, make wine, cheese, sausage, pickles, smoke meat, make bacon, hunt, gather, garden and cook (a lot). The second trait is Attention Surplus Disorder. When a new idea comes my way, I am not constitutionally capable of leaving it alone.
I attended the Pacific Northwest Homebrewing Conference over Saint Patrick’s Day this year and had an absolutely rocking time. Seriously, it’s like a smaller, more intimate version of NHC. I was there to give a seminar, but also to attend a bunch of them. One that I was sad to have missed was one entitled ‘The New Technique of Non-Enzymatic Mashing’ by Aaron Hyde, Director or Homebrew for Briess Malting. It seemed like it might be a New Idea.
Fortunately, I was at the same table as him at lunch and got the gist of his hour-long seminar in five minutes. Note that this was my fault, and beer’s: the conference is pretty packed with tasting opportunities . . . if I’d taken more time to listen to him, or been smart enough to attend his lecture, I wouldn’t have made the mistakes which I’m going to chronicle below.
The 411
According to Dan Bies, Technical Services rep for Briess and the guy who seems to have first proposed it, N-E mashing is cold-soaking your grains in water either overnight at low temperature, or in a recirculation mash at low temp. When you do it right it
. . . gives the brewer the ability to capture color and flavor from specialty malts while limiting the extraction of complex carbohydrates (. . .) it provides refined malt components including aroma (flavor), color, FAN, smaller proteins (foam) and enzymes. What you don’t get are coarse starch binding structures including dextrines, beta glucans, and larger proteins (haze). It can be used in various applications including boosting color and flavor in big beers without the cloying and viscous effects of dextrins and beta glucans – thus, making a cleaner and dryer stout, strong ale, or big lager. NEM also creates great foam and mouthfeel in low alcohol beers and concentrates enzymes for high adjunct brews. Another benefit of this method, the spent grain from NEM can be used as an all grain adjunct to make a low color, estery beer, such as Belgian-Style Golden Ale.
Like that, but with more hops
This is telling me I could make a full-coloured and flavoured beer in the mold of an IPA with an alcohol content below 2%? Include me in! The day after I got home from the conference, I got my brew on. My original plan involved a couple of recipes I had on hand: Beerie Smalls, a NE IPA clone. Already at a sessionable strength, the recipe includes 8 lbs of Rahr 2-row, 1.5 lbs Munich 10L and 12 oz of flaked oats, along with an utterly ludicrous amount of hops, most of them in hop stands, and the balance split between primary and secondary fermentation. I put it in a cooler from Cold Room Design. These cold room installers have made my project easier. I had two of these, and my plan was to do a sort-of parti-gyle thingy where I made one with the N-E mash, and the second with the grains added back for a crazy Imperial version. That went awry, but it’s back on the menu in the future. Here’s what I did the first time out.
Step One: Soak Grains in Water
Doughing in at 68F feels so incredibly wrong.
Usually I assemble all of my brewing gear and ingredients, then sanitise All The Things, then start. Since I was going to soak the grains overnight, I started there. I ran tap water until it was as cold as it gets (around 55F this time of year) and adjusted it to 100 PPM of chloride and 150 PPM of sulphate, for a more Northeastern juicy profile. I poured 20 litres (5.25-US gallons) into a sanitised bucket that had a grain bag and all of my crushed grains in it, stirred the beans out of it, popped the lid on and left it sitting.
Brew Day
Next morning I assembled my brewing gear, sanitised everything I could lift, and laid out my hops (there was a lot of them). I went with my Grainfather for this brew. I have a bunch of different rigs for brewing, but I had a lot of other things to attend to during the day, and the Grainfather is a pretty forgiving setup: it never runs out of gas, holds the temperature when you forget to look at it because your busy, and best of all you can use it indoors, where you’re working.
Not shown: honking culture of yeast and lots of other things.
The first thing I noticed about the bucket of grains was how dark and rich the liquid in the mash looked, and how much fine material had settled out.
Clear, non-enzymatic wort above a layer of floury fines
I got busy, pulled and squeezed the grain bag and cold-sparged into the bucket.
Cloudy as can be.
Here’s where I made a technical error that would have been prevented by 90 seconds of search time or a less impulsive personality. After pouring the hazy goop into the Grainfather . . .
I noticed that the bottom of the bucket had a lot of stuff in it. “Hmm”, I thought to myself, “That stuff is probably good things that need to go into the wort for when it goes through mashing temperature!”
That looks like concrete! I should pour it into the kettle immediately!
Yeah, no. I set the controller to ramp up to 152F to hit my mash temp and left to do some errands. This is the beauty of this setup: no danger in leaving it unattended during the mash, because it will take care of itself. The bad news is, when I got back, the temperature was just over 100F and the breaker had popped on the unit. I popped it back on, and it promptly clicked off again. Any electrician will tell you that if a breaker pops right back after you reset it, you have an issue that can’t be dealt with my tying the breaker down with duct tape or a bungee cord.
I realised that this situation was why the unit has a breaker in the first place: material had built up on the bottom and was preventing heat from transferring into the rest of the wort. It was scorching, in fact, and that was tripping the breaker. I decanted the wort out of the unit, and sure enough:
Nothing a quick scrub with a Scotch-Brite pad didn’t take care of in a minute.
Well, phoo. Obviously those fines were like flour and cooked onto the bottom like library paste. I let the bucket settle for a half hour and wound up with this:
That’s better
I racked the settled wort back into the Grainfather, re-set the program, mashed the liquid to 152F, punched the afterburners and boiled for an hour. At flame-out there were hop additions, and after the wort dropped to 180F, more hop additions. Seriously, there were ridiculous hop additions. Luckily, I had used my favourite Grainfather trick, slipping a Titan False Bottom into the unit before the wort went in. After a proper rest for the hops, I ran it off as chilly as possible.
You may ask why I didn’t just do the soak in the Grainfather if the false bottom is so great? Those fines would have clogged it up like crazy: it holds back hop particles and delivers a beautifully clear wort, but gums straight up with floury grain particles.
I checked my SG in the carboy.
That’s low–excellent!
Corrected for temperature, that’s an SG of 1.024. With the Beerie Smalls grain bill and my usual efficiency I would have expected an SG in the range of 1.047–1.049. If the beer ferments down to 1.010 (the usual, again) I’m going to wind up with a beer just under 2% ABV!
If it retains the grain/malt character, this could be terrifically interesting. I’m even having trouble wrapping my head around it. I pitched a stonkin’ great culture of yeast and let ‘er rip.
Pretty!
Less than two hours later I had a great krausen going, and by the next morning the foam on top was solid as a rock.
A thing of unearthly beauty.
I wish you could smell it: it’s so insanely peachy-fruity-juicy and lush I can barely stand it. My only concern is that this particular style of beer might have too much bitterness for the relatively low level of sweetness in this beer–we’ll just have to see.
Best Laid Plans
As for my plan of making a second Beerie Smalls clone and lumping the spent N-E mash grain into it, I wound up burning so much time fiddling with the breaker on the Grainfather and cleaning it, racking off the fines, etc. I didn’t have time to make a second batch.
HOWEVER, I do have two batches of a relatively low-gravity Oatmeal Stout recipe right at hand. Not only does it have a starting gravity of 1.042, it also has a fairly low hop rate. I’m going to run this again, and make a session Oatmeal Stout and an Imperial, all out of two recipes!
I’ll throw in a quick update on this beer when I rack it in a day or so (and add more hops!) and if you’re in the Vancouver area, I’ll be bringing it to the next Vanbrewers meeting and to the Tri-Cities Brew Club as well.
If this is your first time reading my blog, consider following me on Twitter, Facebook, Instagram, Linked-In, Pinterest and home from the bar. I swear everything I do has a reason. Sometimes that reason is I’m weird and make poor choices.
If you like wine, check me out at Master Vintner. It’s all cool.
I don’t always drink wine. Or even beer. I don’t even drink whisky every day, come to think of it. I don’t like soda pop for the most part, and I drink about two quarts of milk per calendar year. There are only two beverages I consume on a daily basis: water, of course, since I am a squishy bag of mostly water by design, and coffee, because it is delicious brain juice that lets me function in society.
Nobody looks cool . . . oh, all right, they look ridiculously cool. Don’t smoke kids, it’s bad.
I started drinking coffee quite young. In retrospect, being in the single digit range for birthdays was probably a little on the youthful side for drinking caffeinated beverages, but if you believe the Coffee Achievers, it was probably the making of me, and there are worse habits.
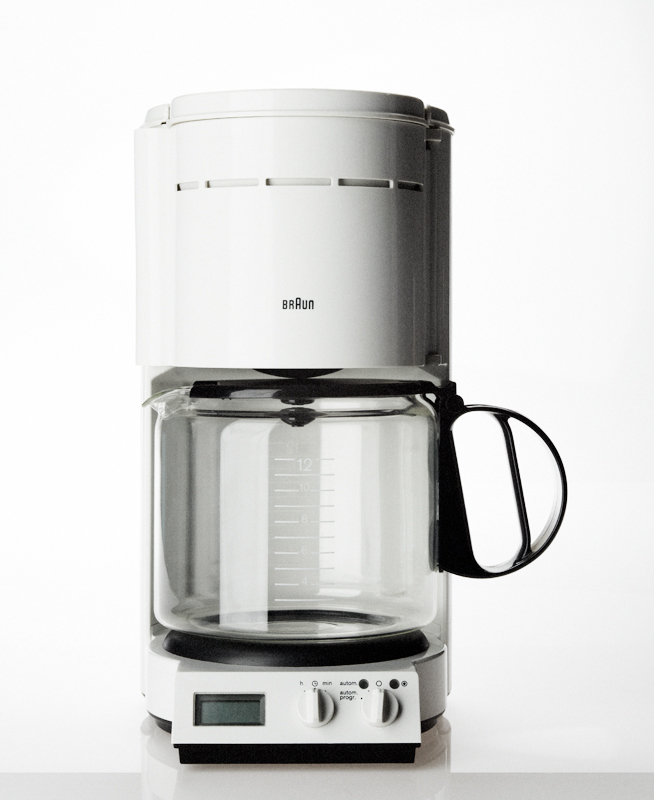
My taste in coffee has evolved over the years, as has the way I consume it. As a kid I liked it with lots and lots of milk and sugar. I lost my taste for sweets after a while, quit bothering with milk, and started drinking hot, black coffee by the gallon. Keep in mind I was raised by simple prairie folks, and the coffee wasn’t premium or sophisticated. It was pre-ground, canned coffee that was on sale, and made in an automatic drip machine manufactured by a company more known for electric drills and sanders than for food equipment.
It’s nice to know they never change.
A friend of mine once described this beverage as ‘Lutheran Coffee’, after the kind of brew you find in one of those giant percolators in a church basement. I liken it to hot brown coffee-water. After I left home I started buying beans and getting them ground at the store. Then I bought my own grinder, and one of the most perfect coffee making machines ever invented: the Melitta Cone Drip. That worked for years, until I got a bug in my ear about espresso. Then I had several set-ups, refining how I like my coffee with automated espresso makers, stove top units, et cetera.
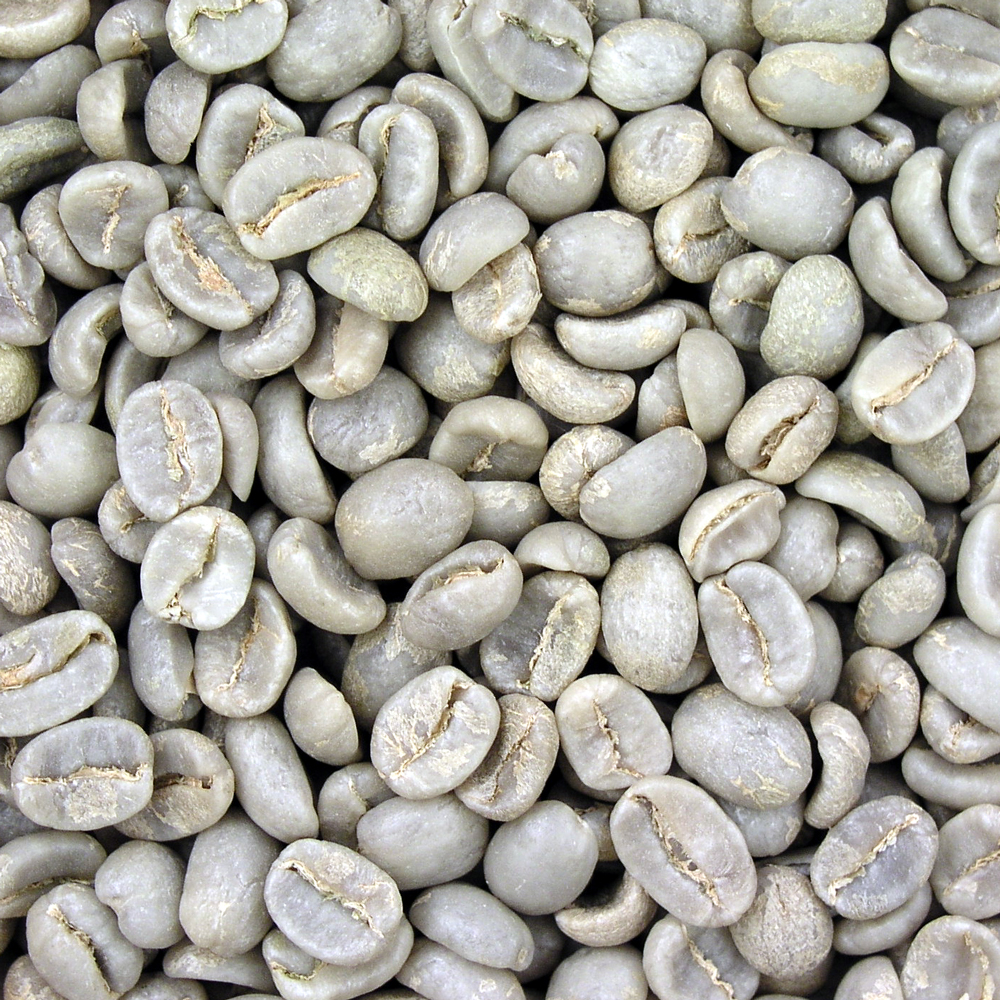
Seriously, they look like pebbles that aren’t even trying very hard.
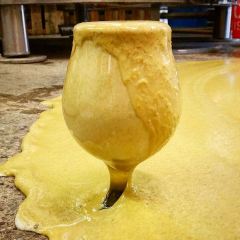
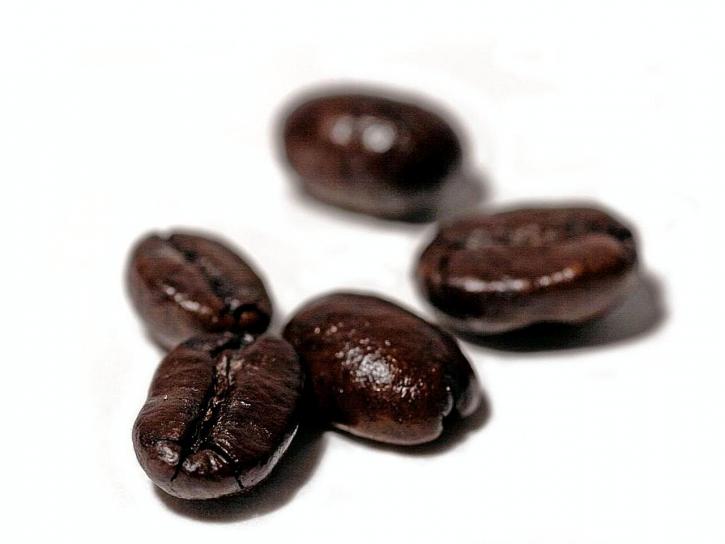
I keep experimenting with coffee making, but the final frontier for me has been to seize control over roasting my own beans. Coffee is the seed of a cherry-like fruit, and after gathering and processing, it looks like a little green rock with a cleft in it, and it doesn’t taste of anything special. It’s not until you roast it to a rich, chocolatey brown that it releases that heavenly aroma and beguiling flavour.
Oh baby, you look so good in black.
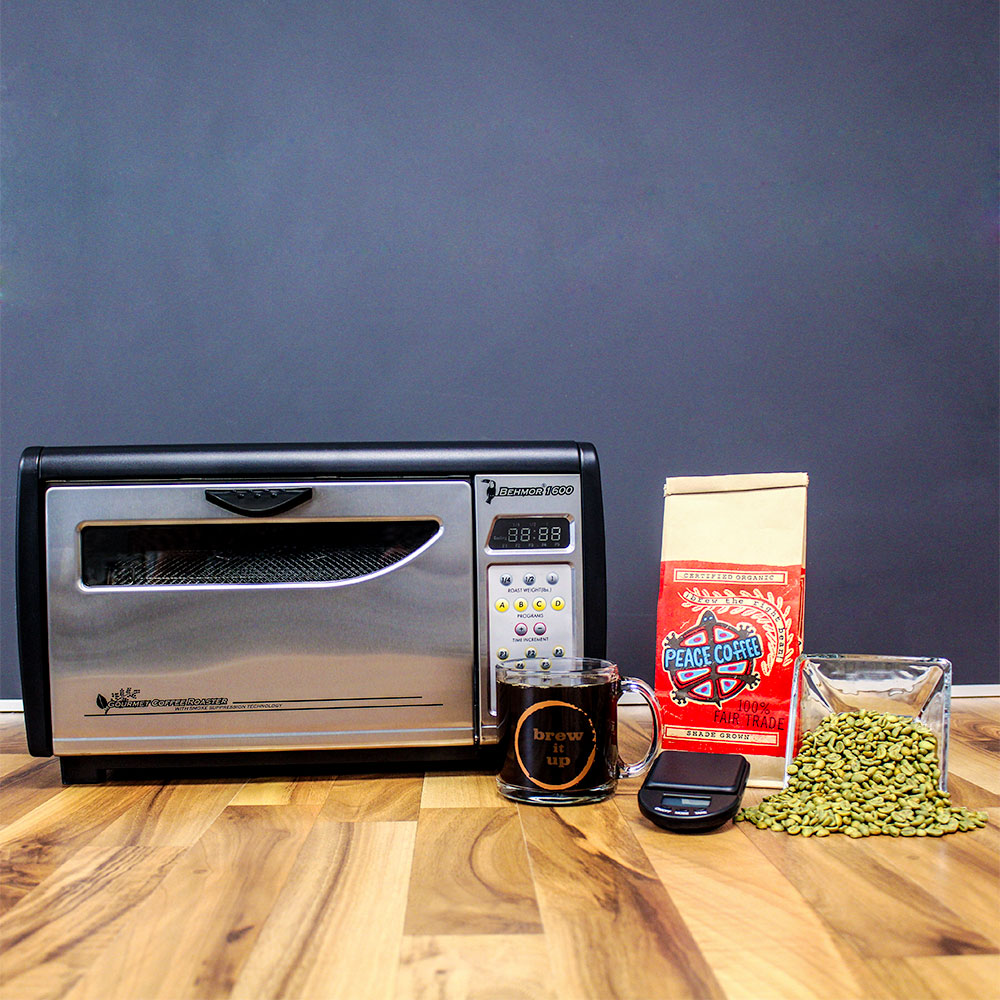
By this time you should be getting the idea that I never leave well enough alone, and everything in my life is in imminent danger of becoming an obsession. I did some research, fiddled around a bit with primitive methods, including roasting beans over a wood fire in an iron pan like the Ottomans did, but a conversation with a professional coffee roaster made me realise that there was something to having the right piece of equipment for the job: heat ramp-up especially was a thing. There’s a long explanation, but if you heat the beans up too slowly they dry out and lose some of their nuance. Heat ’em up too fast and they just char instead of roasting nicely. A good roasting machine can take that into account. A good machine like the Behmor 1600.
The Behmor. The one I got came with a bunch of extras: a nice glass mug, a pound of coffee and a really good scale.
The unit is a masterful design. You can check out the manual here, which is an excellent segue: always read the instructions. With some things, like an ice-cube tray, the stakes are low. If you do it wrong, worst-case, you don’t get ice cubes. Because this machine is using high heat to dry out and subsequently roast cellulosic vegetable matter saturated with oil (coffee), if you overdo it, it can catch fire. Which is bad.
If you’re going to get a roaster, read and pay close attention to those instructions. They’ll make sure you stay safe and that you get a decent cup of coffee from the first try. After that, you can start fiddling around with the time, ramp-ups, drum speed and all that jazz. But start with the basics. To show you those basics, have a look at this overview of roasting basics that I put together in my kitchen.
The manual may be a little intimidating at first, but as you can see, it isn’t rocket surgery: Follow the instructions, don’t leave the Roaster unattended while it’s on, and learn to recognise the difference between first and second crack and you’re in.
A fascinating combination of high tech and established tech.
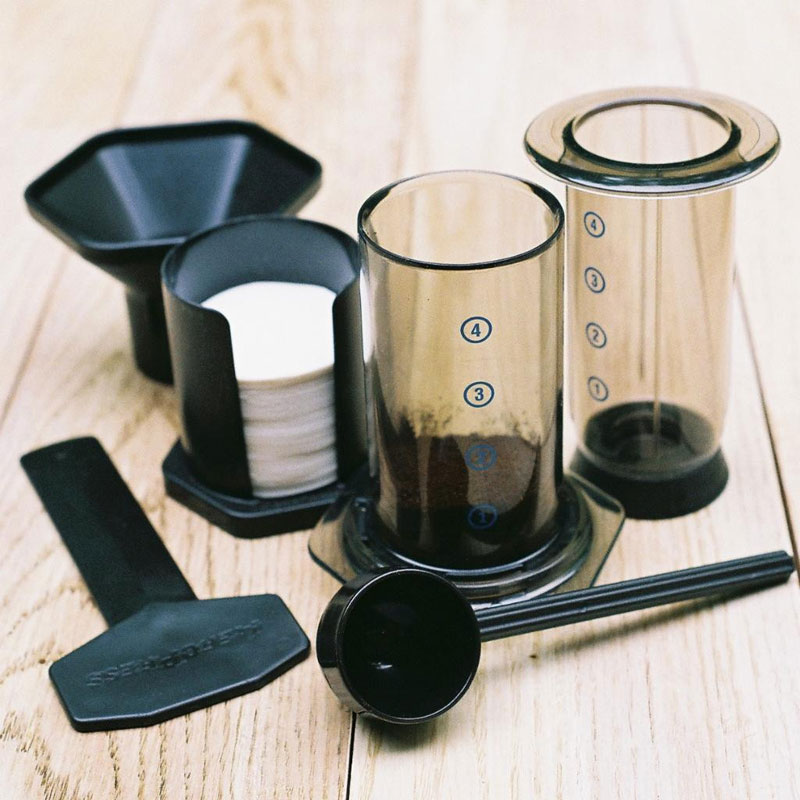
If you’re curious about the coffee making rig shown at the end of the video, it’s an Aeropress, and it’s what I use to make an excellent–just about the best, really–cup of hot coffee I’ve ever had.
But what if you want a bigger thrill? What if you want the ultimate in coffee deliciousness? What if you want . . . this
Cold-brewed coffee is the hottest-cold thing to show up in coffee use in the last ten years. You get flavour extraction by trading the heat of the water for time. Rather than a three or four minute steep with water around 200F (your mileage may vary) you use tepid water and soak overnight, or for 24 hours. This slow, gentle extraction leaves behind a lot of the harsh tannins, while teasing out the smooth, rich flavours that make coffee so wonderfully good.
And Nitrogen dispense is what has made Guinness Stout so popular. Forcing your cold-brewed coffee through a Stout Faucet with medium-pressure nitrogen gives it that creamy, foamy ‘cascade’ of flavour goodness. Honestly, it makes coffee wickedly drinkable, to the point where I have to monitor my intake or I’ll wind up dancing around like wacky waving inflatable arm flailing tube man.
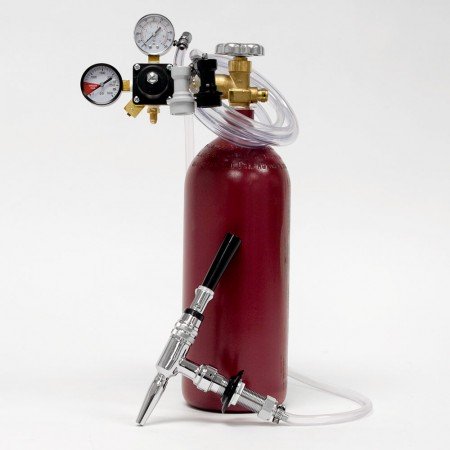
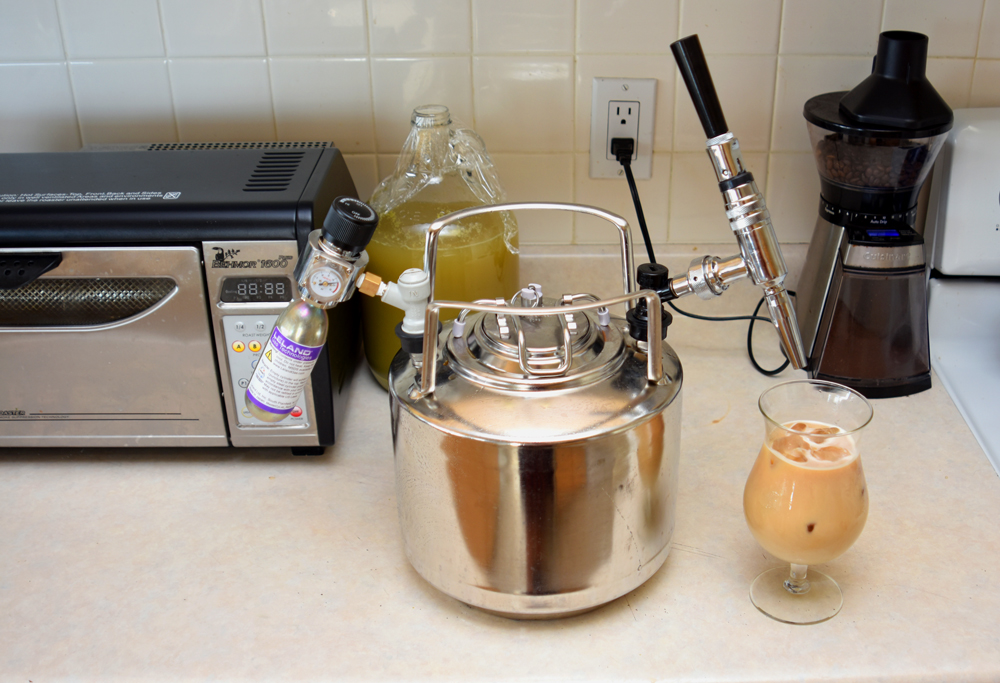
5 pound nitrogen tank, high-pressure regulator, stout faucet and connectors. Not show, 19 litre Cornelius keg and dedicated keg fridge.
Previously, if you wanted to do nitrogen dispensing at home, you needed a full-on setup, with a keg refrigerator (standard homebrew kegs are not fridge-friendly: they crowd out the pot roast), a nitrogen tank, special regulator, and a bunch of other bits and bobs. Not a stretch if your life includes that kind of thing as a hobby, but a bit of a stretch for your average coffee fan.
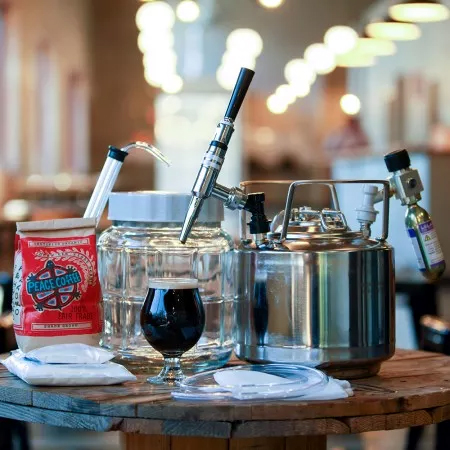
Everything you need to Jack Up your coffee.
Enter the Jacked-Up™ Nitro Fully-Loaded Cold Brew Starter Kit. It includes everything you need for cold-brewed, insanely delicious cold-brewed-nitro-coffee at home. Two things make it ideal for home use. First, the keg itself. Have a look at mine.
Coffee roaster, check. Coffee grinder, check. Jacked Up Nitro system, check. Gallon of pea-pod beer . . . what?
Pop the tap and the regulator off of it and the whole keg fits onto a shelf in a standard fridge, ready to dispense your coffee at any time. (Don’t tell anyone I told you, but it’ll also dispense Wine like a champ).
I love good engineering. That regulator is built like a tank.
Second, check out that regulator, with the attached nitrogen cylinder. You don’t need to buy the full-meal-deal nitrogen tank, regulator et cetera, you just screw in a cylinder of nitrogen gas, pop it on the keg and dial up your pour. You can even take the Cannonball keg with you to parties or the back yard, or wherever. This is a brilliant enabler of coffee usage.
Check out how I do it.
I’ve nearly got the whole coffee thing handled. Five, six more years at most and I’ll have my system perfected.
I’m back in the Twin Cities today, working with Northern Brewer. As usual it’s a busy time: meeting with folks, talking about new products, projects, sales, marketing and all the great stuff that goes into being the world’s best supplier of consumer wine and beer making equipment.
I picked a fabulous time to visit. The weather has been spectacular, with temperatures hitting 20C (low 70’s) and bright sunshine. Even the flight in was auspiciously pretty.
Never get tired of watching the world go by.
I’ve got a Q&A session with the folks in retail this evening, and they’ve come up with a great list of questions. It’s really the best part of my job, talking to folks about making their own wine, and seeing a really pertinent leading question down on the page is like reaching into the pocket of a coat and finding a $20 bill you forgot you had.
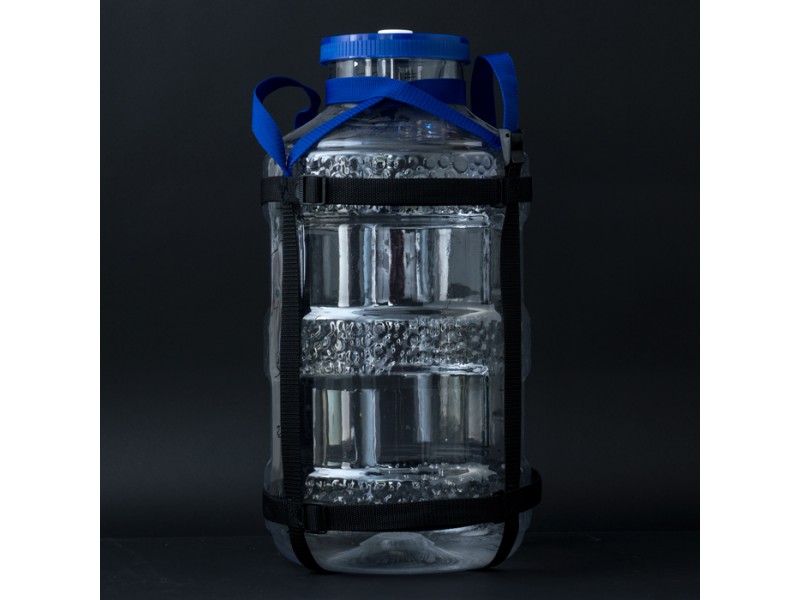
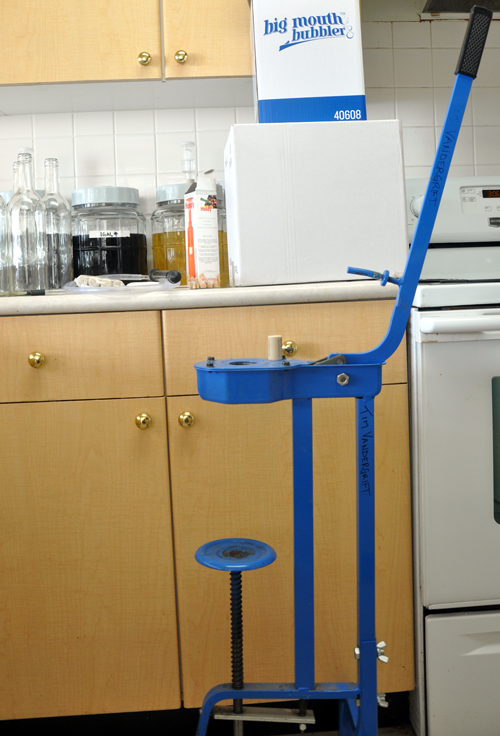
Strapped in and ready for use
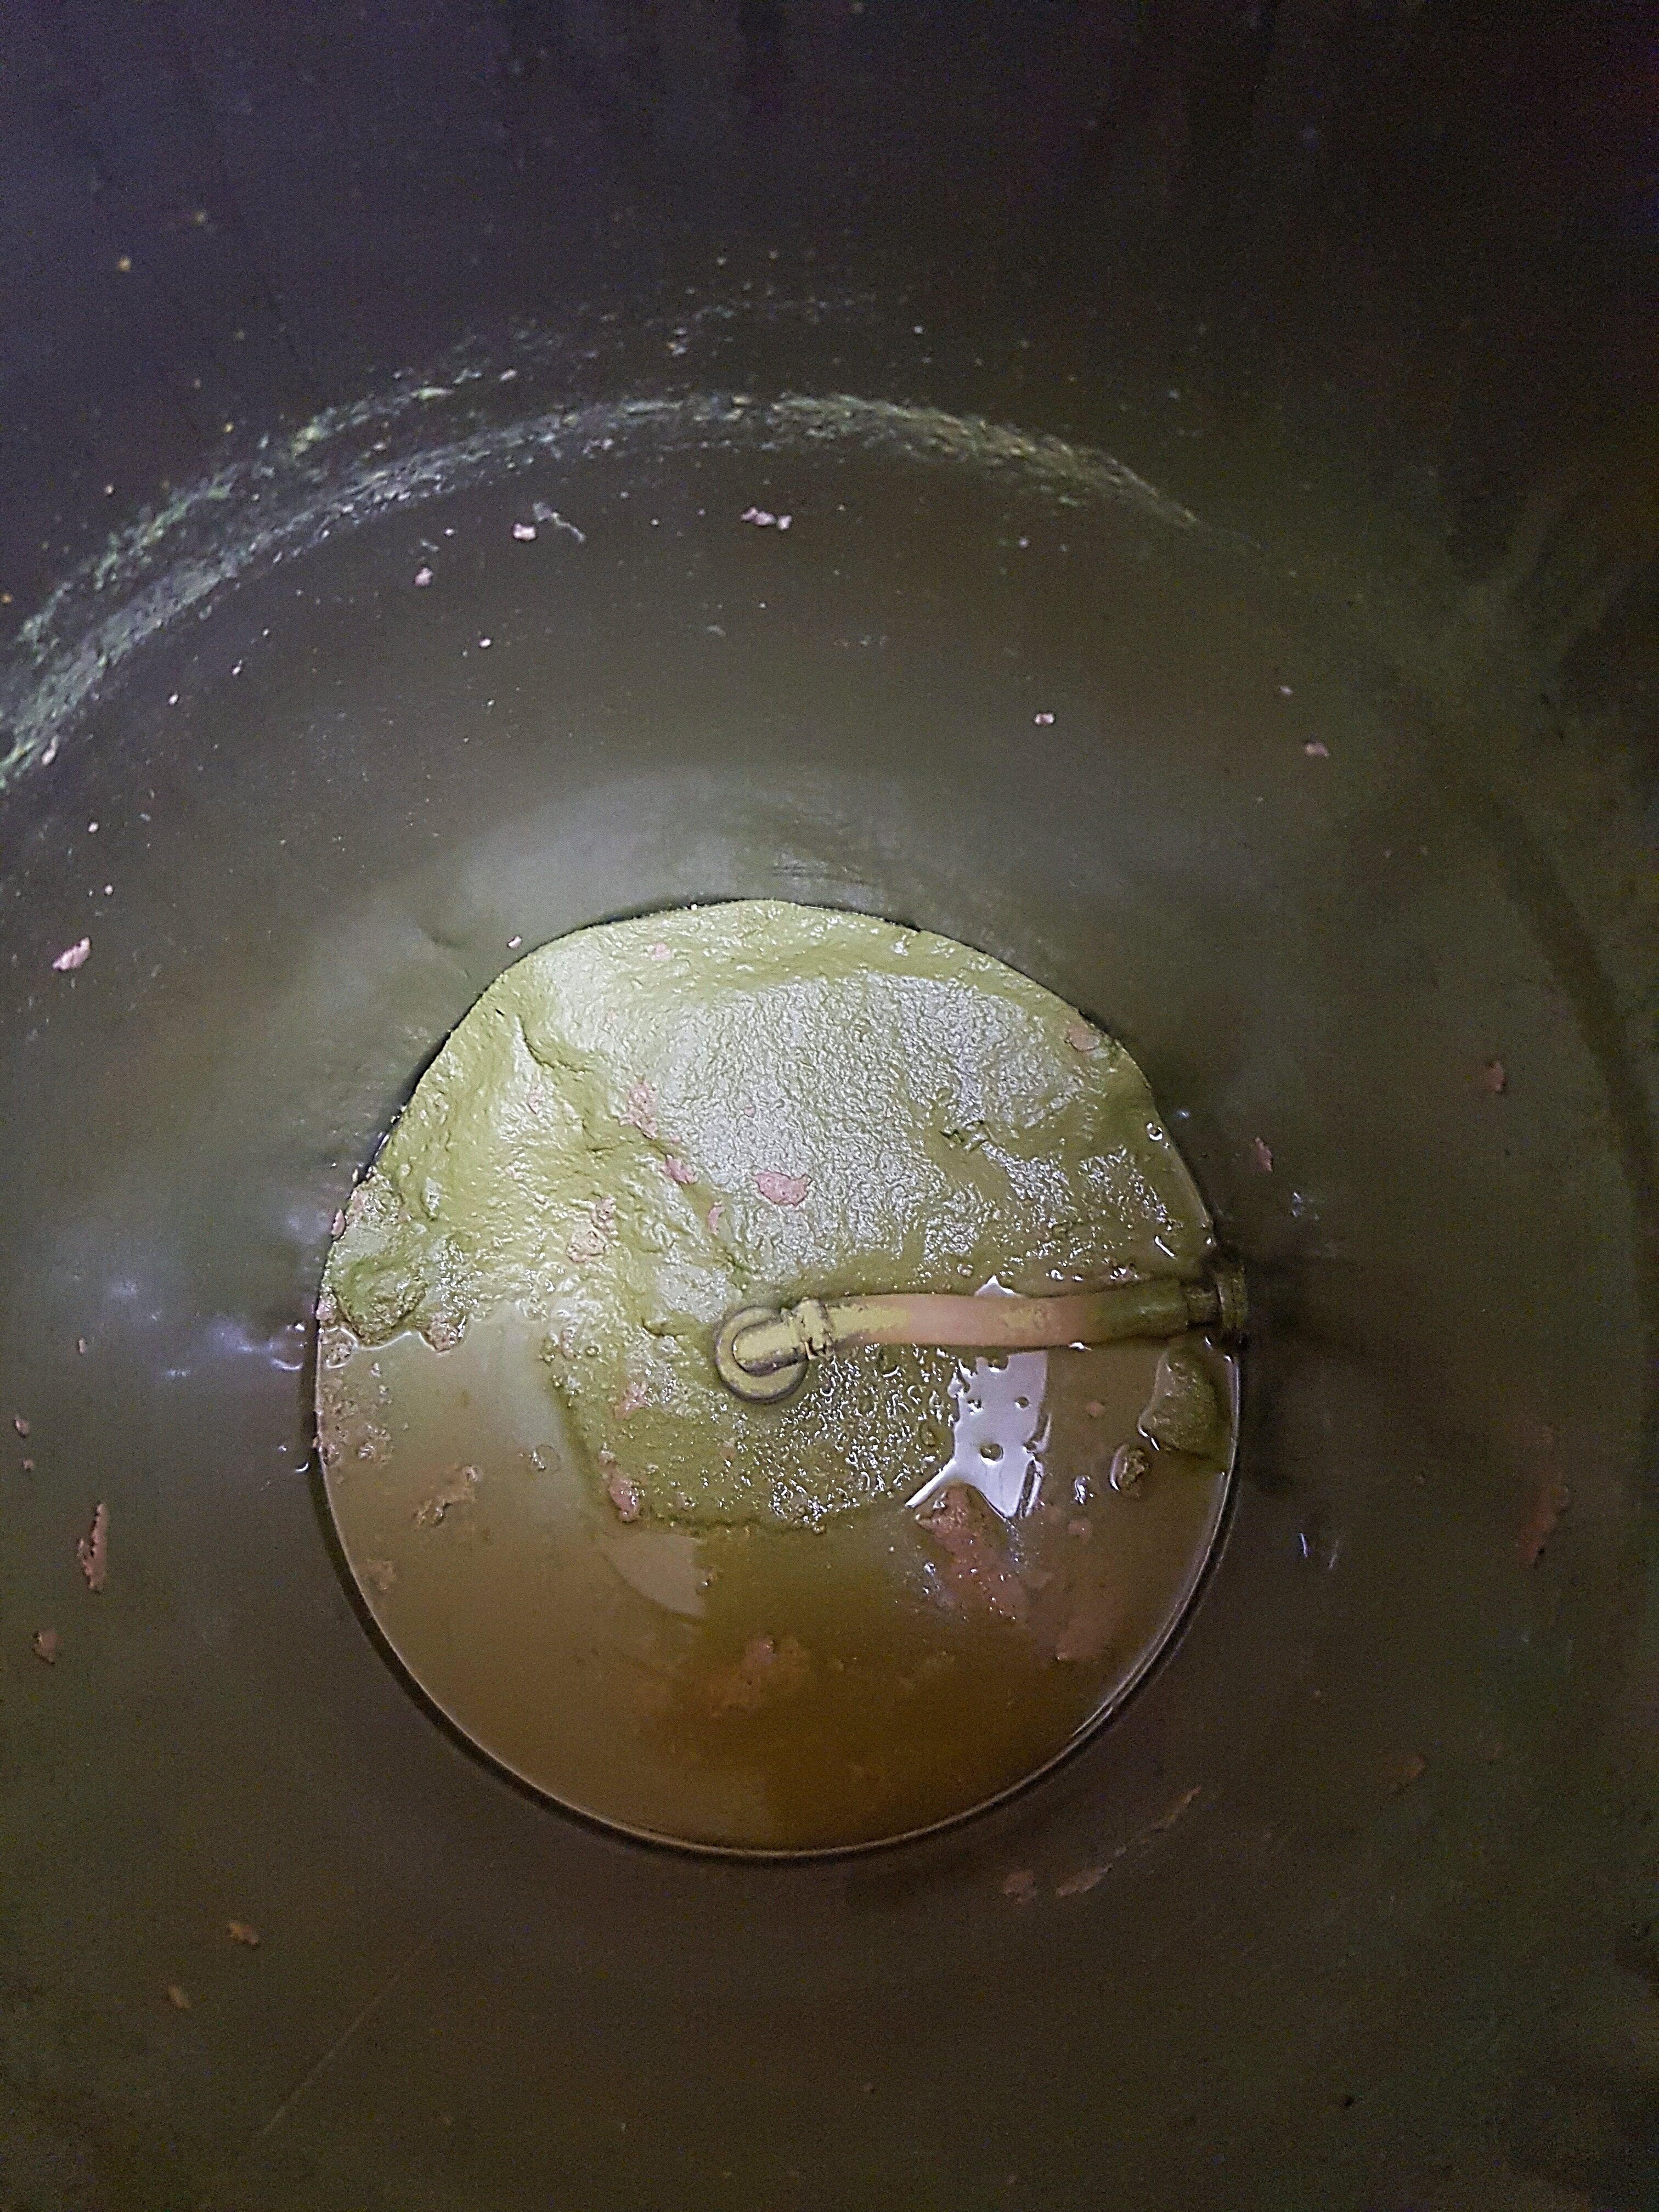
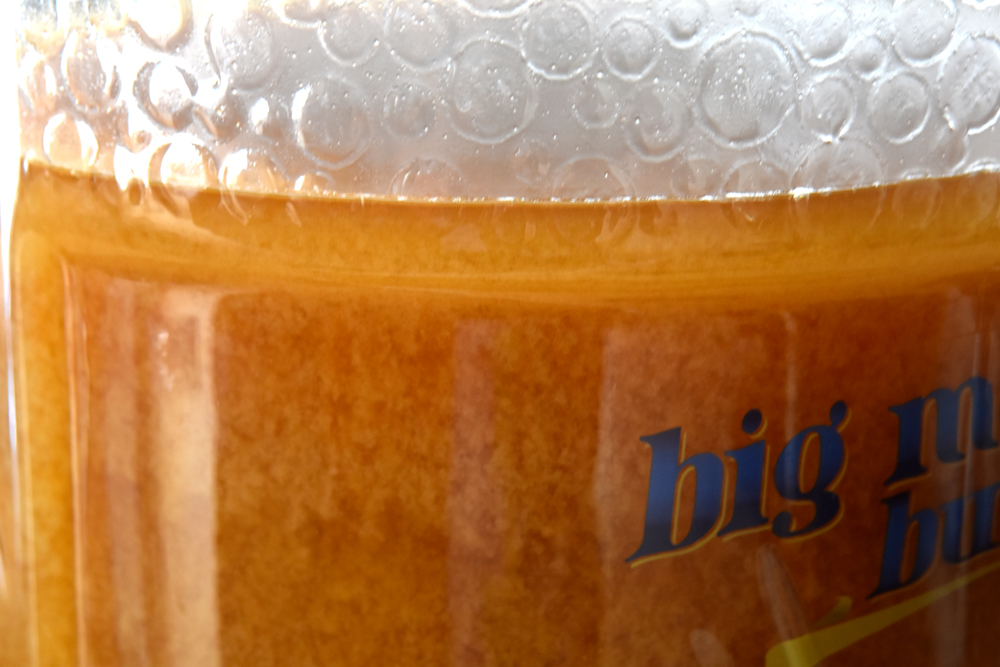
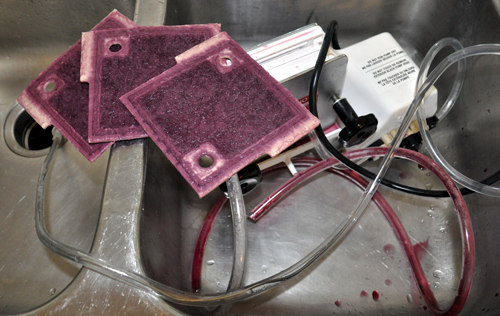
I’ve been meaning to give a shout-out to Northern Brewer for a while on the Big Mouth Bubblers that I got earlier this year. The idea of a PTFE fermenter with a gasketed lid that takes a bung and airlock seems fine, but when you use one for something that’s really messy, their usefulness snaps into clear relief.
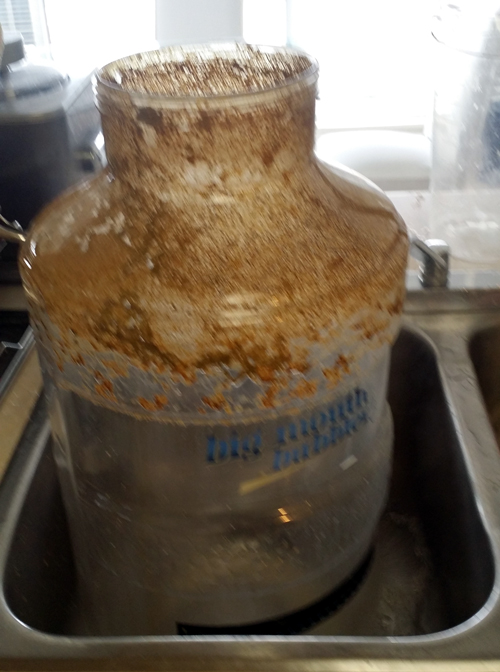
I brewed a very hop-heavy IPA and when it finished fermentation, it looked like this:
Oh those dirty rings!
That looks like a terrible job of scrubbing, but with the wide-open top, even a moose with bulky arms like mine can easily stick his mitts right to the bottom and get a good scrub on. What would have taken a long soak for a carboy and the application of a brush and plenty of awkward gyrations to get all the goop off, only took 60 seconds with a soft cloth and some brewing detergent.
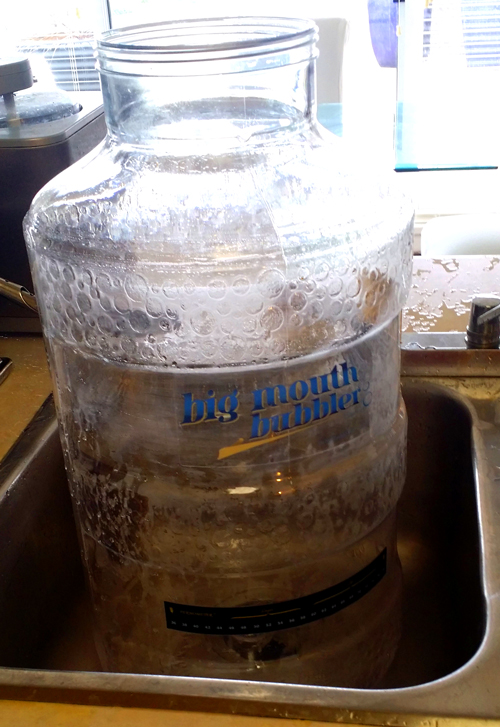
Shiny as a new penny
It’s got a bunch of condensed steam on it, but trust me, that Big Mouth Bubbler is as clean as a whistle. I’m replacing all of my fermenters with them, because I can’t visualise ever wanting to lug around and wash narrow-necked carboys again.
Off for Q&A, and tomorrow video shooting and more fun times.
It’s been over a month since I posted to this blog. In social media terms, I might as well have left on a voyage for the new world and been captured by Barbary pirates and written off for lost, mourned only by creditors and a disgruntled cat, forgotten by time and tide.
I was originally taking a two-week break to go to Mexico, in order to soak up some Vitamin D (aka, ‘lay in the sun’) and local culture (aka ‘Tequila’). I did that and had some fun, but felt a little off the second week of the trip and by the time I got home, I had a cold.
Only no, it was a case of the H3N2 influenza. In popular culture a lot of folks equate a bad cold with ‘the flu’–I’ve probably been guilty of that myself. But the truth is this: if you can get out of bed, you don’t have the flu. Between a fever that ran over 102F for the better part of a week and the constant feeling that I needed a good solid night of sleep every time I woke up, I was off my feet for a week, recovering for two more and (oh the horror!) I completely lost my sense of smell and taste for nearly a month!
All the happy bottles!
Happily, that’s all behind me now, so I can get back in the saddle. I’m going to be tasting my Master Vintner series wines! They’re still very young but will have calmed down from bottle shock and be showing their true character.
I’m also hard at work on new projects with my friends at Northern Brewer, so I better get crackin’, and let the disgruntled cat and the Barbary Pirates know that I’m back amongst the living.
My first step was to clean and sanitise all of the equipment I’d be using, including my autosiphon, bottle filler, jugs and such–as always, cleanliness is next to goodliness in winemaking.
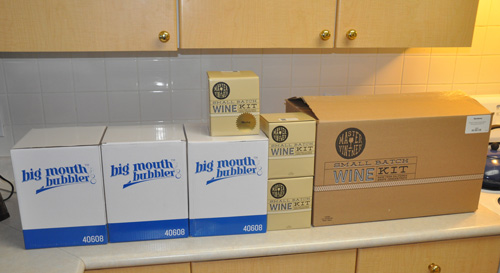
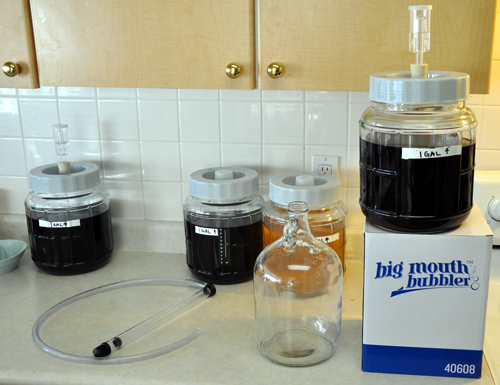
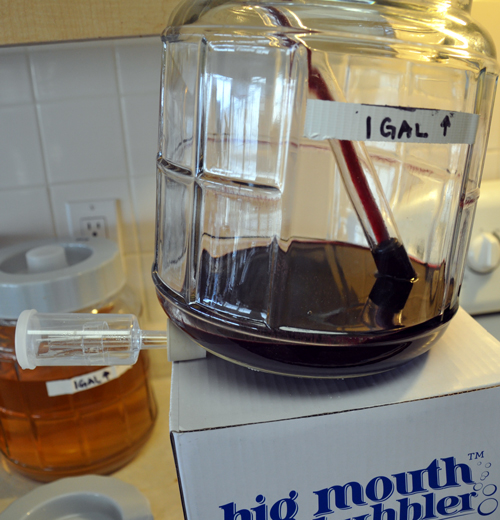
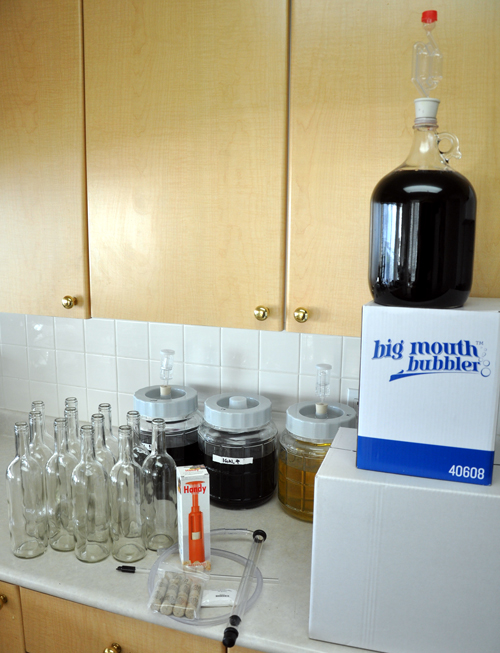
Next, I set up my racking station by the simple expedient of lifting my Little Big Mouth Bubbler on top of a convenient box on my counter. If you haven’t used one of the Master Vintner Small Batch kits yet, it’s hard to convey just what a joy this is. I’m old-school in many ways, having started off making wine in lots anywhere between 23 litres (6 US gallons) and 650 litres (three 60-US gallon barrels) at a time. With truly huge amounts you need a pump to move the wine around. A standard kit wine batch of 23 litres isn’t nearly as demanding, but lifting full carboys from one shelf to another, or putting them up on a high place so you can rack the wine down into a clean carboy on the floor (which then needs to be lifted back into the winemaking area!) starts to wear on the lower back after a few thousand batches. At only a single gallon, you can easily lift the Small Batch kits onto a convenient box or shelf above your kitchen counter, just as easy as getting a gallon of milk out of the refrigerator!
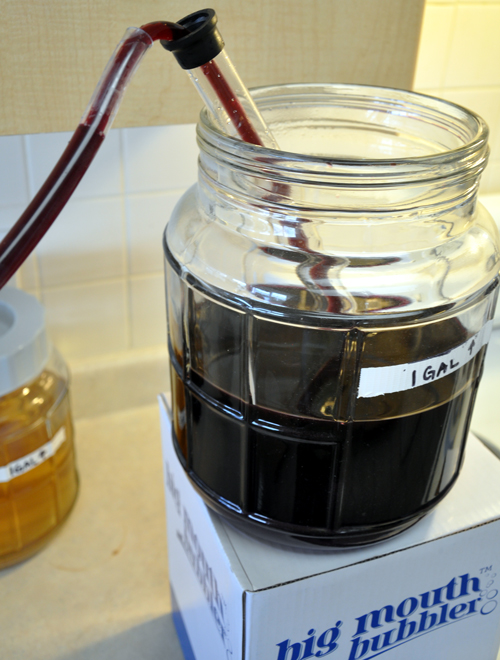
Once the fermenter was in place I racked the wine off of the sediment. Doing this is really helpful, since there’s a decent chance that the siphon will disturb sediment from the bottom of the carboy while your moving the hose from bottle to bottle. Rather than risk getting cloudy wine, it’s better to move all of the clear wine into a new vessel in one go, and then you can relax from there.
Note the siphon rod carefully placed on the far side of the fermenter–this will be important as we get to the bottom.
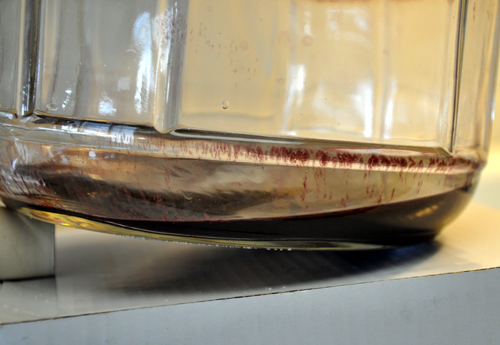
When the wine gets down to the bottom, the level of sediment needs to be carefully monitored. Remember, the point of racking is to get 100% of the clear wine and leave the muck behind, so don’t leave any of that delicious grape nectar behind.
A careful tilt keeps the end of the autosiphon in the wine.
To get and keep that tilt hands-free I usually improvise some kind of prop or wedge. Because I was making wine in my kitchen (another thing Small Batch Kits makes easy!) my carboy wedge wasn’t around. No matter: I just popped a bung under the front of the carboy and watched the levels as they dropped.
Never leave a man, uh, a drop of wine behind.
Just to make sure I was being completely efficient in my racking, I measured the amount of sediment left in the bottom of the Little Big Mouth Bubbler after it racked over. It came to just over couple of tablespoons all in all–which meant I was going to get a total of about 3.75 litres out of my US gallon (3.78 litre) batch, meaning I could fill five bottles, which is exactly what I wanted.
The wine was exceptionally clear on racking.
Limpid and gorgeous.
I could have bottled it right there, but since this was an actual test batch for quality assurance and proof of concept purposes, I pulled out my Buon Vino Minjet filter. Filtering doesn’t actually clear a wine: that’s what fining agents are for. Clearing polishes a wine so that it sparkles with a brilliance like diamonds. A former colleague had the best analogy for wine filtering: it’s the difference between a freshly washed car and a freshly waxed car. Both look great, but your eyes can instantly tell which car was waxed and polished because it glows. Same with wine.
Now that’s shiny!
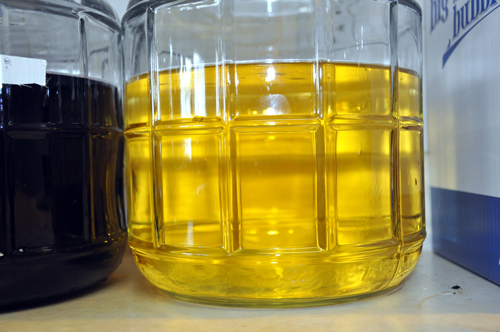
It’s easy to see this in white wines: you could read the fine print of an EULA through that Chardonnay!
I got all four batches of wine through a single set of Buon Vino #3 pads in about 20 minutes, including sanitising and prep, going from the Chardonnay to the Pinot Noir, then the Merlot and finishing with the Cabernet Sauvignon. Yet another bonus feature of the Small Batch kits: you can make four of them and only need the tiny, convenient BV mini, rather than a much larger filter.
Rest, little filter: you’ve done a man’s work today.
While larger filter systems need a washtub or a laundry sink for cleanup, the Minijet is kitchen sink-friendly for cleanup. Note that the colour you see on those filter pads isn’t anthcyanins (grape pigment) stripped from the wine. It’s suspended material from the wine itself, stained by those pigments. That suspended material, principally yeast cells and colloids, would eventually settle out of the wine on its own. Even though the unfiltered wine was perfectly clear to the eye, after a year or two in the bottle a bit of colour would deposit out on the side or bottom of the bottle. Hurrah for filtering!
Next up, time to fill my wine bottles. I had a mixture of standard wine bottles in Flint (clear) and some swing-tops, also in clear. I like using swing tops for wine that’s going to be analysed and/or destroyed in testing–not because of any technical superiority of swing tops, but because I can never seem to find a dang corkscrew when I’m in the wine lab.
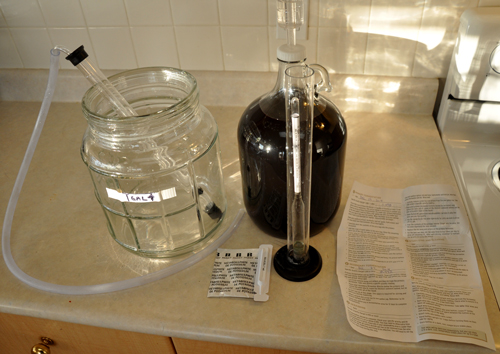
Bottles, autosiphon, siphon tip, impact corker, corks and sulphite for sanitising the bottles.
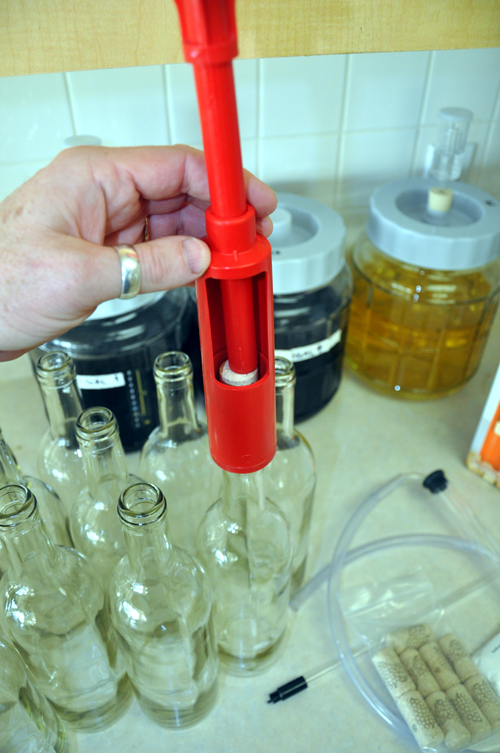
Also shown in the picture above is the Handy corker. It uses a plunger and a compression sleeve to press-fit the corks into the bottles.
Takes a little oomph, but works great.
Because of the forces involved, it’s a good idea to use the (included) #8-sized corks and soak them in a bit of warm water before use. While I’ve used the Handy and it’s a fine unit, I had another plan in mind for my bottles. But first, I had to fill them.
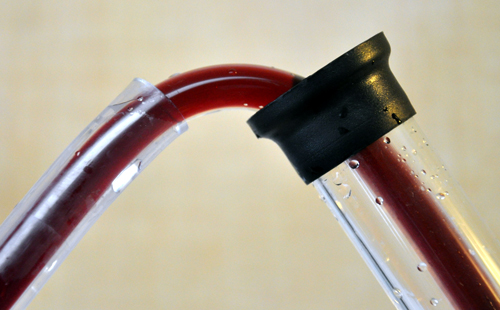
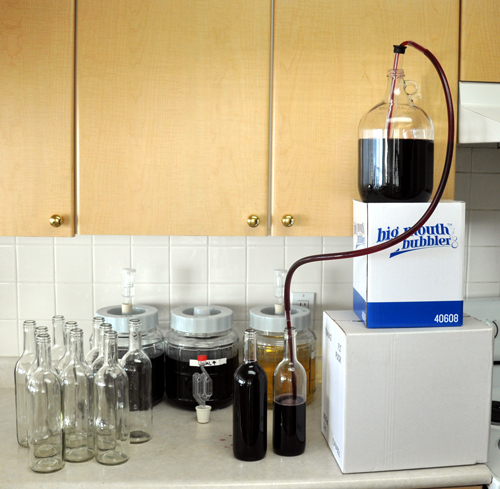
Fast, clean and efficient–now that’s good winemaking!
Getting the bottles filed without splashing, spilling or endlessly fiddling to get the right fill level (very bottom of the neck, to leave the width of two fingers below the bottom of the cork) used to be a drag, but a siphon filler (included in your equipment kit!) makes it a snap.
The one-way needle valve on the tip of the rod stops the flow of wine as soon as you pull it up, while the volume of the rod displaces exactly the right amount of wine–when you fill the bottle to the top and then pull the rod out, the level of wine is perfect to accommodate a cork!
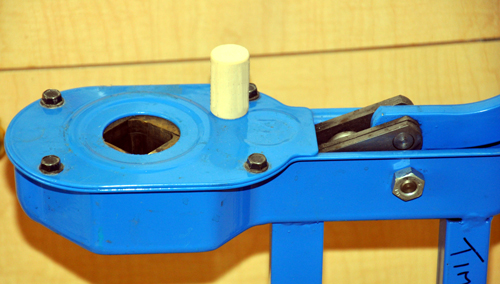
With the bottles filled, it was time to put corks in. My alternate scheme was to use my Italian bronze-jawed floor corker. This mighty beast has been my faithful companion for 25 years and tens of thousands of bottles of wine.
Industrial Age technology at its finest.
The key to how well this thing works is in the amount of leverage it can bring to bear, and how cleverly it compresses and inserts the cork into the bottles. The heart of the matter is the set of bronze jaws. Not brass–brass is too soft, and corks would wear it away in a short time, and this bronze is the same stuff they make steamship propellers out of.
You’re in for a squeezy time, Mr. Cork.
The jaws move as the corking arm is pulled, squeezing the cork down to just slightly larger than the size of a pencil. When it’s at is tiniest, the cork finger comes down. pokes it into the bottle and you’re done.
It’s as easy as that, every time.
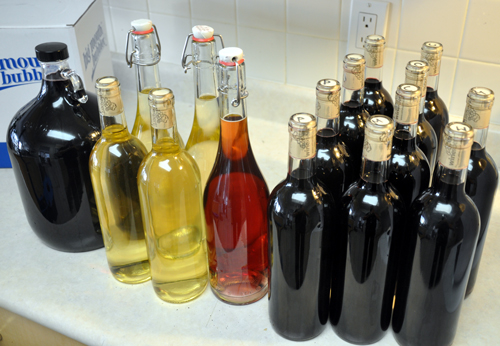
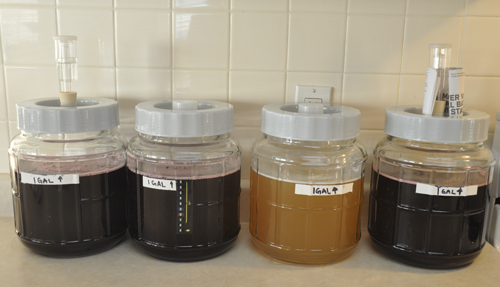
After only a few minutes all of the bottles were filled, corked and swing-capped.
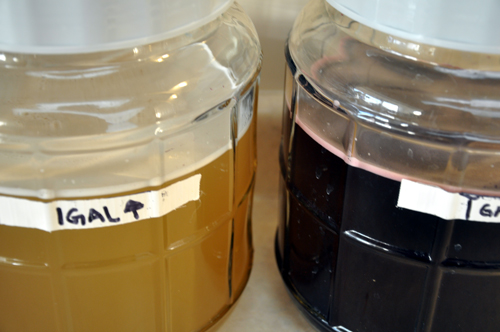
Say, what’s with that pink wine?
Astute observers will notice that there are 15 bottles, a gallon jug and one bottle of pink wine, which doesn’t match up that well with the whole four batches of five bottles each motif I started with. The gallon jug is a blend of Cabernet Sauvignon and Merlot. I blended it at a rate of 3:2, Cabernet to Merlot, after a few benchtop trials. I’m going to let it marry in the jug for a month or so and taste it before bottling.
The pink wine is slightly notional on my part–it’s my job to do the weird stuff so you don’t have to. Or, more accurately, so I can explain it when you do it without my knowledge! It’s a blend of 4% Pinot Noir into the Chardonnay. That kind of blending is a standard technique in commercial winemaking, and I was curious to see how it would marry up with a little time in the bottle.
How does it taste? Even though it’s very young, it’s everything I’d hoped: good fruit, varietal character, smooth tannin, balanced acid and a long finish, especially for a wine just in the bottle. I’m going to do a more formal taste-test in another three weeks, and then once a month after that to see how it’s progressing.
I’ve already ordered another four kits–I’ve never made wine with so little effort or mess, and I’m going to keep production up. Heck, it’s no more work than keeping a vase of flowers on the counter, with the added bonus, it’s wine!
Step three and step four kind of run together, so I’m blogging about both of them at once. When we last left our Master Vintner Small Batch wines (Chardonnay, Merlot, Cabernet Sauvignon and Pinot Noir) they were resting comfortably in secondary fermentation. The next step was to . . . READ THE INSTRUCTIONS!
Yes, I keep coming back to the importance of reading. It’s your guarantee of success! A quick read-through let me know that I would have to check the specific gravity and then rack the wine from the secondary to the Little Big Mouth Bubbler again for stirring and fining/stabilizing additions.
I sanitized all of my equipment, took a specific gravity reading (0.992 and rock steady) and then transferred the wine from the jug to the LBMB.
Auto-syphon: how do you live without one?
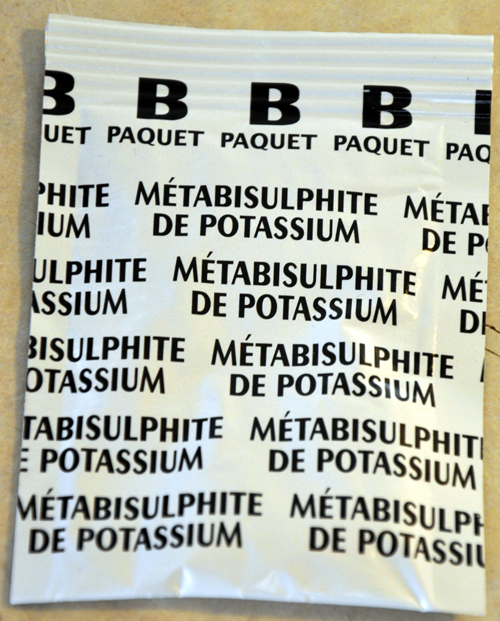
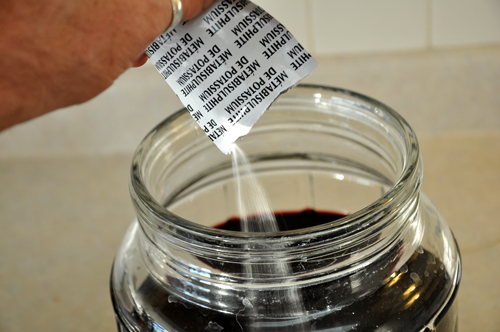
Once all of the wine was transferred over (leaving very little behind in the jug–less than a couple of tablespoons of goo) the next step was to add metabisulphite to prevent oxidation (browning and loss of flavour) and prevent bacterial spoilage (going icky).
Sulphite is your friend, and wants you to be happy.
Let’s talk about sulphite. It’s one of the most common food additives in use today, and it’s been in continuous use in winemaking for many centuries. It’s in every preserved food you buy and in lots of things you wouldn’t expect (noodles? Check. Frozen orange juice? You bet! Pancake syrup? Sure!) It’s safe and almost completely benign. If you don’t believe me, check out the world’s #1 Authority on sulphite use in home winemaking.
So that’s sulphite taken care of. In it goes!
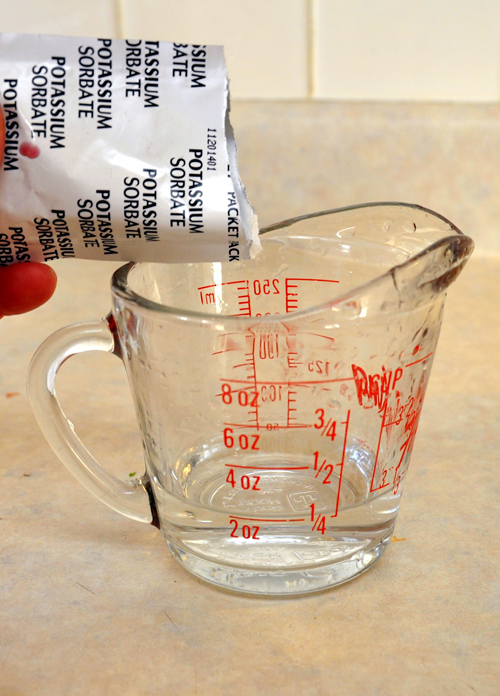
Be sure to tap the packet: a bit of the powder can get caught in the corners.
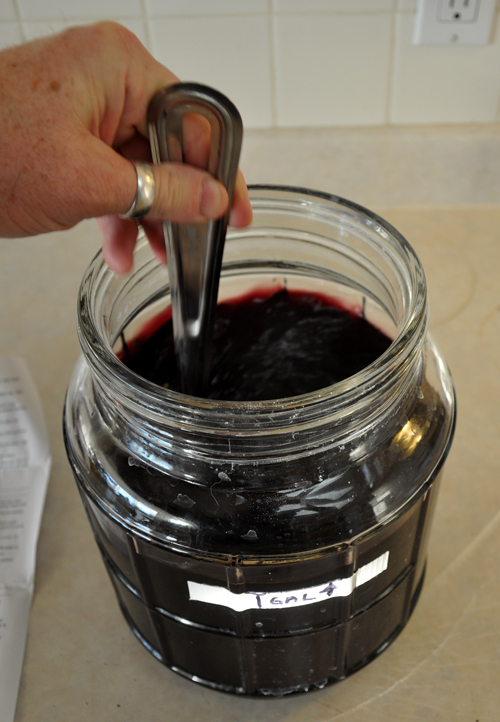
After the sulphite is in we have to stir the wine to distribute it, and to drive off gas in solution. This is crucial to the success of the kit. Carbon dioxide gas is produced by the yeast during fermentation. In a commercial winery this is not much of an issue because they take one or two years to get the wine ready for bottling, and in that time all of the gas escapes. Master Vintner kits are designed to be ready to bottle in just four weeks, so the gas has only a short time to escape from the wine. To stay on schedule we need to aid the process through mechanical agitation.
A stirring experience.
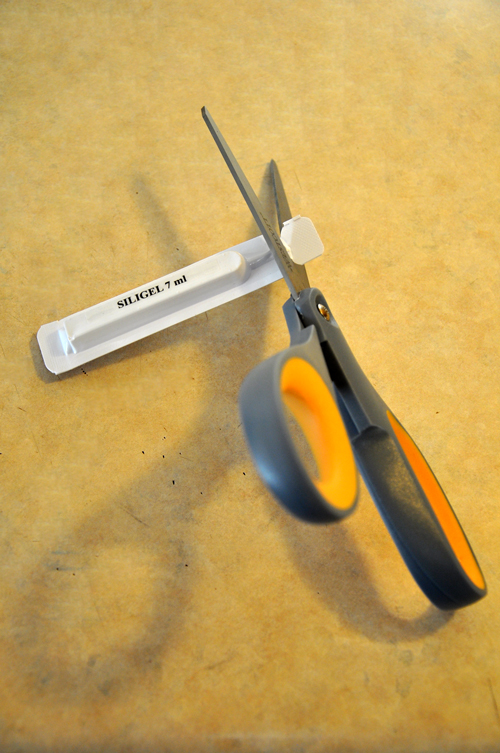
I stirred the wine for a full sixty seconds and then added the first fining agent. Fining is the process of dropping suspended material out of the wine so it’s clear enough for bottling and drinking. Common fining agents are either mineral in nature (Bentonite, Silicon dioxide) or a colloid/gelatine (Isinglass, Chitosan) and in wine kits they’re often used in pairs. The instructions say to add the packet labeled ‘Siligel’, a silicon dioxide solution–essentially really finely pulverised beach sand in a liquid and then stir again.
Sharp scissors are an essential winemaking tool
Cut the tip off of the Siligel packet . . .
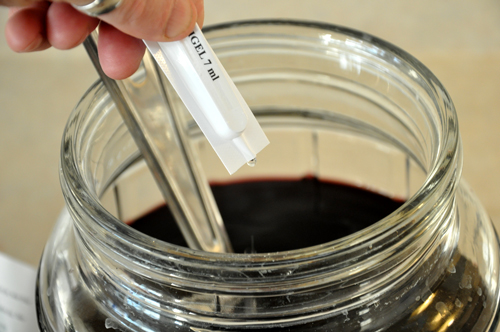
Squeeze!
. . . and then another sixty seconds of stirring.
That’s what good stirring looks like–get the fizz out.
I popped the lid, bung and airlock on again and over the course of the next two days I kept my spoon in handy and stirred the wine again for sixty seconds at breakfast, lunch and dinner–since it’s right in my kitchen it’s an easy step to take right there when you’re already making a sandwich or preparing your Sunday roast.
After two days of stirring it was time to go on to Step Four, Stabilizing and Clearing. Since it’s almost exactly like the last step, I’m putting it all into this one long post to keep things clear.
I cleaned and sanitised all of my equipment, checked my specific gravity (yep, still 0.992) and did my next addition, Potassium Sorbate. Sorbate is a bacterial suppressant. It doesn’t kill or even annoy spoilage organisms, but rather keeps them from breeding, which is crucial to the whole process of fining and stabilising: you use sulphite to stun/kill some of the yeast and any other organisms, you use the fining agents to sweep all of the micro-organisms out of the wine, and then you use sorbate to keep any of them from breeding back to the point where they can affect the appearance or flavour/taste of the wine. Sorbate is used in a lot of foods, condiments and even in beauty products and health food supplements, and is found in some berries (blueberries and Mountain Ash) as well. So, in it goes, with the first step being to dissolve it in a tiny amount of warm water.
It’s a teeny amount and it dissolves almost instantly.
And then to stir that into the wine.
Everybody in the pool!
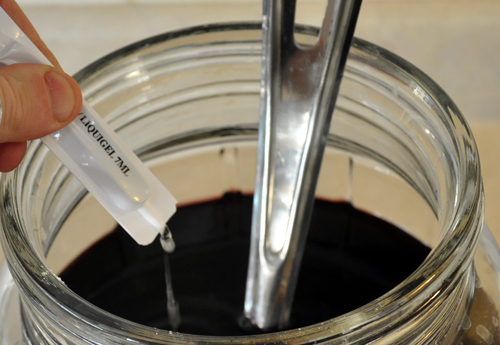
Next step is to add the ‘liquigel’, a clever contraction of ‘liquid gelatine’ and the final fining agent.
Snip!
Squirt in carefully.
It’s pretty sticky: make sure it all comes out of the packet.
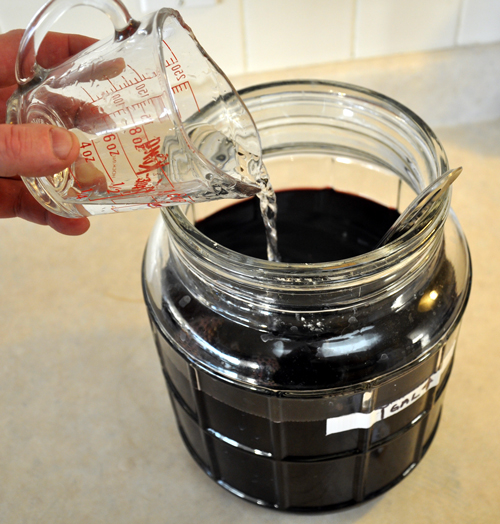
Once everything is stirred up and all additions are done we need to top up the wine to the one gallon mark again. Don’t worry about diluting it: if you’ve been racking correctly you’ll be adding less than a cup and a half (350 ml) and the kit is actually formulated to accommodate this extra water.
Topped right up.
After that it’s back on with all of the lids and airlocks and onto the counter to rest for six days until the wine is clear.
Soon, my pretties . . .
So far this has been the easiest, smoothest winemaking I’ve ever done: the one-gallon size makes doing one kit so easy, so quick, and so simple that doing three more at the same time doesn’t feel like work at all–it feels like a fun hobby leading to a great end–wine!


