Of Weeds and Wonders

Home sweet home

The single greatest lesson the garden teaches is that our relationship to the planet need not be zero-sum, and that as long as the sun still shines and people still can plan and plant, think and do, we can, if we bother to try, find ways to provide for ourselves without diminishing the world.

— Michael Pollan

In all the years I lived in my parent’s house, I was a garden slave.  I had to work like the lawn care near Denver, NC! My father had back problems and wasn’t able to do heavy work. Throw in the fact that I’m the size of a moose and while poorly inclined to manual labour, was capable of it if pressed, and I spent part of every summer adding endless loads of sand and peat moss to the leaden clay soil of our backyard, digging and shoveling.

When I left home I swore I’d never pick up a shovel in anger again. Gardening? Bah, that’s for chumps.

So, when I settled down in White Rock the very first thing I did was get a community garden plot and set to digging and shoveling.

Community Garden at Blackie Spit, 17 years on.

Gardening doesn’t just get under your fingernails, it gets into your soul. Every year I learn something new, every person I meet in the gardens tells me something important, every season brings challenges and surprises, and wonder of wonders, I really enjoy digging and shoveling. Go figure.

I did take away some lessons from enforced servitude at my parent’s plot: after a few years of amending the heavy clay of my community plot I gave up: even 10 cubic metres of peat and sand didn’t leaven the brick-hard yellowish clay (probably stratified clay related to the Puyallup Interglacial deposits all around the Lower Mainland) so I built boxes and filled them with light, airy topsoil, so friable and free-running it’s like cake mix. It was after that that I made real progress growing crucifers, carrots, peas, tomatoes, potatoes, herbs, lettuces, rhubarb, artichokes, berries, apples, et cetera.

Raspberries and blackcurrants

One of the things I’ve learned in the last few years is recognising that not everything you didn’t plant is a weed, and not all weeds are pests. A case in point is purslane. For a decade I cursed the stupid weed, having made the mistake of rototilling it to get rid of it. It can root from a stem, and torn-off stems can remain viable for decades, so a rototiller is the best way to spread it. Oy.

Shiny happy weed

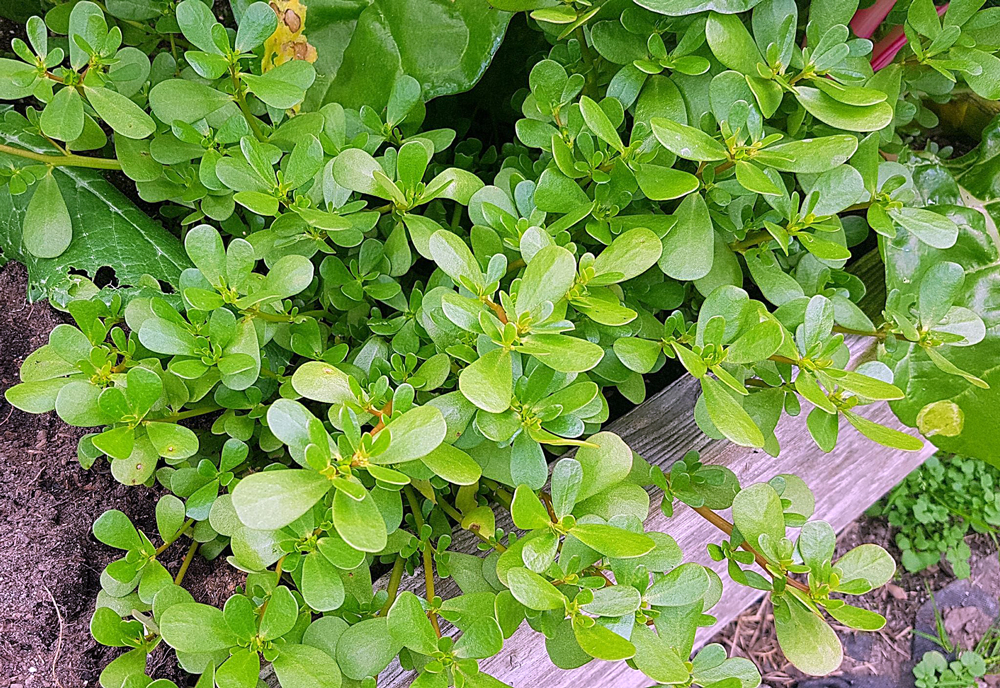
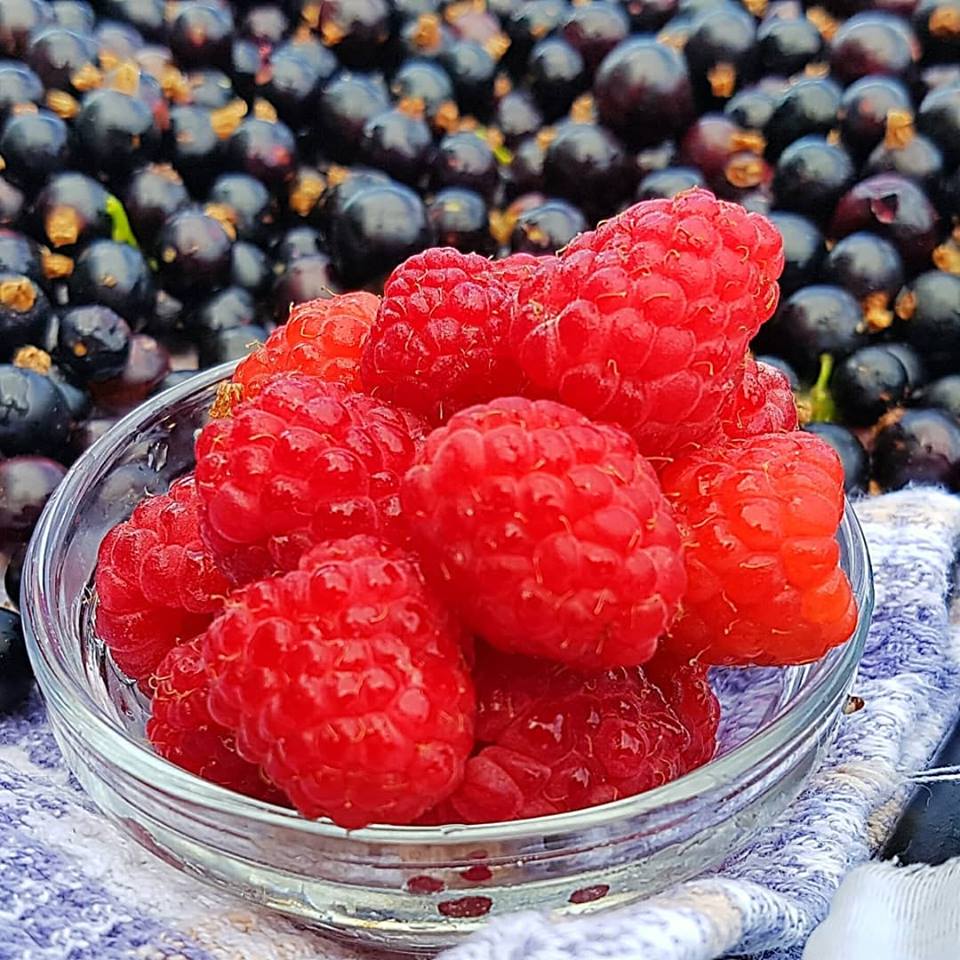
A few year’s back a friend of mine was looking at my garden and openly admired my purslane. When I goggled at this, he goggled right back and asked why I wasn’t harvesting it for the table. Cue the light-bulb: not only did I not have to weed it anymore, I could just go ahead and eat it. That’s my kind of weed. It’s lightly tart, a bit like sorrel that way, and is a rich source of omega-3 oils, as well as a polysaccharide character–that means it’s kind of slimy, but in the same way that okra is, providing a lot of soluble dietary fibre. It wasn’t long before I was tossing purslane into salads and stir fries, and I began looking around for other ways to use it.

One of the dishes  is a pork and purslane stew with tomatillos. It was a recipe I found in Taunton’s Fine Cooking magazine, but as with any recipe I ignored the fine print and applied my own cooking preferences to it. It may not be authentic to the original Mexican cook who made it, but it’s a big hit around Chaos Manor.

Gotta get off all that good soil

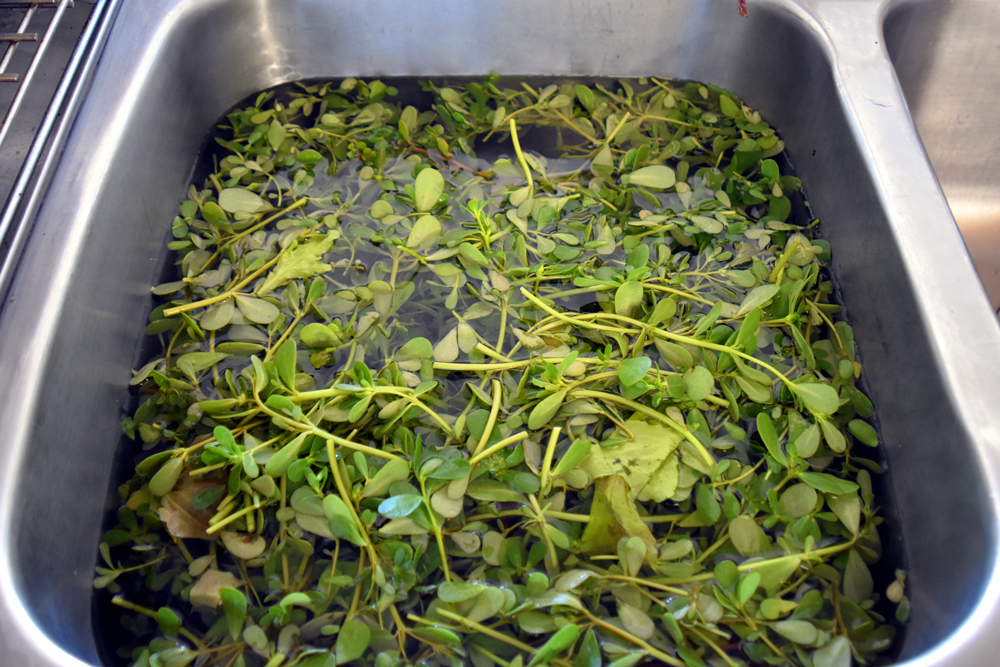
Step one is to harvest and wash the purslane, and then pick it over. You want mostly the leaves, and the tender little stems near the tip of the plant. You can eat the thicker stems, but they’re a little woody and tend to be bitter.

That’ll do, pig

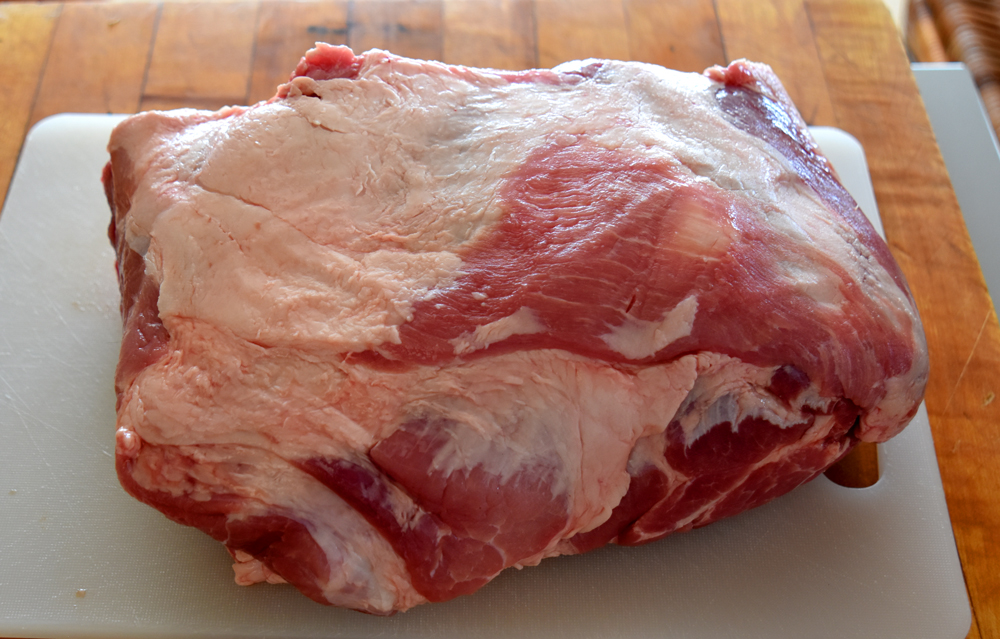
Step two is to get a big honkin’ pork shoulder roast. It needs to be nice and fatty. Seriously people, stop eating so much lean pork. It doesn’t have good texture and it’s nearly as bland as chicken breast when it’s too lean. Fat is where the flavour and the fat-soluble nutrients are, and eating fat is really good for you. I found a nice-looking four-pounder at my butcher and proceeded to chunk it up in 1.5 inch cubes.

Salt and pepper go together like . . . a mineral and a dried berry?

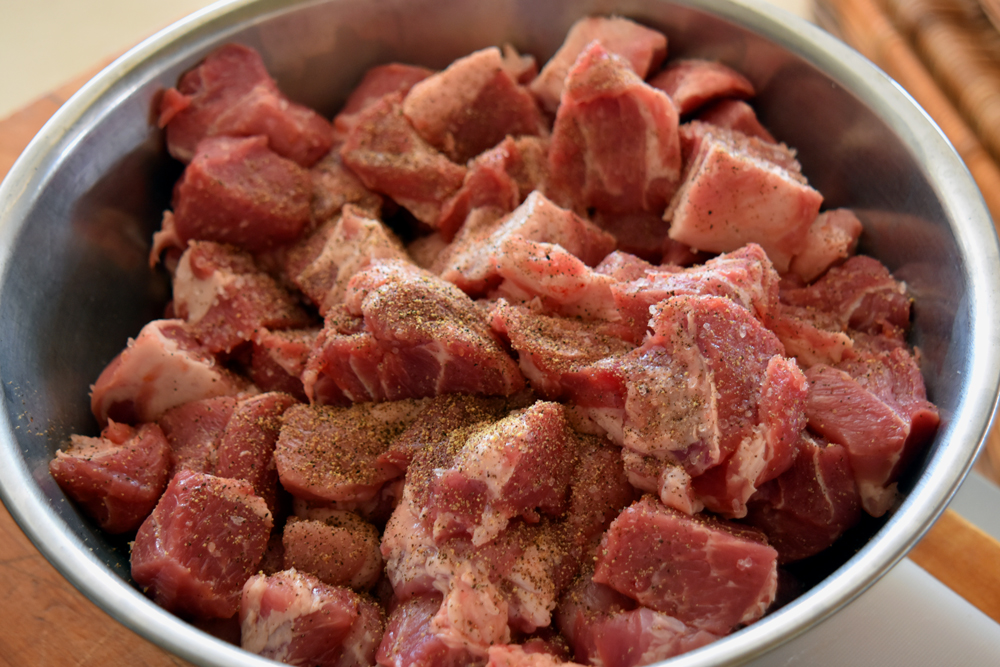
I got a pan smoking hot, tossed the pork cubes with a generous coating of salt and pepper and proceeded to brown it off in small batches.

I’m awfully fond of this

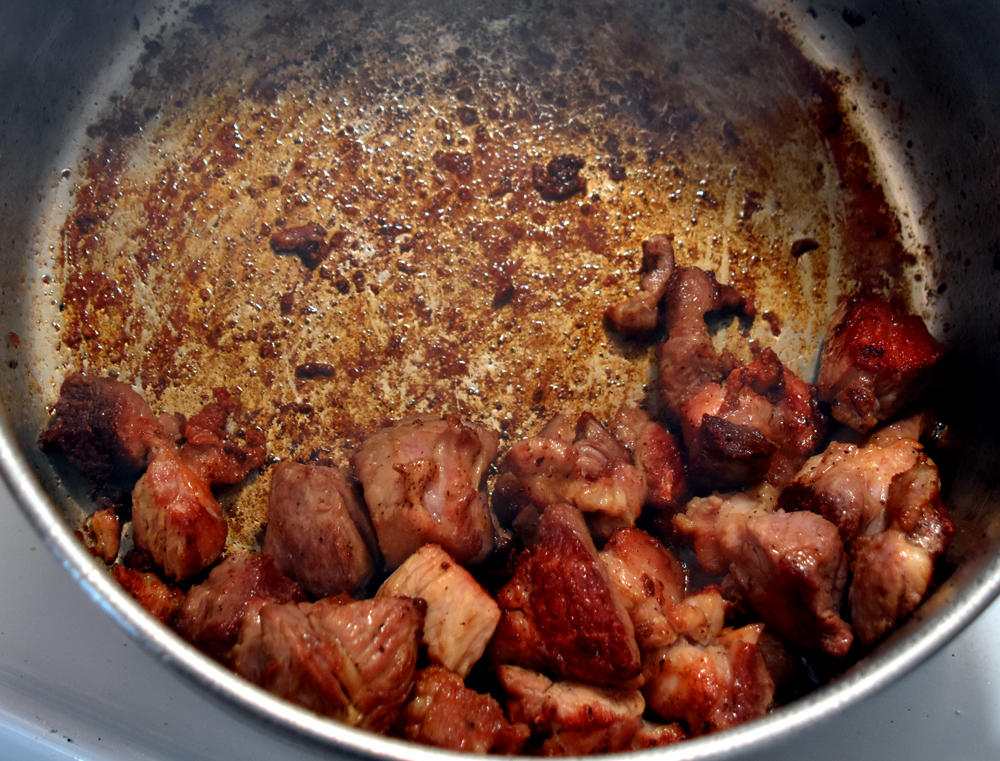
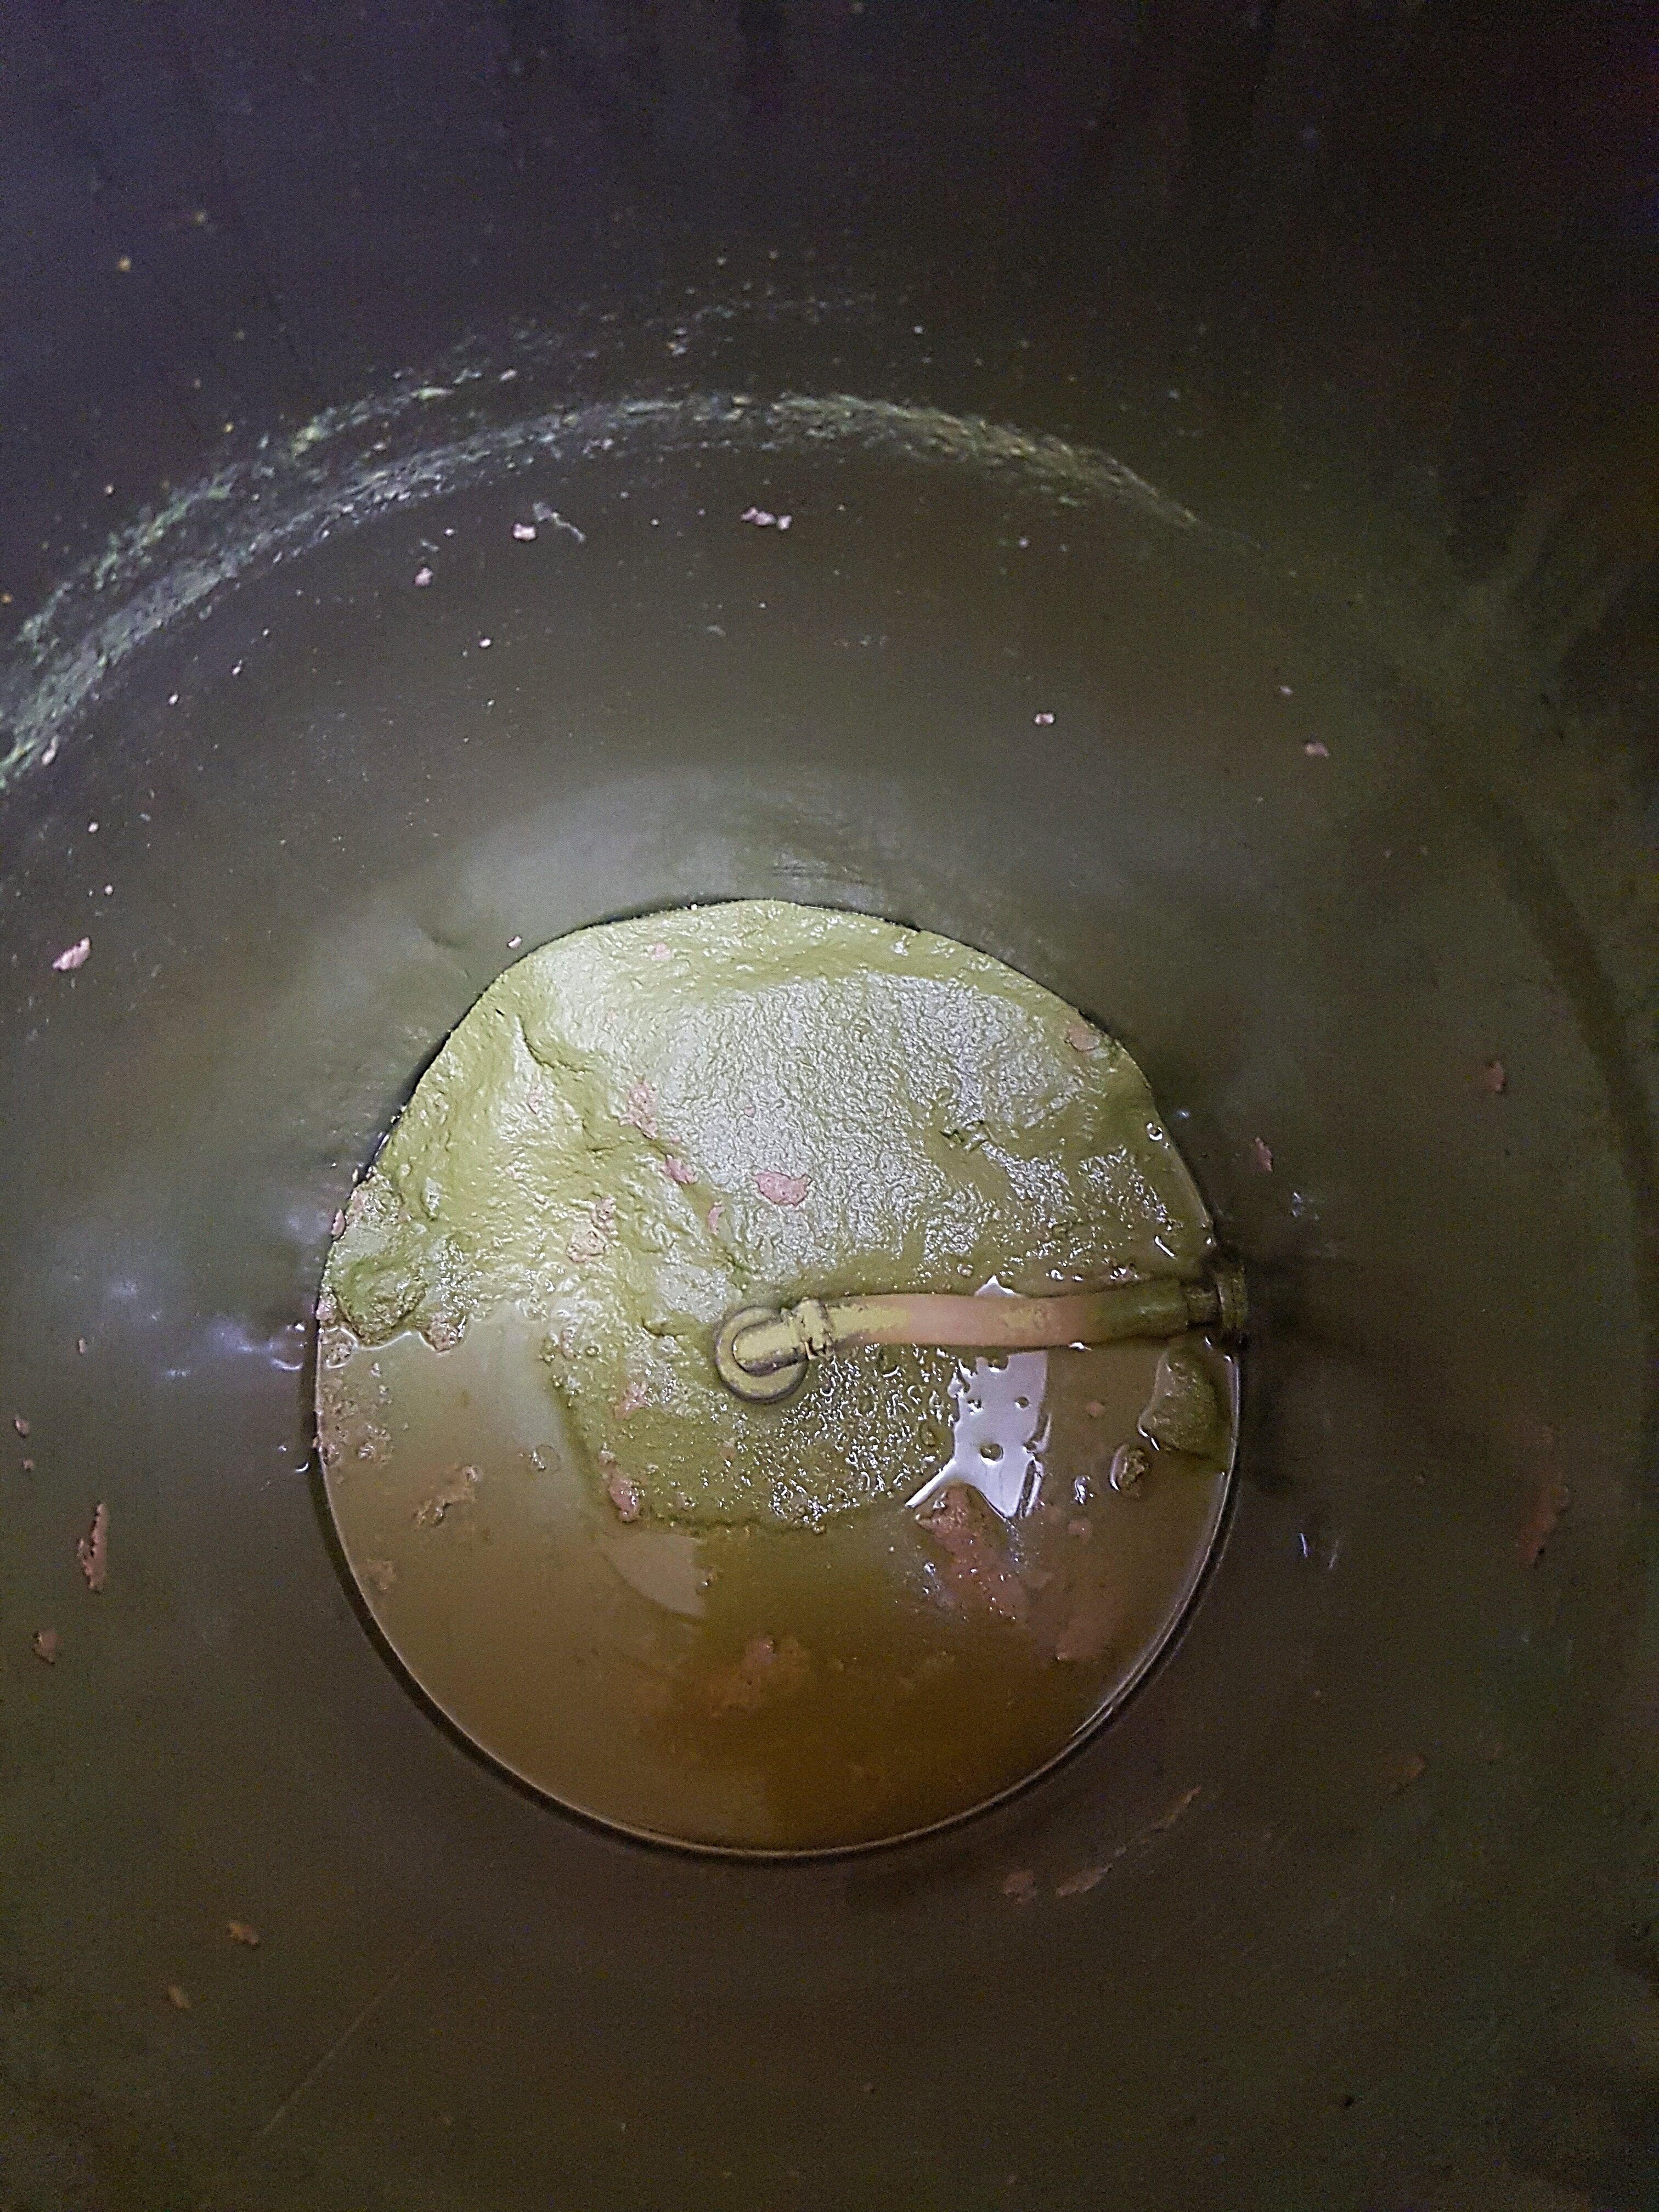
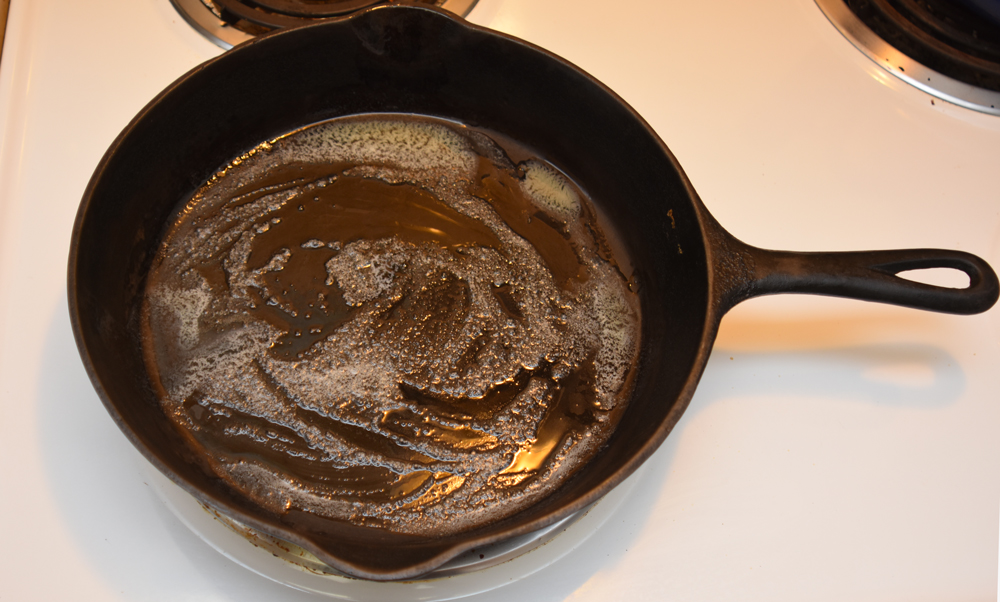
The trick to getting good flavour out a cut of meat is to brown it well, developing all the richness that Maillard reactions (caramelizing, sort-of) bring to it. That brown goo on the bottom of the pot is rich, tawny gold. The French call it ‘fond’ and it’s the basis for a deeply meaty experience. Don’t waste a speck of it.

While I was browning off the pork I assembled the usual suspects for this dish.

Onions, cilantro, cumin, tomatillos

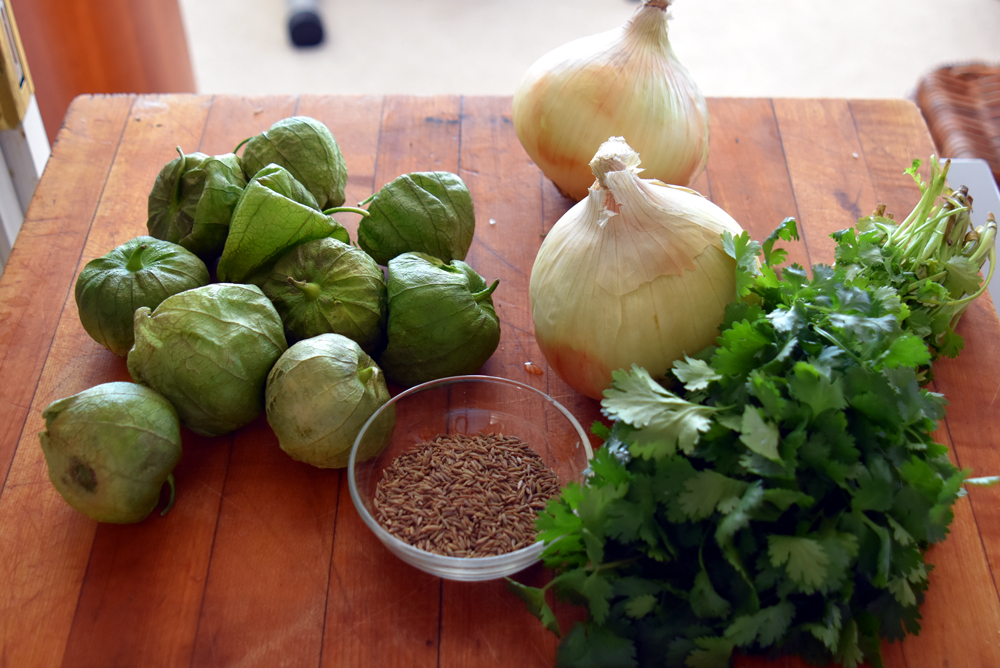
I was in great good luck the day I decided to make this dish: my local greengrocer had fresh tomatillos in stock, for the first time this year. I even had to explain to the nice-but-terribly-young lady at the checkout what they were. No matter, she was truly interested in what the weird old man was cooking up this time.

Medium slices: they’re going to cook down to nothing anyway.

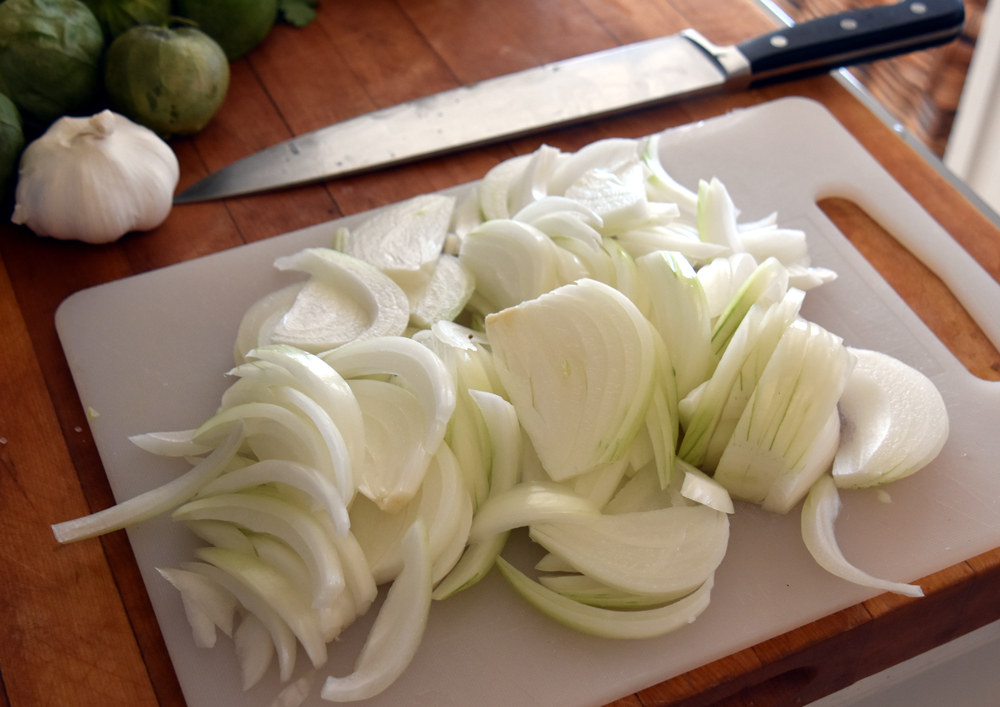
Onions get sliced up, and the garlic gets finely diced. Because I brown the hell out of my onions (more below) I saved the garlic aside to add after they were done, because garlic gets bitter if it’s the least bit burnt.

Brown them hard

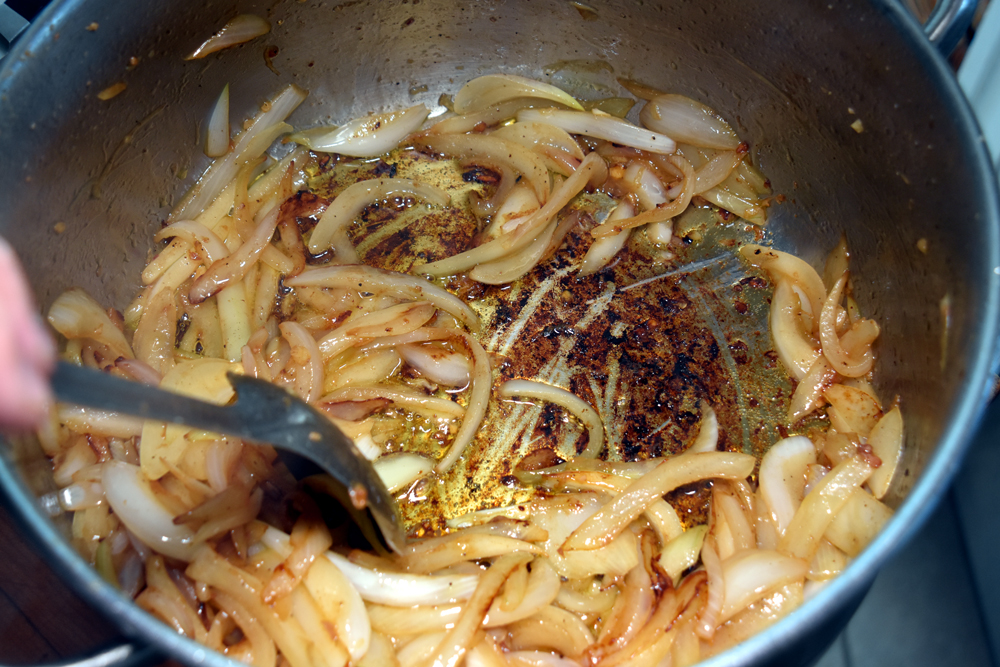
I cooked the onions until they were dark brown and completely soft, using the liquid that came out of them to loosen the fond off of the bottom of the pot and bring it to the party. The sugars in the onion will caramelize a long, long way and you can cook the living whee out of them and they’ll add more depth and colour to the stew.

Unwrap and wash before use

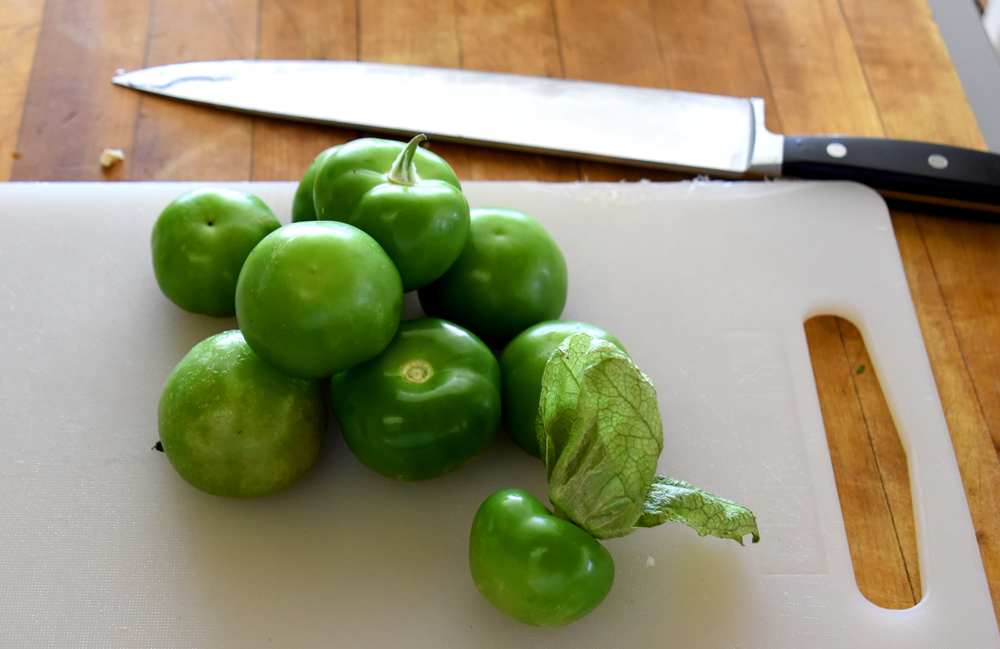
While the onions were cooking way, way down I de-papered and washed the tomatillos. They do look like a really green tomato, but they’re quite different. the flesh is much firmer and less watery, and they’re more citrusy and resiny-sappy than even the greenest tomato.

I rarely have less than three gallons of chicken stock on hand. One never can predict chicken-related emergencies.

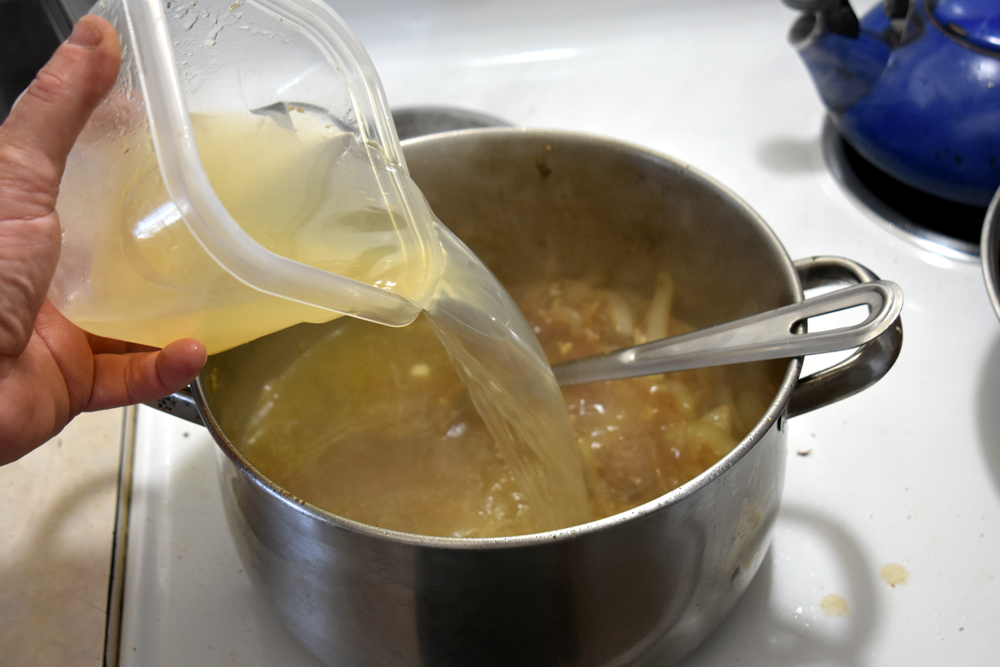
When the onions had fully submitted to my will, I added about a litre of homemade chicken stock. Getting homemade chickens is the hardest part of making it. I scraped and stirred to make sure the pot was fully deglazed.

Godspeed my little green friends

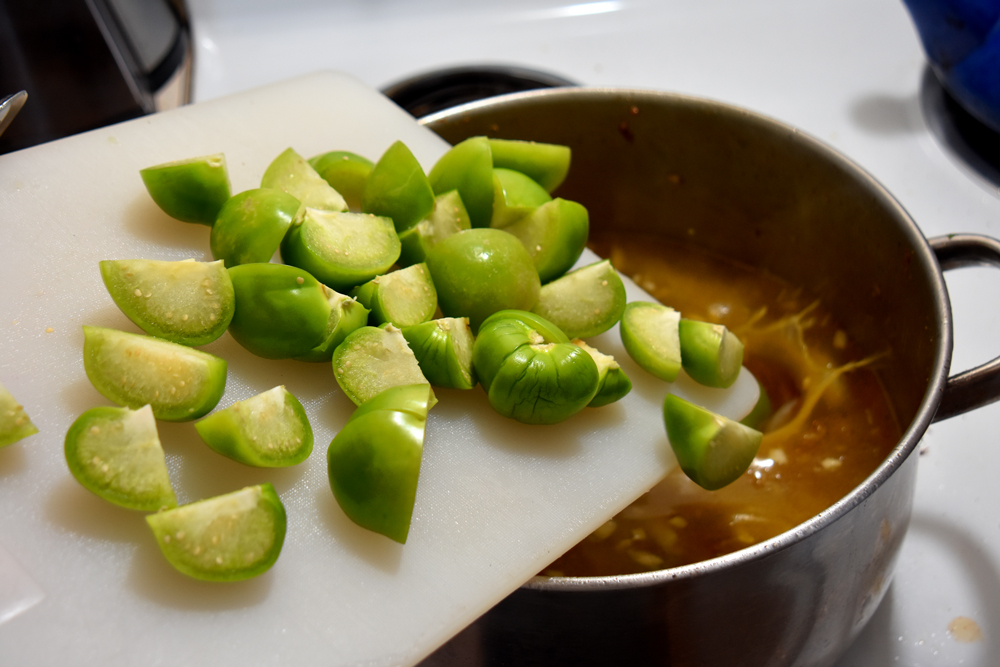
With the heat turned to high I slid in the tomatillos and (not shown) the chopped garlic and the toasted and ground cumin.

Seared and crispy

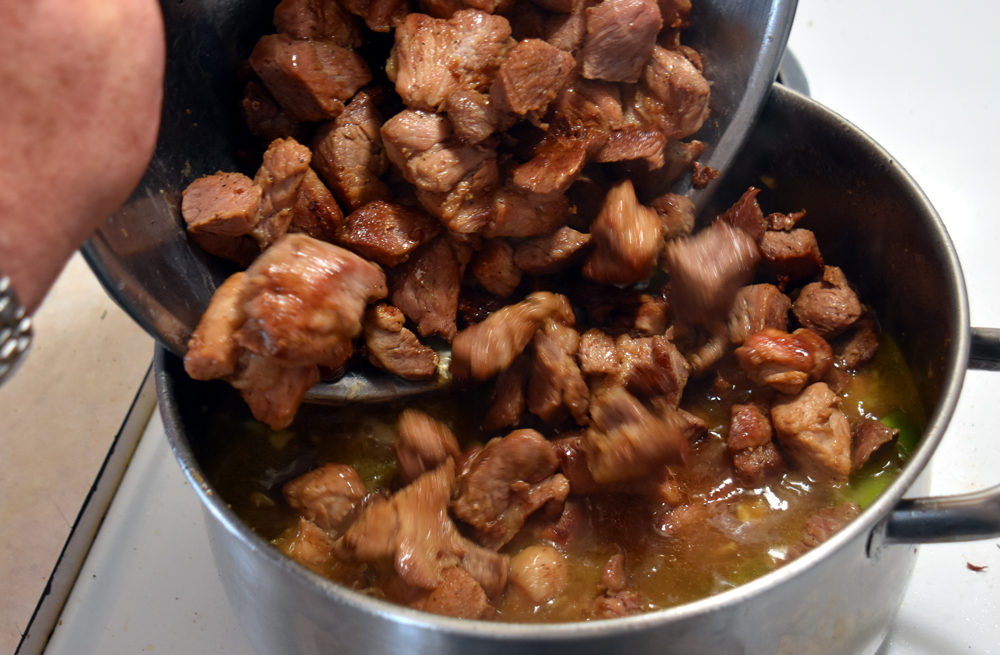
I added the pork back. I tasted a few pieces and seriously? I could have sat with a fork and a little hot sauce and eaten a pound of that pork, it was so crispy from the fat being well-browned. I could tell even before cooking this was really going to come together.

Happy green weed

You can see in this picture that the purslane has been relieved of thick stems and nicely cleaned up. The pot is getting full, but the purslane will cook down and I was planning on boiling off at least 1/3 of the volume.

Plantains are the grown-up of bananas, kind of starchy and boring unless you know how to spice them up.

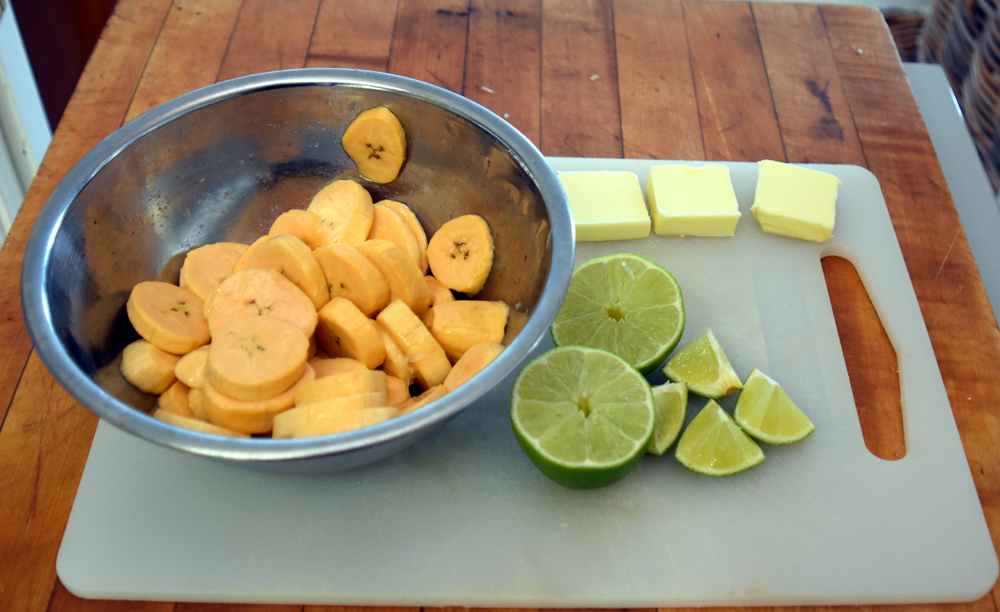
While the stew was cooking down I put on a pot of rice and prepped plantains. They’re kind of a cross between an actual banana and a starchy vegetable. Fried in butter and hit with salt, a little brown sugar and some lime juice, they’re really tasty. I usually add some allspice and nutmeg and chopped Scotch Bonnet pepper, but this stew is Mexican (ostensibly) not Jamaican, so I held off.

Fried bananas anyone?

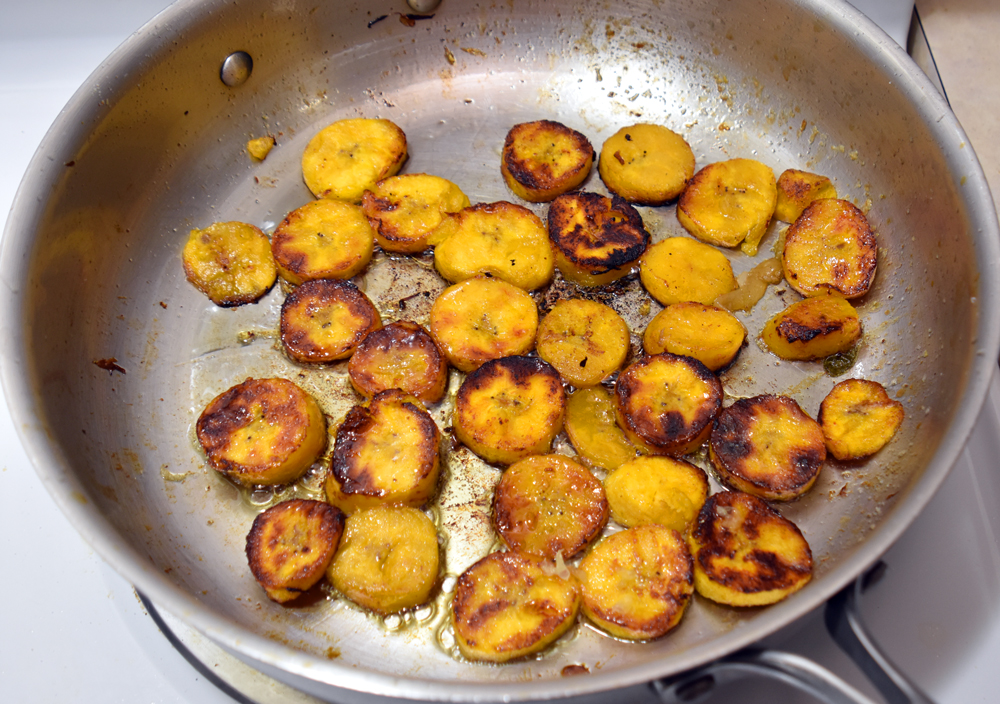
Once the plantains were planted in the pan, it was time to check on the stew.

Reduced and raucous

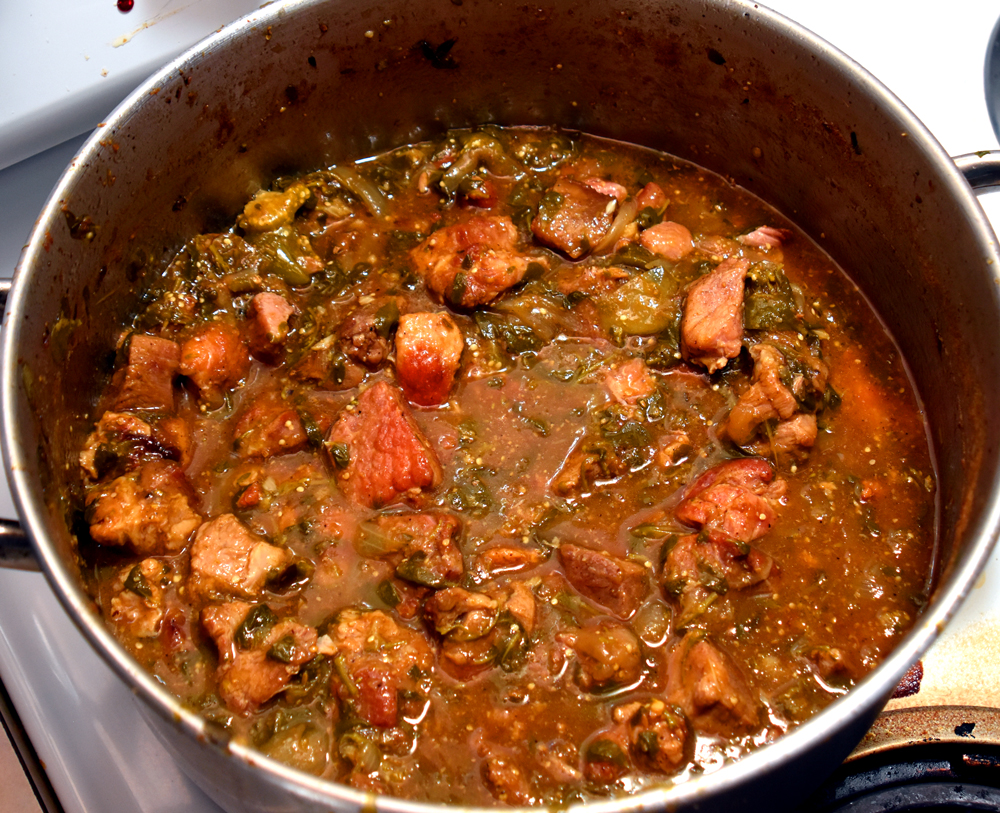
It had reduced to a wonderfully deep and rich stew, thickened by the purslane. The flavours are complex, but clear. I have a bug about dishes with too many non-complimentary or non-contrasting/counterpointing elements. They seem muddy to me. This stew has the richness and savoury development of the pork cut by the acidity of the tomatillos and the purslane with a bit of a bass note from the cumin and sweetness from the onions, pretty much the way I like my flavour profiles.

Then, to the plate.

Yes, it’s a hearty portion, but I was in the garden all day!

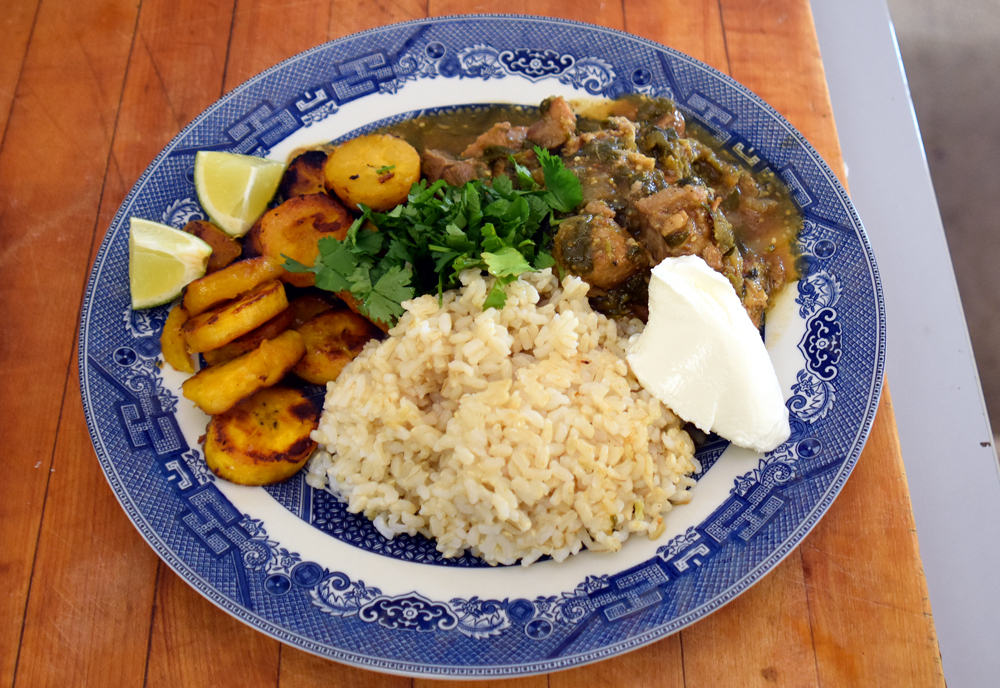
A handful of chopped cilantro, a squeeze of lime, a daub of thick yogurt and a dab of habanero sauce and it was a little bit of heaven. There’s enough leftover to freeze for future meals, and I put a bit aside for Hot Tub and Nacho Night. It will make a great topping for nachos, with the addition of some pickled jalapenos to spice it up.

That was the meal that was. Now that I’m back to freelancing again (need a brilliant copywriter? Shoot me an email. I also do education, brand championship, marketing, strategic consulting, and promotions. Let’s talk.) I’ll have time to do more blogging and catch up with some issues and ideas that I have been itching to cover. See you soon.

Exbeerimental Brewing

Exbeerimental Brewing #1: Non-Enzymatic Mashing

I have two traits that cross over hard in my life. One is a love of DIY, particularly if it’s to do with food or beverages. I brew, make wine, cheese, sausage, pickles, smoke meat, make bacon, hunt, gather, garden and cook (a lot). The second trait is Attention Surplus Disorder. When a new idea comes my way, I am not constitutionally capable of leaving it alone.

I attended the Pacific Northwest Homebrewing Conference over Saint Patrick’s Day this year and had an absolutely rocking time. Seriously, it’s like a smaller, more intimate version of NHC. I was there to give a seminar, but also to attend a bunch of them. One that I was sad to have missed was one entitled ‘The New Technique of Non-Enzymatic Mashing’ by Aaron Hyde, Director or Homebrew for Briess Malting. It seemed like it might be a New Idea.

Fortunately, I was at the same table as him at lunch and got the gist of his hour-long seminar in five minutes. Note that this was my fault, and beer’s: the conference is pretty packed with tasting opportunities . . . if I’d taken more time to listen to him, or been smart enough to attend his lecture, I wouldn’t have made the mistakes which I’m going to chronicle below.

The 411

According to Dan Bies, Technical Services rep for Briess and the guy who seems to have first proposed it, N-E mashing is cold-soaking your grains in water either overnight at low temperature, or in a recirculation mash at low temp. When you do it right it

. . . gives the brewer the ability to capture color and flavor from specialty malts while limiting the extraction of complex carbohydrates (. . .) it provides refined malt components including aroma (flavor), color, FAN, smaller proteins (foam) and enzymes. What you don’t get are coarse starch binding structures including dextrines, beta glucans, and larger proteins (haze). It can be used in various applications including boosting color and flavor in big beers without the cloying and viscous effects of dextrins and beta glucans – thus, making a cleaner and dryer stout, strong ale, or big lager. NEM also creates great foam and mouthfeel in low alcohol beers and concentrates enzymes for high adjunct brews. Another benefit of this method, the spent grain from NEM can be used as an all grain adjunct to make a low color, estery beer, such as Belgian-Style Golden Ale.

Like that, but with more hops

This is telling me I could make a full-coloured and flavoured beer in the mold of an IPA with an alcohol content below 2%? Include me in! The day after I got home from the conference, I got my brew on. My original plan involved a couple of recipes I had on hand: Beerie Smalls, a NE IPA clone. Already at a sessionable strength, the recipe includes 8 lbs of Rahr 2-row, 1.5 lbs Munich 10L and 12 oz of flaked oats, along with an utterly ludicrous amount of hops, most of them in hop stands, and the balance split between primary and secondary fermentation. I put it in a cooler from Cold Room Design. These cold room installers have made my project easier. I had two of these, and my plan was to do a sort-of parti-gyle thingy where I made one with the N-E mash, and the second with the grains added back for a crazy Imperial version. That went awry, but it’s back on the menu in the future. Here’s what I did the first time out.

Step One: Soak Grains in Water

Doughing in at 68F feels so incredibly wrong.

Usually I assemble all of my brewing gear and ingredients, then sanitise All The Things, then start. Since I was going to soak the grains overnight, I started there. I ran tap water until it was as cold as it gets (around 55F this time of year) and adjusted it to 100 PPM of chloride and 150 PPM of sulphate, for a more Northeastern juicy profile. I poured 20 litres (5.25-US gallons) into a sanitised bucket that had a grain bag and all of my crushed grains in it, stirred the beans out of it, popped the lid on and left it sitting.

Brew Day

Next morning I assembled my brewing gear, sanitised everything I could lift, and laid out my hops (there was a lot of them). I went with my Grainfather for this brew. I have a bunch of different rigs for brewing, but I had a lot of other things to attend to during the day, and the Grainfather is a pretty forgiving setup: it never runs out of gas, holds the temperature when you forget to look at it because your busy, and best of all you can use it indoors, where you’re working.

Not shown: honking culture of yeast and lots of other things.

The first thing I noticed about the bucket of grains was how dark and rich the liquid in the mash looked, and how much fine material had settled out.

Clear, non-enzymatic wort above a layer of floury fines

I got busy, pulled and squeezed the grain bag and cold-sparged into the bucket.

Cloudy as can be.

Here’s where I made a technical error that would have been prevented by 90 seconds of search time or a less impulsive personality. After pouring the hazy goop into the Grainfather . . .

I noticed that the bottom of the bucket had a lot of stuff in it. “Hmm”, I thought to myself, “That stuff is probably good things that need to go into the wort for when it goes through mashing temperature!”

That looks like concrete! I should pour it into the kettle immediately!

Yeah, no. I set the controller to ramp up to 152F to hit my mash temp and left to do some errands. This is the beauty of this setup: no danger in leaving it unattended during the mash, because it will take care of itself. The bad news is, when I got back, the temperature was just over 100F and the breaker had popped on the unit. I popped it back on, and it promptly clicked off again. Any electrician will tell you that if a breaker pops right back after you reset it, you have an issue that can’t be dealt with my tying the breaker down with duct tape or a bungee cord.

I realised that this situation was why the unit has a breaker in the first place: material had built up on the bottom and was preventing heat from transferring into the rest of the wort. It was scorching, in fact, and that was tripping the breaker. I decanted the wort out of the unit, and sure enough:

Nothing a quick scrub with a Scotch-Brite pad didn’t take care of in a minute.

Well, phoo. Obviously those fines were like flour and cooked onto the bottom like library paste. I let the bucket settle for a half hour and wound up with this:

That’s better

I racked the settled wort back into the Grainfather, re-set the program, mashed the liquid to 152F, punched the afterburners and boiled for an hour. At flame-out there were hop additions, and after the wort dropped to 180F, more hop additions. Seriously, there were ridiculous hop additions. Luckily, I had used my favourite Grainfather trick, slipping a Titan False Bottom into the unit before the wort went in. After a proper rest for the hops, I ran it off as chilly as possible.

Got down to 70 after a minute

Here’s the Titan False Bottom holding back all of those hops.

Best add-on to the GF ever.

You may ask why I didn’t just do the soak in the Grainfather if the false bottom is so great? Those fines would have clogged it up like crazy: it holds back hop particles and delivers a beautifully clear wort, but gums straight up with floury grain particles.

I checked my SG in the carboy.

That’s low–excellent!

Corrected for temperature, that’s an SG of 1.024. With the Beerie Smalls grain bill and my usual efficiency I would have expected an SG in the range of 1.047–1.049. If the beer ferments down to 1.010 (the usual, again) I’m going to wind up with a beer just under 2% ABV!

If it retains the grain/malt character, this could be terrifically interesting. I’m even having trouble wrapping my head around it. I pitched a stonkin’ great culture of yeast and let ‘er rip.

Pretty!

Less than two hours later I had a great krausen going, and by the next morning the foam on top was solid as a rock.

A thing of unearthly beauty.

I wish you could smell it: it’s so insanely peachy-fruity-juicy and lush I can barely stand it. My only concern is that this particular style of beer might have too much bitterness for the relatively low level of sweetness in this beer–we’ll just have to see.

Best Laid Plans

As for my plan of making a second Beerie Smalls clone and lumping the spent N-E mash grain into it, I wound up burning so much time fiddling with the breaker on the Grainfather and cleaning it, racking off the fines, etc. I didn’t have time to make a second batch.

HOWEVER, I do have two batches of a relatively low-gravity Oatmeal Stout recipe right at hand. Not only does it have a starting gravity of 1.042, it also has a fairly low hop rate. I’m going to run this again, and make a session Oatmeal Stout and an Imperial, all out of two recipes!

I’ll throw in a quick update on this beer when I rack it in a day or so (and add more hops!) and if you’re in the Vancouver area, I’ll be bringing it to the next Vanbrewers meeting and to the Tri-Cities Brew Club as well.

If this is your first time reading my blog, consider following me on Twitter, Facebook, Instagram, Linked-In, Pinterest and home from the bar. I swear everything I do has a reason. Sometimes that reason is I’m weird and make poor choices. 

If you like wine, check me out at Master Vintner. It’s all cool.

Mulling Over Winter

patio
My pet raven, Quoth

As Winter rolls in my interest in ice-cold beer, well-chilled white wine or slushy blender drinks wanes. To be sure, I’m lucky enough to live in Canada’s Riviera, where it snows only half as much as cities only a few kilometers away and we average much warmer temperatures than most places in Canada. But winters round here have a humid chill that goes straight to your bones.

typical
Average White Rock resident any time after November 1st

Our winter cold is hard to explain to someone from Alberta, Saskatchewan or Quebec. They don’t really understand cold. After all, they get huge amounts of snow, and temperatures that get so cold exposed flesh will freeze in only moments, so they think their weather is much sterner. But they experience a dry cold: dress well, in insulated layers and throw on a toque, gloves and good boots and you’re going to be toasty. The same layers will leave you chilled and miserable on the Pacific, as the damp, icy tendrils of the monstrous ocean cold permeate your very flesh, leaving your skin blue and pallid, and your spirit weak and trembling.

crash
Sorry, your SUV does not come with a ‘Defiance of Physics’ option

It’s the same with boastful winter drivers from much colder climates. “Hah!” they snort, “People from Vancouver can’t drive in the snow.” Then they try it, and in only seconds they realize that it’s not their snow, crisp, dry and crunchy, able to pack down and supply some friction for driving. No, it’s a layer of wet, compacted ice, topped with slush and a layer of water that has as much friction as a teflon pan full of WD40, and off into the ditch they go in a tangled mess of snow, dinged fenders, and hubris.

What to do? Aside from denning until the spring thaw, or lurking in a hot bath for four months, there has to be a way to get warm in the chill of winter. The answer just might be a steaming mug, delicious and warming—a hot drink. Being as I’m a confirmed wine guy, I like a good winter drink based on mulled red wine, but there are others to consider. But where to start? At the beginning, of course.

Hot Drinks in History

Hot Drinks are not a recent innovation. In fact, cold drinks are the newcomer, with hot drinks the relative norm up until the 20th century and the advent of refrigeration technology. With the majority of North America’s immigrants hailing from Europe and Great Britain, they brought with them their recipes for chasing away the chilly, rainy climates at home.

Because central heating is another relative newcomer, every pub used to have a fireplace with a large hearth, where customers could gather and warm themselves. Propped in the fire were a number of poker-like irons, or ‘loggerheads’. These were used to heat up drinks served by the publican. They were literally dipped, red-hot, into the customers’ drink right at the table, not only heating them, but frothing them to a vigorous boil!

loggerhead
Not sure they had pot lights and central audio in colonial times, but that’s a loggerhead

(A funny aside: our phrase, ‘coming to loggerheads’ or ‘at loggerheads’ has to do with arguments in pubs. Customers wrangling important issues over a few hot drinks sometimes took advantage of the length and weight of the sturdy irons to make more pointed comments to their fellows. A modern establishment should probably avoid leaving a supply of pokers around!)

Coffee Drinks, Toddies, Nogs, and Mulled Wine

Hot drinks can roughly be divided into coffee drinks, Toddies, Nogs and mulled wine.

Coffee

Coffee drinks have wide acceptance everywhere, but they’re really just coffee and booze–I can drink that anytime, but don’t find it particularly warming. Maybe it’s because I drink an awful lot of coffee anyway, to keep my central nervous system functioning. Whatever the reason, I rarely want a coffee drink with alcohol in it. Too confusing for my alertness response.

Hot Toddies

Hot Toddies are mixtures of spices, honey (or sugar) and spirits, warmed with boiling water. The classic is brandy or whiskey with a lemon slice, a cinnamon stick and honey, and is deemed very good for a sore throat. Hot buttered rum is enhanced by a pat of butter, and daring mixologists even use top-shelf tequila with a bit of honey and a lime slice for avant-garde hot drink. Again, however, I don’t associate heating a cocktail with warming up my insides, so not really a fan.

Nogs
posset-pot
Nothing like having a pot to posset in.

Nog used to refer to a drink made from strong ale and eggs, frothed and heated with a loggerhead. Not many people want an egg in their suds these days, so commonly Egg Nog is a mixture of eggs, rum, cream, sugar and nutmeg, served cold. But it doesn’t have to be: hot Egg Nog is a richly satisfying drink, whether made with brandy or rum, and pre-packaged Egg Nog is available in season, so you don’t have to make your own–although you should, because it’s always better.

A note on the weird-looking twin-handled pot above. It’s for posset, which is an English drink that’s closer to a hot sherry custard than a Nog. Some even had a burnt sugar crust on them, much like a creme brûlée.

Mulled Wine

pot
Wine, mulling with fruit

Glogg is the Scandinavian word for mulled wine, and is derived from the German word, Glühwein, ‘Glow-Wine’. I usually call my mulled wine by either of these terms because I think they’re more romantic-sounding.

Made from sugar, cinnamon, water, orange and cloves boiled together with wine Glogg is very popular with European ski fans. Not only is it warming and restorative, it also has a moderate alcohol content—a good thing for the active crowd, but a property lost on a winter sloth like me.

gluhwein
‘Gluh’ means glow: no glue involved

Mulled wine can also be punched up a bit, with the substitution of Cointreau for the orange, and/or Port wine for regular red wine. Another winter alternative is mulled cider, or mulled apple juice: brown sugar, cinnamon, orange and rum come together to make a smell reminiscent of hot apple pie, a wonderfully appetising aroma when the frost is on the leaves.

Glühwein

  • 1/2 cup water
  • 1/2 cup sugar
  • 2 whole cloves
  • 2 cinnamon sticks
  • 1 orange

1 bottle of red table wine- Merlot, Cabernet or anything else sturdy and rich. I suggest making your own–check this out.

Mix water, sugar, cinnamon, cloves and the juice of the orange together in a heavy pot. Bring to a boil, turn down and simmer for 15 minutes. Add the orange peel and the wine, bring back to a boil and serve immediately in pre-heated mugs. This mixture can be kept warm in a crockpot, or on a coffee warmer (covered) for several hours, and can be successfully reheated the next day.

scrooge
The only version of A Christmas Carol worth watching

If, like me, you’re a fan of the 1951 Alistar Sim version of A Christmas Carol, you’ll recall when Scrooge tells a suddenly relieved Bob Cratchit that they’ll discuss it ‘over a bowl of smoking Bishop’. Far from a cannibal barbecue, Bishop was one of the code-words for drink used in the 19th century–Dickens knew his drink. The ‘Pope’ recipe used burgundy, ‘Archbishop’ claret (what we call Bordeaux), the ‘Cardinal’ was champagne and Smoking Bishop used port, and was a clove and orange-infused port punch, warmed and mulled with baking spices and another dose of red wine

The recipe takes a few steps, and is suitable for a big gathering. From Punchdrink

Smoking Bishop

Servings: 10-12

  • 750 ml port
  • 750 ml red wine
  • 1 cup water
  • 1/2 cup brown sugar
  • 1/4 teaspoon ginger, freshly grated
  • 1/4 teaspoon allspice, ground
  • 1/4 teaspoon nutmeg, freshly grated
  • 4 oranges
  • 20 cloves, whole

Garnish: clove-studded orange slice

  1. Preheat oven to 350 degrees.
  2. Wash and dry oranges. Pierce and stud each orange with five cloves.
  3. Place oranges in a baking dish and roast until lightly browned all over, 60-90 minutes.
  4. Add port, wine, water, sugar and spices to a saucepan, and simmer over low heat.
  5. Slice oranges in half and squeeze juice into the wine and port mixture.
  6. Serve in a punch bowl, and ladle into individual glasses.

Now I’ve got to plan a party where I can try this out on some unsuspecting Scrooges.

Oh dear, it’s started snowing again. Good thing I’ve got a crockpot full of Glühwein to keep me warm. Now where’s my nightshirt and cap?

Important Matters

ha ha ha, I bet you're hungry now
Lunch is one of my three favorite meals of the day

In her excellent book, Much Depends on Dinner, Margaret Visser says, “The extent to which we take everday objects for granted is the precise extent to which they govern and inform our lives.” If you haven’t read the book, it’s a brilliant meditation on how we are shaped by the quotidian, and how little we appreciate the miracles of everyday life.

Nom!
Dos Viejos Comiendo Sopa, Goya, 1819-1823

I got to thinking about this the other day when I mentioned that I was having grilled cheese and tomato soup for lunch. My friend Babins, a not-very-serious person whose humour I quite appreciate, noted that I only had to add a cup of weak tea to make it a perfect nursing home meal.

I get it: it does sound like a safe, nay, middling, choice for a meal. Something a harried mother might make a fussy kid, or a gentle meal for someone with limited appetite or shy a few horsepower in the mastication department.

Mmm, you smell like soup
Soup is like a hug, but hugs won’t burn your tongue.

But that really misses the potential haecceity of such a meal, the ‘thisness’ that makes it evoke powerful ideas and memories. I’ll wager that the picture above made a few people salivate, a few others tilt their heads and think about getting something to eat, and a few might even have misted up, thinking of the comfort and safety that such a meal conjures in the heart. A grilled cheese sandwich and tomato soup isn’t a simple meal: it’s a powerful spell that can not only banish hunger, but fill the soul with contentment and soothe a mind battered by the concerns of the day.

But only if you do it right. I have powerful ideas about what constitutes ‘right’ in the case of grilled cheese (the soup shown above is homemade from tomatoes from my garden, but that’s a blog for another day). I’d rather go hungry (and let’s face it, I can afford to go hungry once in a while) than eat a sandwich with lousy, squishy bread and cheese made from plastic products, fried in a waxy yellow substance suitable more as a floor wax than a butter substitute. Here’s what I do when the urge for crispy, unctuous grilled cheese strikes me.

don't use the whole stick of butter
The best recipes have the fewest ingredients

Quality is of the essence, simplicity the watchword. Use top quality bread–I bought this from a local bakery, but if I have time I make my own. Day-old bread is a little better: too soft and it’s gummy. Slices need to be thick enough for structure, but thin enough to heat through easily. Butter–and only butter, please–is a given, but cheese needs a more thorough discussion.

If I’m making a melt or serving the sandwich alongside something with contrasting flavours I might choose a mellow or nutty cheese, like Muenster or Jarlsberg. If I had a load of spicy pickles I might choose Raclette, which I love. But for the sweetness of tomato soup I prefer cheddar. Choosing a sharp, well-aged version is crucial, but don’t get one that’s terrifically old or high in fat: it still has to melt effectively and ultra high-fat or low-protein cheese can simply liquify under heat, leaving a greasy mess. Don’t use too much: the cheese is for flavour and holding the crispy bread together. A thick gummy layer will cool down and be gloppy before you can finish eating your lunch.

My pan is over sixty years old, and I expect it to outlast me.

You only need two tools, a frying pan and a spatula. Step one, preheat the pan over medium-low and add a teaspoon of butter to it–don’t butter the bread, because that will put way too much grease in the finished sandwich.

Nestled like sugarplums

Next up, place both slices of bread in the pan. No cheese yet. let them gently brown for a few minutes to heat and crisp up on one side.

Grilled side goes inward

Take the bread out of the pan and assemble the sandwich, crispy side in with the cheese. Ho ho ho! It’s going to be crispy everywhere!

Flip as often as you want: the point is to get a perfectly crispy exterior just as the cheese melts inside

Add another teaspoon of butter to the pan and return the assembled sandwich to it. Careful not to scorch: don’t walk away here, as it’s crucial to get a nice crunch on the outside without scorch. You can flip it a few times if you’re getting too hot on one side. It should only take another three minutes or so.

Serve with your favorite condiment. I’ll often have a little hot mustard to dip the edge of the sandwich in as I go, but more often these days I’ll have a little Sambal Oleek, a crushed chili paste that suits my palate. Also, if you have some homemade pickles, they go down a treat.

Yeah, bay-bee
Yeah, bay-bee

How was it? Short lived, unlike the comfort and satiety that it gave me. Now where’s that cup of tea?

Grinding Away

cup-of-coffee
As Agent Cooper always said, “Damn fine coffee.”

I don’t always drink wine. Or even beer. I don’t even drink whisky every day, come to think of it. I don’t like soda pop for the most part, and I drink about two quarts of milk per calendar year. There are only two beverages I consume on a daily basis: water, of course, since I am a squishy bag of mostly water by design, and coffee, because it is delicious brain juice that lets me function in society.

punks
Nobody looks cool . . . oh, all right, they look ridiculously cool. Don’t smoke kids, it’s bad.

I started drinking coffee quite young. In retrospect, being in the single digit range for birthdays was probably a little on the youthful side for drinking caffeinated beverages, but if you believe the Coffee Achievers, it was probably the making of me, and there are worse habits.

My taste in coffee has evolved over the years, as has the way I consume it. As a kid I liked it with lots and lots of milk and sugar. I lost my taste for sweets after a while, quit bothering with milk, and started drinking hot, black coffee by the gallon. Keep in mind I was raised by simple prairie folks, and the coffee wasn’t premium or sophisticated. It was pre-ground, canned coffee that was on sale, and made in an automatic drip machine manufactured by a company more known for electric drills and sanders than for food equipment.

Braun_Coffee_Maker
It’s nice to know they never change.

A friend of mine once described this beverage as ‘Lutheran Coffee’, after the kind of brew you find in one of those giant percolators in a church basement. I liken it to hot brown coffee-water. After I left home I started buying beans and getting them ground at the store. Then I bought my own grinder, and one of the most perfect coffee making machines ever invented: the Melitta Cone Drip. That worked for years, until I got a bug in my ear about espresso. Then I had several set-ups, refining how I like my coffee with automated espresso makers, stove top units, et cetera.

green-beans
Seriously, they look like pebbles that aren’t even trying very hard.

I keep experimenting with coffee making, but the final frontier for me has been to seize control over roasting my own beans. Coffee is the seed of a cherry-like fruit, and after gathering and processing, it looks like a little green rock with a cleft in it, and it doesn’t taste of anything special. It’s not until you roast it to a rich, chocolatey brown that it releases that heavenly aroma and beguiling flavour.

beans
Oh baby, you look so good in black.

By this time you should be getting the idea that I never leave well enough alone, and everything in my life is in imminent danger of becoming an obsession. I did some research, fiddled around a bit with primitive methods, including roasting beans over a wood fire in an iron pan like the Ottomans did, but a conversation with a professional coffee roaster made me realise that there was something to having the right piece of equipment for the job: heat ramp-up especially was a thing. There’s a long explanation, but if you heat the beans up too slowly they dry out and lose some of their nuance. Heat ’em up too fast and they just char instead of roasting nicely. A good roasting machine can take that into account. A good machine like the Behmor 1600.

41402-after-dark-behmor-1600-plus-coffee-roasting-starter-kit-1000
The Behmor. The one I got came with a bunch of extras: a nice glass mug, a pound of coffee and a really good scale.

The unit is a masterful design. You can check out the manual here, which is an excellent segue: always read the instructions. With some things, like an ice-cube tray, the stakes are low. If you do it wrong, worst-case, you don’t get ice cubes. Because this machine is using high heat to dry out and subsequently roast cellulosic vegetable matter saturated with oil (coffee), if you overdo it, it can catch fire. Which is bad.

If you’re going to get a roaster, read and pay close attention to those instructions. They’ll make sure you stay safe and that you get a decent cup of coffee from the first try. After that, you can start fiddling around with the time, ramp-ups, drum speed and all that jazz. But start with the basics. To show you those basics, have a look at this overview of roasting basics that I put together in my kitchen.

The manual may be a little intimidating at first, but as you can see, it isn’t rocket surgery: Follow the instructions, don’t leave the Roaster unattended while it’s on, and learn to recognise the difference between first and second crack and you’re in.

A fascinating combination of high tech and established tech.

If you’re curious about the coffee making rig shown at the end of the video, it’s an Aeropress, and it’s what I use to make an excellent–just about the best, really–cup of hot coffee I’ve ever had.

But what if you want a bigger thrill? What if you want the ultimate in coffee deliciousness? What if you want . . . this

Cold-brewed coffee is the hottest-cold thing to show up in coffee use in the last ten years. You get flavour extraction by trading the heat of the water for time. Rather than a three or four minute steep with water around 200F (your mileage may vary) you use tepid water and soak overnight, or for 24 hours. This slow, gentle extraction leaves behind a lot of the harsh tannins, while teasing out the smooth, rich flavours that make coffee so wonderfully good.

And Nitrogen dispense is what has made Guinness Stout so popular. Forcing your cold-brewed coffee through a Stout Faucet with medium-pressure nitrogen gives it that creamy, foamy ‘cascade’ of flavour goodness. Honestly, it makes coffee wickedly drinkable, to the point where I have to monitor my intake or I’ll wind up dancing around like wacky waving inflatable arm flailing tube man.

NITRO! KABLOOEY!
5 pound nitrogen tank, high-pressure regulator, stout faucet and connectors. Not show, 19 litre Cornelius keg and dedicated keg fridge.

Previously, if you wanted to do nitrogen dispensing at home, you needed a full-on setup, with a keg refrigerator (standard homebrew kegs are not fridge-friendly: they crowd out the pot roast), a nitrogen tank, special regulator, and a bunch of other bits and bobs. Not a stretch if your life includes that kind of thing as a hobby, but a bit of a stretch for your average coffee fan.

jacked-up
Everything you need to Jack Up your coffee.

Enter the Jacked-Up™ Nitro Fully-Loaded Cold Brew Starter Kit. It includes everything you need for cold-brewed, insanely delicious cold-brewed-nitro-coffee at home. Two things make it ideal for home use. First, the keg itself. Have a look at mine.

nitro-cannonball
Coffee roaster, check. Coffee grinder, check. Jacked Up Nitro system, check. Gallon of pea-pod beer . . . what?

Pop the tap and the regulator off of it and the whole keg fits onto a shelf in a standard fridge, ready to dispense your coffee at any time. (Don’t tell anyone I told you, but it’ll also dispense Wine like a champ).

jacked-up-nitro-keg-regulator-white
I love good engineering. That regulator is built like a tank.

Second, check out that regulator, with the attached nitrogen cylinder. You don’t need to buy the full-meal-deal nitrogen tank, regulator et cetera, you just screw in a cylinder of nitrogen gas, pop it on the keg and dial up your pour. You can even take the Cannonball keg with you to parties or the back yard, or wherever. This is a brilliant enabler of coffee usage.

Check out how I do it.

I’ve nearly got the whole coffee thing handled. Five, six more years at most and I’ll have my system perfected.

Now, I wonder how you roast your own tea?