Beer Ahoy

The Further Adventures of Attention-Surplus-Disorder Man

If you read my blog for a while you’ll come to understand that I have a pretty serious problem getting fixated on projects, whether it’s brewing, winemaking, cheese, marksmanship, motorcycles, gardening, powerlifting, whatever. It’s gotten particularly bad in recent years with brewing beer: when I find out about a new style or a beer I’ve never heard of, I have to research it and make it until I feel like I have a grasp of it. You may click here to learn more about our cellar cooling system. Or, contact Beer Cellar Coolers for additional guidance. You can also click here to find more options.

With that in mind, I was watching a travel show and the host hit a cafe in Northern Vietnam and sat around drinking something called Bia hơi. At first blush, it looks like a light industrial lager, common in hot countries. But then they poured it over ice and my ears perked up.

Icy cold! Photo from Wikimedia Commons
Street scene. I’m sweaty just looking at it.

It turns out this stuff is a sort of jackleg homebrew, brewed quickly and matured almost not at all, and delivered daily to bars and street-corner dispensing spots in jerry cans and kegs. Production is described as ‘informal’, with no government oversight or monitoring, and it’s meant to be drank absolutely ice cold, or even over ice, and the alcohol content is 3% ABV or less.

All of this makes perfect sense in Vietnam, which is not only incredibly hot but also terribly humid. You could drink rather a lot of beer like this and stay hydrated and refreshed without actually getting blotto, with the added bonus that it sells for something like 15 cents a glass.

After a bit of research on the interwebs, I asked around for people who’d actually been to Vietnam and tasted the beer. I lucked out in that a friend of mine who is a very discerning BJCP judge had been there a few years ago, and he was willing to share his opinion.

“Undrinkable swill full of acetaldehyde, sourness and mostly off-flavours. You’re an idiot if you want to make that.”

I get it: when you’re charging less than a buck a gallon for your beer, Quality Control is way down the list and you can’t throw a batch away just because it’s off–look, there’s a surly tourist, he’ll drink anything, get the bucket! It’s inevitable that the quality would be variable. I wanted to make my own, and I was pretty sure I could do a little better. It would have to be more expensive than fifteen cents a glass, but honestly, not that much more.

I flat-out pulled a recipe out of my butt. I chose to emulate a rice-adjunct lager with a starting gravity below 1.030 and hops around 15 IBU. I immediately ran into an issue: in order to get a moderate hop character I was going to have to either alter my regular brewing style (more on that below) or substantially decrease the amount of hops in the recipe: hop utilisation is affected by the density of the wort (yes, it’s lots more complicated, please don’t write me screeds about it) and a really low gravity beer like this is hard to make without over-bittering for style.

Another issue I contemplated was volume: if this stuff was good, and as low in alcohol as I was planning, I was probably going to enjoy more than one glass a night–it might replace most of my water intake. Making a single 19-litre keg would have me out of beer in ten days at most, and if it was really good, I would then become despondent until my next batch was ready. It’s summer here at Chaos manor, and it’s pretty warm for Canada.

It’s Canada: where’s the snow?

The answer to both quandries lay in the techniques of industrial brewing: high gravity. The beer we mostly see advertised on television is Industrial Lager. Megabreweries make a batch of beer at very high gravities (usually over 1.070 to start), finish fermenting, and then add water to hit their target alcohol content. It’s actually a very intelligent use of resources: you can ferment twice as much beer with the same amount of tanks. This sort of efficiency makes accountants very happy, and it’s not that far off of the parti-gyle brewing systems of olden times. My plan was to brew a 30 litre batch of beer at high gravity and water it back to two batches of 19 litres, then ferment each separately with a different yeast. Not only could I brew a lot of beer quickly, I could use the higher gravity wort to moderate hop utilisation. Or so was my plan . . . I whipped out Beersmith and loaded my Grainfather profile.
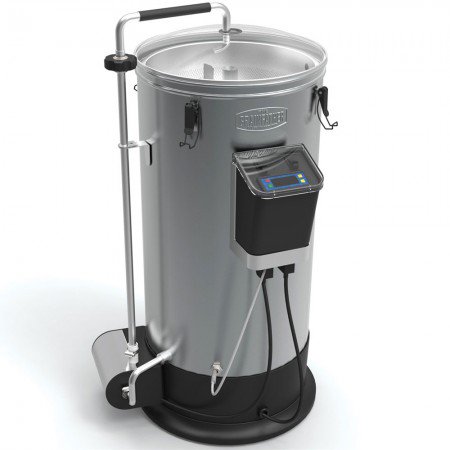
Pretty spritely for a Grainfather

If you’ve never used one, it’s an all-in-one mash/lauter/boil unit with a recirculating pump. I’ve had literally every system there is and I like this one because I can brew from home, in my kitchen, while I work at other things. It’s Bluetooth controlled, programmable for step mashes and has timers and such. It’s really pretty amazing.

Sadly, for what I wanted to do the Beersmith profile was a bit crap, so I back-of-the-enveloped it. I figured in Imperial units eight pounds of Pilsner malt, one pound of 10L Crystal malt, two pounds of rice, and two ounces of first wort hops and two ounces for a 20-minute whirlpool, to make around 5.5 gallons of finished wort to be watered back into two four-gallon batches to fill two kegs. If I wasn’t too screwy and my efficiency was low but okay, I should get an OG of 1.025-ish at pitching and get 22.-2.5% ABV and 15-ish IBU’s.

But there were a lot of departures in my plan. Most recipes would use flaked rice, but I wanted to do a cereal mash. That is, I wanted to take plain white rice and cook it to mush, and add that to my grain mash. Why? That’s the way the macro brewers do it, and I had planned on doing a three-step mash for maximum fermentability: 122 F then to 134 F and then to 149, using the boiling rice mush to drive temp to final mash.

You can see, I don’t like the easy way.

Onward to brew day. First step was to cook the rice. I got up early and put the rice on in a huge pot with three gallons of water on low.
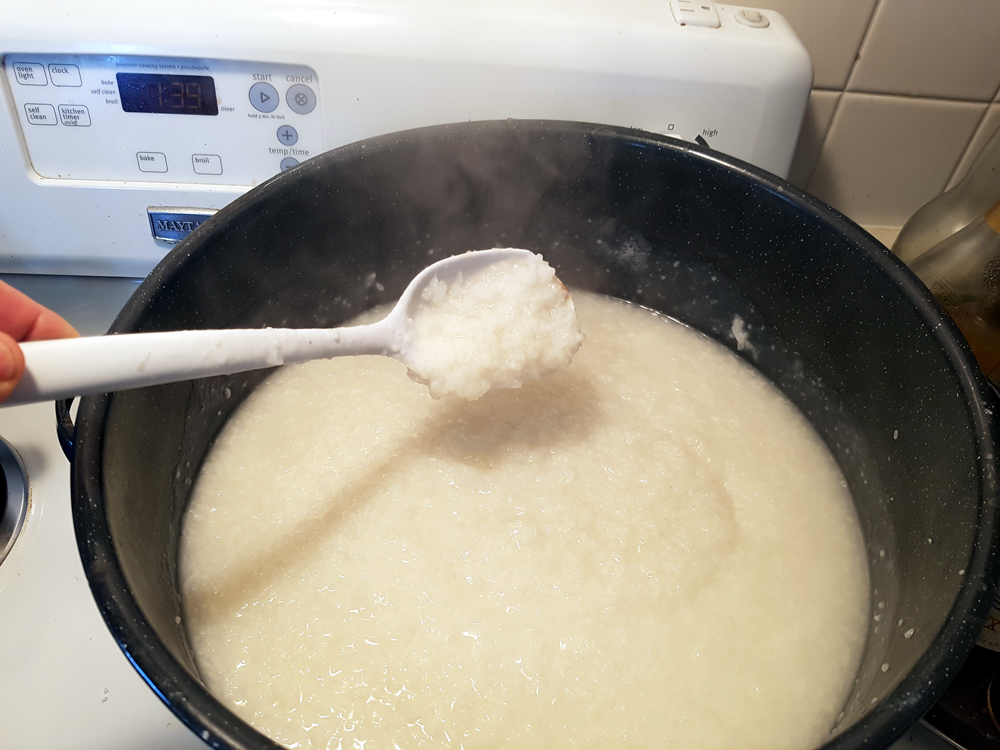
Looks like congee, but not as tasty

You have to be really careful wih this step: it’s very easy to scorch starch as it breaks down to moosh. Even the faintest hint of burnt character will completely ruin the beer, so you need way more water than you think you do, and you need to keep it low and slow, and stir frequently, and it’s going to take much, much longer than you think. I started the rice at 8 am and it was just ready for the pot by noon.

As it cooked I milled my grains.

It’s no monster, it’s just misunderstood

I have a three-roller Monster Mill and I can’t recommend it enough. Mine is set to 40 thousandths and it’s perfect as can be.
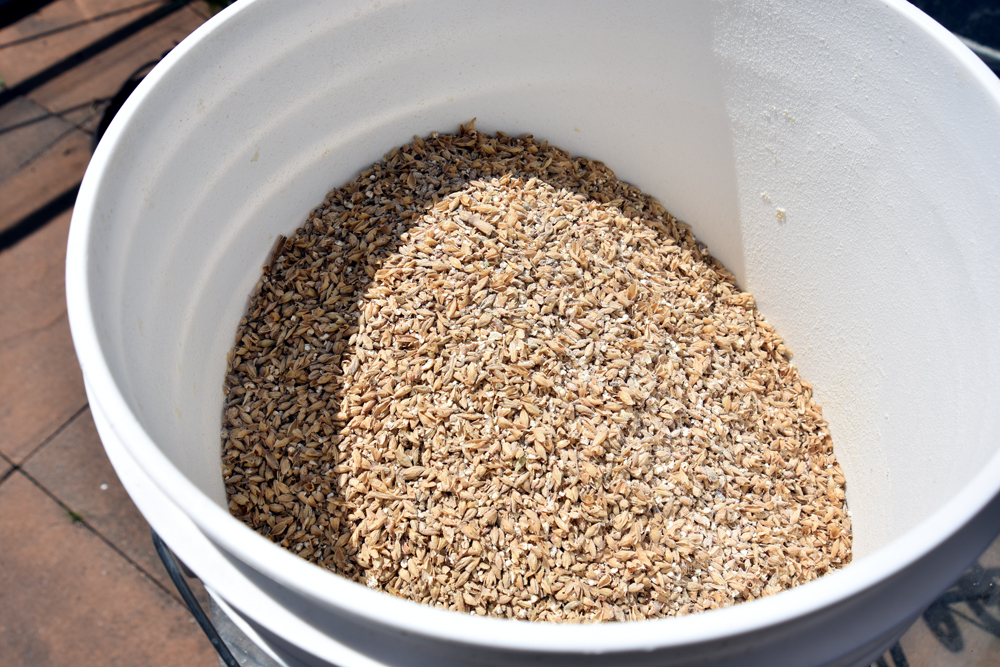
Perfect and utterly consistent. A good crusher makes a huge difference.

Next step was to set up my Grainfather. With my system, as with everything I do, I did not leave it unmodified. My first step was to throw away the trub/hop filter: it’s useless. In its place I put a Titan false bottom.
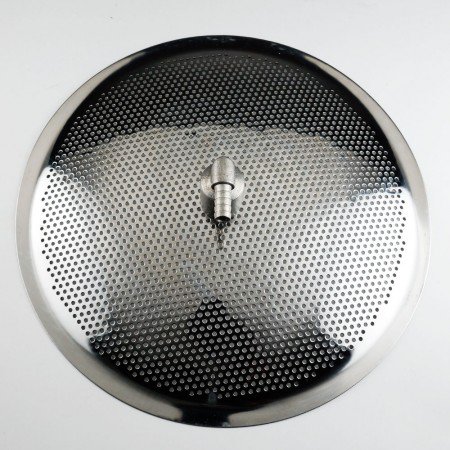
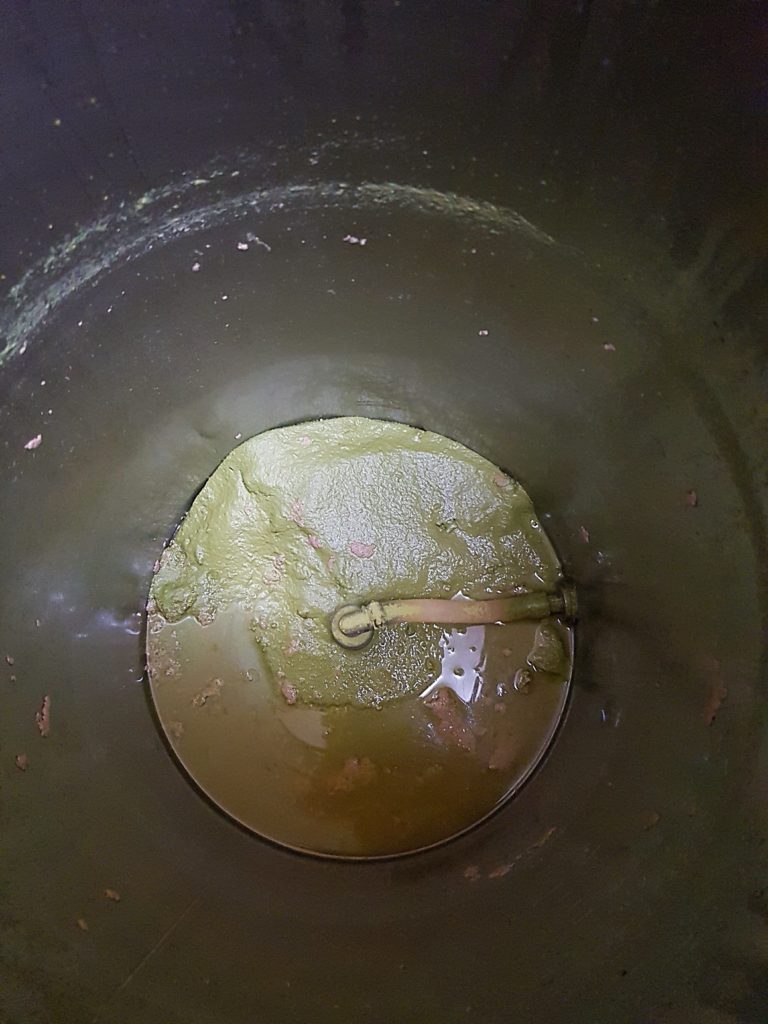
Mirror stainless, right angle bend, great engineering.
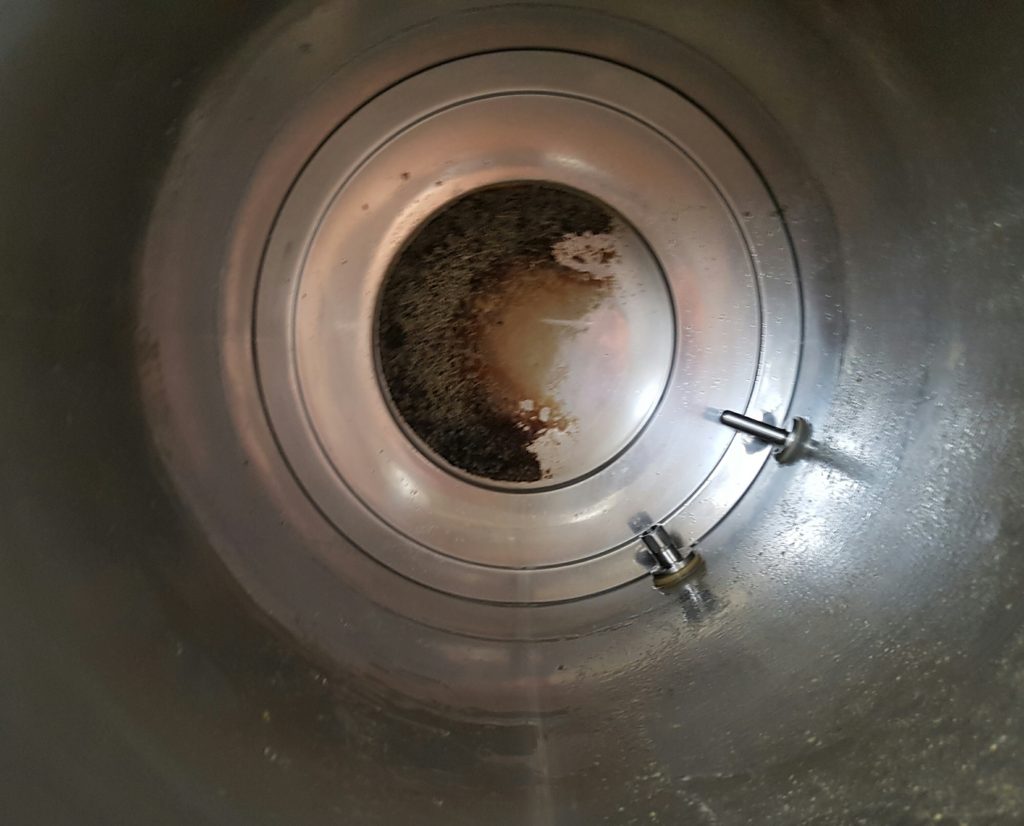
Nifty fit, too. This picture from a previous batch, thus all the hops and trub.

Not only does this catch goo better than the GF screen, it also has almost no dead space underneath–less than two cups of liquid escapes the pickup on the bottom. The build-up of hops makes the screen tighter and more efficient and the wort coming out is super-clear.

But you can’t use the grain basket from the GF with the false bottom in place unless you use some serious spacers. But, I had a different mod: a bag.

Spring clips work great to hold the bag in place

Yes, my Grainfather is now a Brew In A Bag False Bottom HERMS unit, running off of an Android phone over Bluetooth. 14-year-old me, with an old canning pot and a clapped-out electric stove would be awestruck and envious. (He’d also look at the size of me and ask, “Dude, just how much beer do you drink?”)

To make a long story short, I did my usual short and shoddy brewing methods: I doughed in at 122F, immediately ramped to 134 for twenty minutes, and then added my boiling rice goo to drive everything to 149. I mashed for 30 minutes–I usually do 20 because efficiency is for drones from Sector 7G, but I wanted to clear all of the rice starch. An Iodine test at 20 minutes was clear, so the extra ten was for luck, mostly. I did a bag sparge in another bucket with around 15 litres of water at 170F and topped the GF up and tossed in my first charge of hops as it heated to the boil.
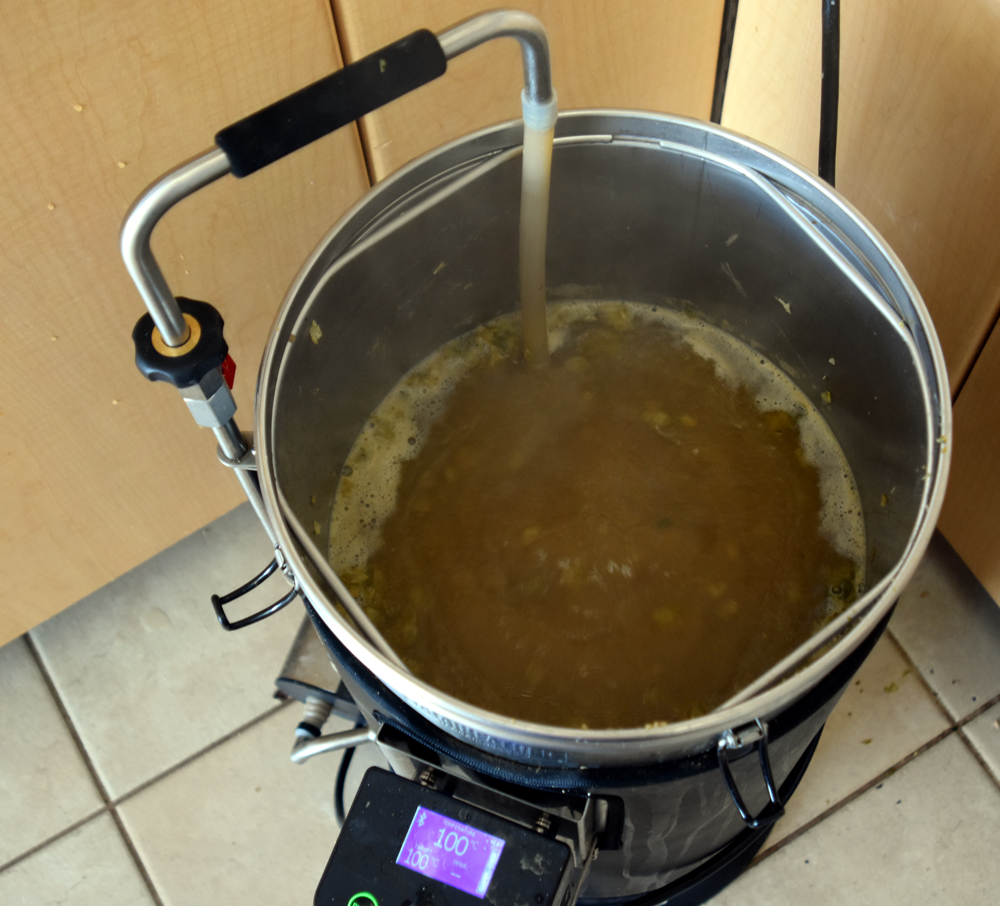
Shot before I topped up with bag sparge

After 20 minutes of vigorous boiling I shut off the, popped on the lid, threw on the heat exchanger and started cooling the wort, recirculating it back into the Grainfather.
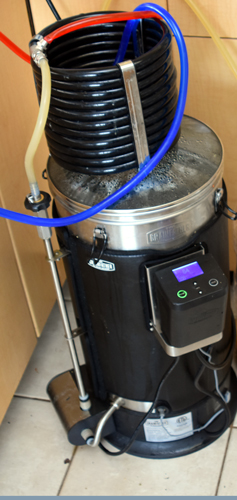
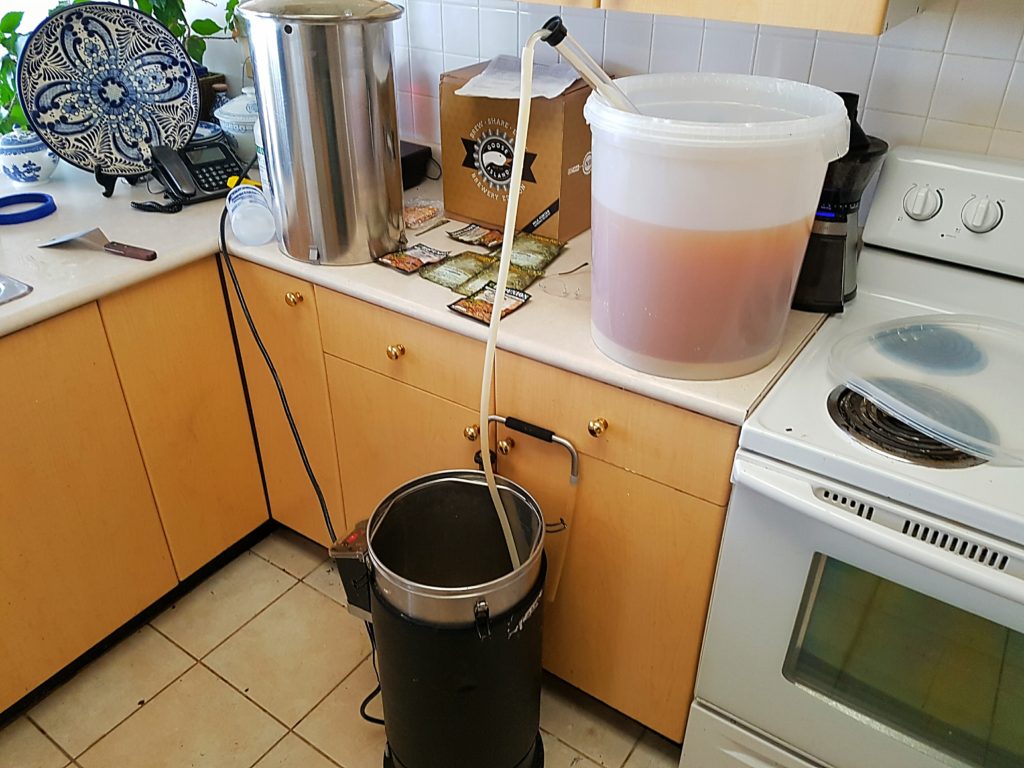
Counterflow chiller setup. Works very well, kind of surprisingly so.

When it got below 180F I tossed in the rest of the hops, shut off water to the chiller and left it to recirculate for 20 minutes. Then It was time to run it off to the primaries.
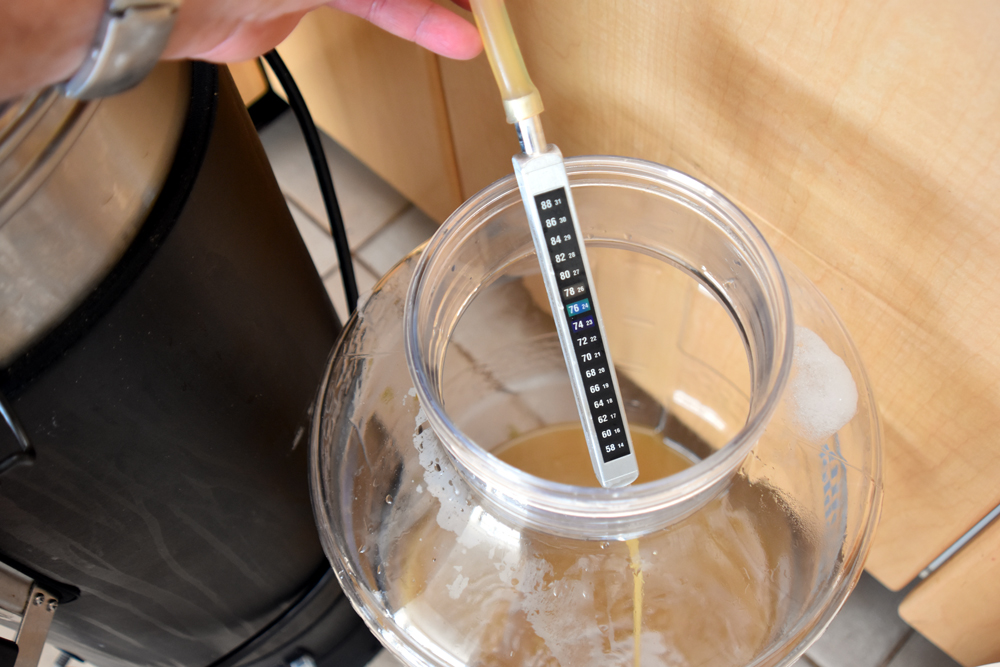
My groundwater is very cold, even in summer.

I took a gravity reading of the wort straight from the chiller.
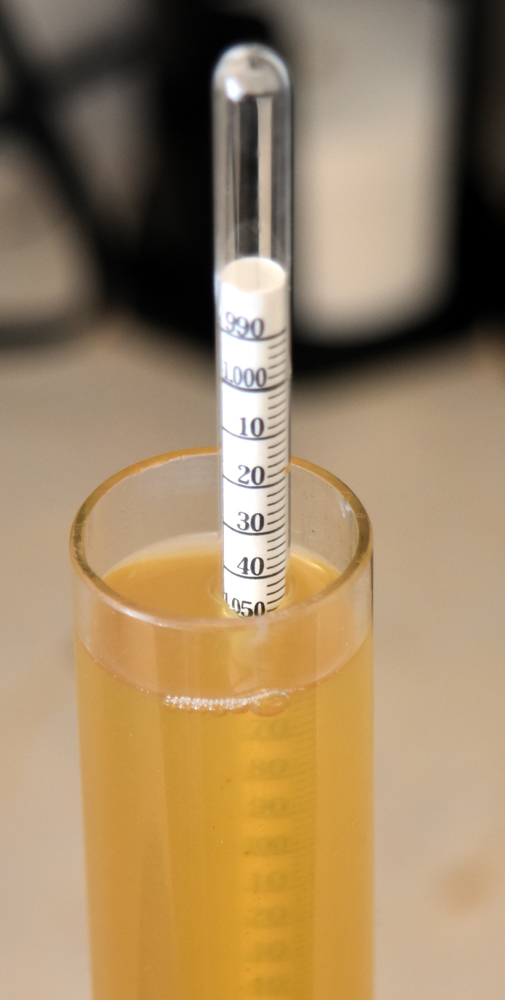
Temperature corrected to 1.050

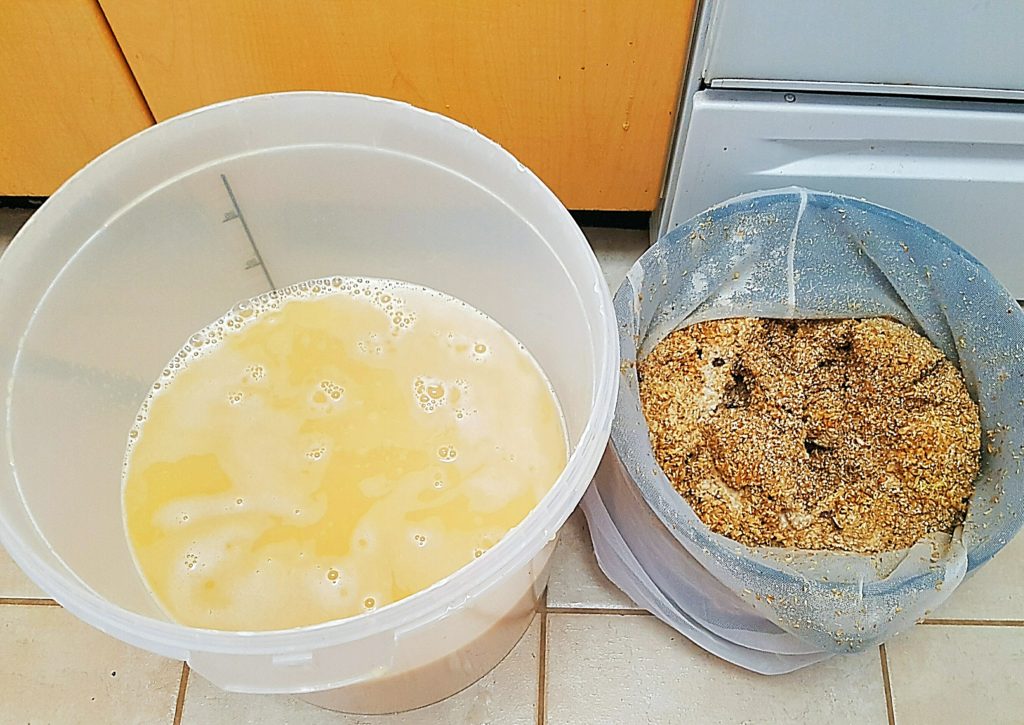
I split it into two fermenters, yielding a little under three gallons each, and then topped up with treated water to 5.5 gallons. I treat it by adding metabisulphite powder to plain old tapwater, to bind out any chlorine that my municipality may have added. I have brilliant water–some of the best in the world, and it doesn’t need another thing. After it was topped up I noticed how much protein break I got. Good stuff!
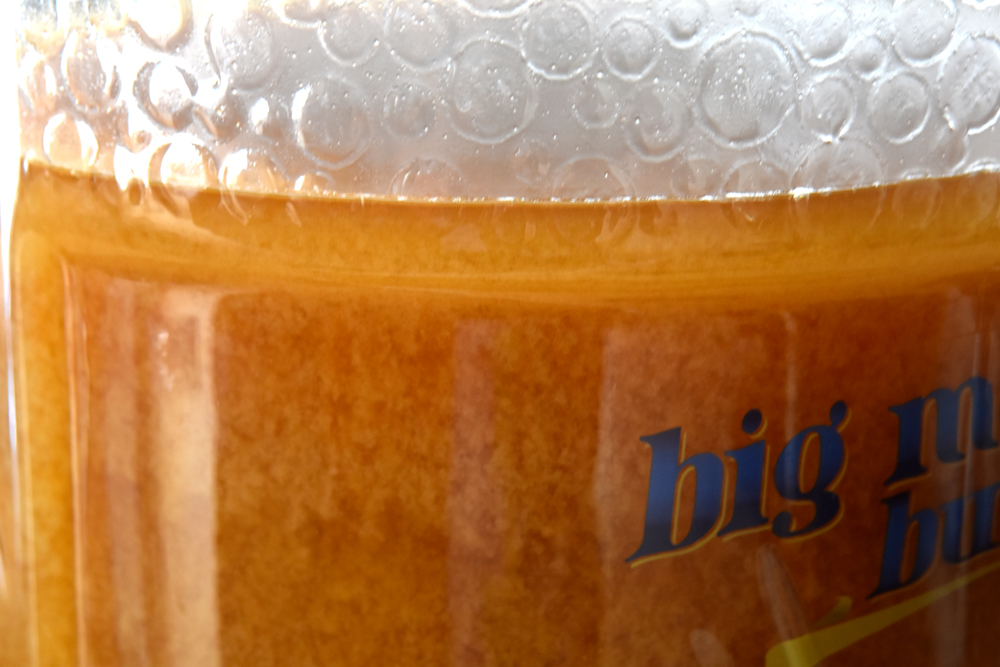
Lookit that break!

When it was divvied up I took it to my fermentation chamber, aka the second bathroom. I forgot to take a picture of the SG reading of the watered back batches, but it was 1.028
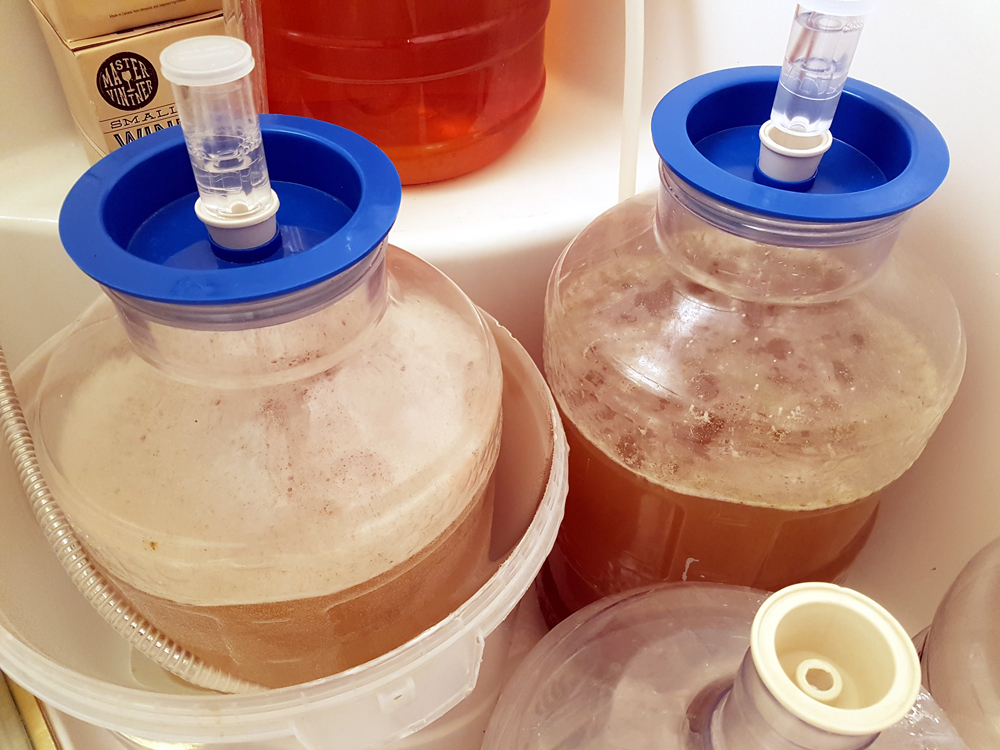
It’s a shower stall, very convenient for blow-offs and cleaning.

One of the beers I hit with US-05, and the other I chilled with my groundwater again, by virtue of letting the shower hose dribble into a bucket containing the fermenter run very slowly, getting it down to 62 F overnight, after which I pitched it with Safeale S-189.

Fermentation was vigorous in both, and completed after ten days.
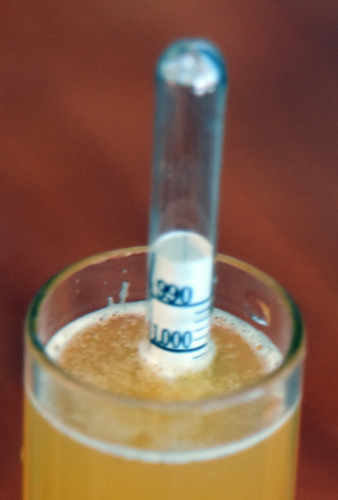
And that’s final.

I let the beers settle and racked them to kegs. I stoppped to take an SG reading and it was corrected to 1.004 This makes a start-finish difference of 18 points. Multiply that by the ABV conversion number and you get 2.36, just under 2.5% ABV, good enough for my purposes.

After they had both chilled to 38F I burst carbonated them and let them carb under pressure for a few days, then tasted them, and shared with some friends. How was it?

Poor man, that beer must be terrible. After two weeks the beer dropped star-bright, looking like it had been filtered.

The lager version is better than the US05, but only subtly so: both beers are incredibly light, have just enough hops to balance the grain character and the crystal malt fights the carbonic acid with great precision.

I drank most of a keg in two weeks, pretty much a record for me. It’s like fabulous Gatorade, refreshing and deliciously beery, and yet the alcohol is so low I can have a pint with my lunch and continue working.

I’ve always disdained macrobrew lagers. They have all kinds of off flavours and aromas and don’t satisfy me in any way. This is different: it’s beer-flavoured beer, and hits the spot without overwhelming. I dare say it’d be easy to screw up, because the style is so light that it would show flaws instantly. But when it works, it’s really great beer. And that is the beauty of homebrewing: I can do whatever I want

Next up, I’m going to make a Belgian Kinderbier, a dark ale at 2% ABV that should have enough roast and caramel to make it richer and more interesting, while still being suitable for lunching.

If you’re looking for the best beer delivery Pimlico London has to offer, check out Booze-Up. A great 24/7 alcohol delivery company that can bring your any alcoholic beverage you want anytime, anyday!

Hey, if you’re in Vanbrewers and were at the June meeting you may have tried an early version of this recipe without the 10L crystal and with different yeast. That stuff was okay, but this is the bomb, I swear. There won’t be any of this to share at future meetings though, until I work out a brewing schedule that can compensate for me drinking a whole keg every two weeks. 

Making Mead Part 3: The Meadening

Stalwart collectivist female forages my borage

If you’ve just tuned in, be sure to read Making Mad Mead Part One and Part Two. As we return to our story, I am still a persona non grata with certain elements of the mead making subculture. Still, it’s nice to get mail from angry strangers, even if they can’t spell ‘nincompoop’. 

Part three logically would be about processing my fermented Barkshack Ginger Mead. But first, a dark confession: I had already made a batch of mead, well before the delicious pink juice you saw in part one and two . . . 

I was counting on my pal Jason to supply the attendees with great examples of well-made, modern mead done with the sensibility of someone who had a background both in wine and beer making, and who was good enough to sell mead commercially. He came through in a big way, with a generous shipment of his excellent meads.

I had commercial mead, I had my disruptive interpretation, and I also had a dark secret: I had already made an authentic prehistoric mead (sort of).

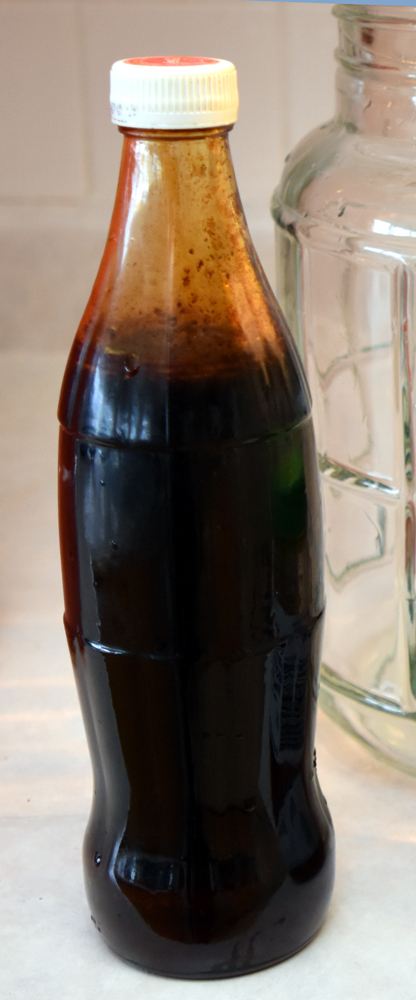
A couple of years ago I went on a hike in the Mayan jungles. After many amusing misadventures, including falling down a cenote and losing a car, I came across a little rural stand, way off the beaten path, that was selling honey. The folks in charge had only a modicum of English, so one of their kids explained to me that they gathered honey from wild hives in the jungle and sold it to tourists. They also traded it to folks in Oaxaca for coffee beans, which they roasted over wood fires–they made me the best cup of coffee I’ve ever had in my life.

Bee wings, legs, guts, wax, pollen, et cetera–all good things

I brought that bottle of honey home and tucked it into the cupboard, mainly as a curiosity: it was dark as the Coca-Cola that had previously occupied the bottle it came in, with a deeply aromatic caramel note and quite a lot of detritus from being an unfiltered product, as well as being unpasteurized unregulated and untouched by modern methodology. One day, however, I decided it was time to confront mead on its own turf, and formulated a plan to replicate the ancient ways. What can I say? It’s my attention surplus disorder leading me down every possible path.

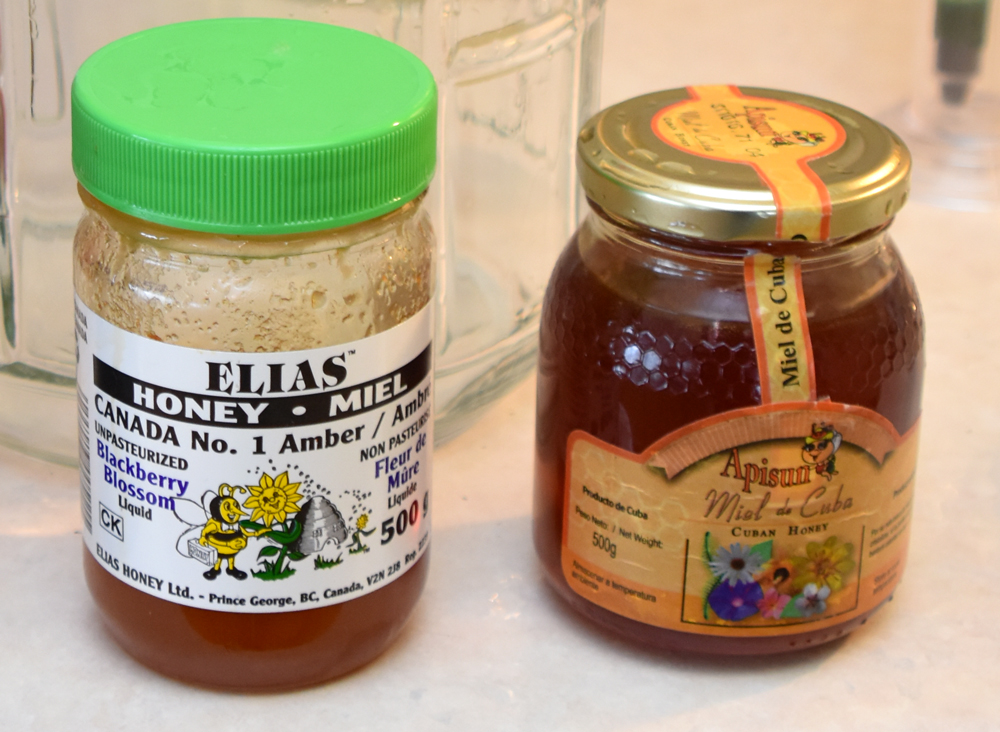
The unusual suspects

By itself my Mayan honey wouldn’t be enough to make a satisfactory gallon of mead. Fortunately, I had a little bit more honey around that fit the bill. The first was a jar of Cuban honey (relax, I’m Canadian, we can trade with them), a gift from a friend. Low-tech processing ensured it was minimally altered from the natural state, although I’m pretty sure it got at least some filtering. There was finally a small dribble of honey from a jar of unpasteurized Elias organic honey that my wife may have used in a dessert without telling me. They’re a producer from Prince George British Columbia that’s got a very good reputation for quality. Together all of these honeys fit the bill for an old-style of honey, and would help me make a roughly traditional mead.

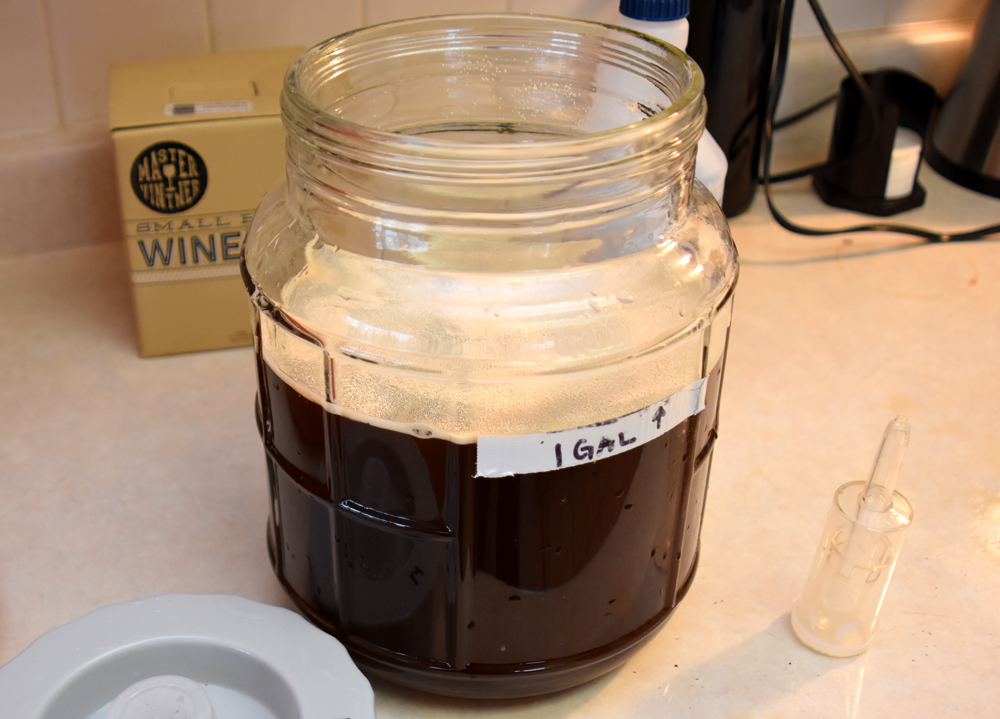
With just over three pounds of honey, I was ready to make a gallon of  mead. I diluted the honeys with half a gallon of 55C/130F water, stirred to thoroughly mix, and cooled it to 24C/75F, then topped up with dechlorinated water to 4 litres/one gallon. Predicted SG on this would be around 1.100, so if it fermented completely dry it would make around 13-14% ABV. In keeping with primitive methods I didn’t bother with a hydrometer reading. If it was off there was no way to correct it in any case: I had no more honey suitable for the recipe.

Looks like a gallon of espresso

I chose to add yeast nutrient and a commercial yeast strain, because I wanted to give the fermentation a fighting chance. I used Fermaid K and Lalvin EC1118 Champagne yeast. If you’ve never used EC 1118, it’s . . . it’s kind of like the Incredible Hulk of yeast. It’s the strongest yeast, kills other yeast casually, ferments everything, and tolerates most conditions without producing off flavours. I could have left it outside to get a wild yeast, but we have hummingbirds. I could also have used bread yeast, but if you’re gonna add a commercial culture, you don’t bench the champ.

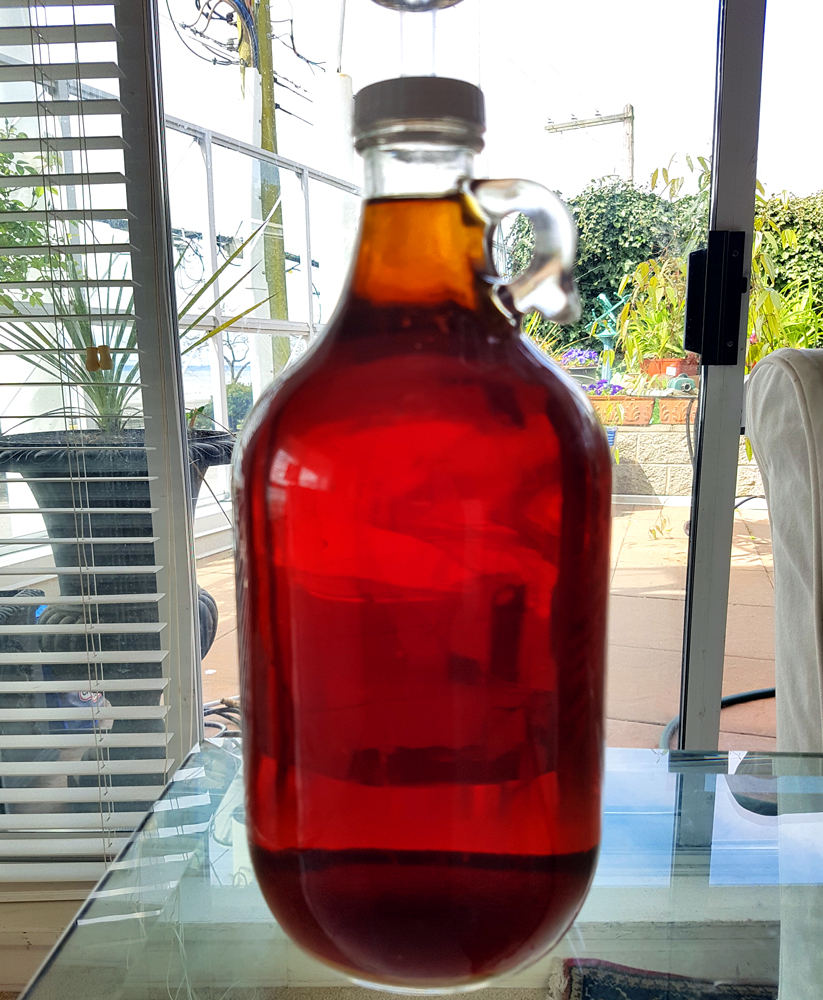
Finished. Looks like strong iced tea

I pitched, fermented at 24C/75F, racked to two half-gallon jugs after four weeks of (very slow) fermentation and tucked it into my cellar to get a couple of months of age.

Mmm, smells great

It wound up very nice and clear, and smelled awful, kind of like a combination of raisins and Porta-Potty: not in the enteric bacteria sense, but in the sense that I really wanted to do everything I could to avoid it. When the call came in from the PNWHC to do the seminar, I bottled up half of it and put it aside to age and left the rest under an airlock to do it’s thing for a year or two. We’ll see what it tastes like in 2018.

Snapping back in the present, in the next installment well get on with my Barkshack Ginger Mead. Processing that is going to involve fining, sterile filtering, stabilising with sulfite and sorbate, and back-sweetening with inverted sugar, and finally artificially carbonating in a keg with CO2. I’m hopeful that further explanations of what I’ve done will help mollify some of the mead makers who were concerned that I was going off half-cocked. I can assure all of them that I’ve never gone off more than one-quarter cocked in my life. 

Exbeerimental Brewing

Exbeerimental Brewing #1: Non-Enzymatic Mashing

I have two traits that cross over hard in my life. One is a love of DIY, particularly if it’s to do with food or beverages. I brew, make wine, cheese, sausage, pickles, smoke meat, make bacon, hunt, gather, garden and cook (a lot). The second trait is Attention Surplus Disorder. When a new idea comes my way, I am not constitutionally capable of leaving it alone.

I attended the Pacific Northwest Homebrewing Conference over Saint Patrick’s Day this year and had an absolutely rocking time. Seriously, it’s like a smaller, more intimate version of NHC. I was there to give a seminar, but also to attend a bunch of them. One that I was sad to have missed was one entitled ‘The New Technique of Non-Enzymatic Mashing’ by Aaron Hyde, Director or Homebrew for Briess Malting. It seemed like it might be a New Idea.

Fortunately, I was at the same table as him at lunch and got the gist of his hour-long seminar in five minutes. Note that this was my fault, and beer’s: the conference is pretty packed with tasting opportunities . . . if I’d taken more time to listen to him, or been smart enough to attend his lecture, I wouldn’t have made the mistakes which I’m going to chronicle below.

The 411

According to Dan Bies, Technical Services rep for Briess and the guy who seems to have first proposed it, N-E mashing is cold-soaking your grains in water either overnight at low temperature, or in a recirculation mash at low temp. When you do it right it

. . . gives the brewer the ability to capture color and flavor from specialty malts while limiting the extraction of complex carbohydrates (. . .) it provides refined malt components including aroma (flavor), color, FAN, smaller proteins (foam) and enzymes. What you don’t get are coarse starch binding structures including dextrines, beta glucans, and larger proteins (haze). It can be used in various applications including boosting color and flavor in big beers without the cloying and viscous effects of dextrins and beta glucans – thus, making a cleaner and dryer stout, strong ale, or big lager. NEM also creates great foam and mouthfeel in low alcohol beers and concentrates enzymes for high adjunct brews. Another benefit of this method, the spent grain from NEM can be used as an all grain adjunct to make a low color, estery beer, such as Belgian-Style Golden Ale.

Like that, but with more hops

This is telling me I could make a full-coloured and flavoured beer in the mold of an IPA with an alcohol content below 2%? Include me in! The day after I got home from the conference, I got my brew on. My original plan involved a couple of recipes I had on hand: Beerie Smalls, a NE IPA clone. Already at a sessionable strength, the recipe includes 8 lbs of Rahr 2-row, 1.5 lbs Munich 10L and 12 oz of flaked oats, along with an utterly ludicrous amount of hops, most of them in hop stands, and the balance split between primary and secondary fermentation. I had two of these, and my plan was to do a sort-of parti-gyle thingy where I made one with the N-E mash, and the second with the grains added back for a crazy Imperial version. That went awry, but it’s back on the menu in the future. Here’s what I did the first time out.

Step One: Soak Grains in Water

Doughing in at 68F feels so incredibly wrong.

Usually I assemble all of my brewing gear and ingredients, then sanitise All The Things, then start. Since I was going to soak the grains overnight, I started there. I ran tap water until it was as cold as it gets (around 55F this time of year) and adjusted it to 100 PPM of chloride and 150 PPM of sulphate, for a more Northeastern juicy profile. I poured 20 litres (5.25-US gallons) into a sanitised bucket that had a grain bag and all of my crushed grains in it, stirred the beans out of it, popped the lid on and left it sitting.

Brew Day

Next morning I assembled my brewing gear, sanitised everything I could lift, and laid out my hops (there was a lot of them). I went with my Grainfather for this brew. I have a bunch of different rigs for brewing, but I had a lot of other things to attend to during the day, and the Grainfather is a pretty forgiving setup: it never runs out of gas, holds the temperature when you forget to look at it because your busy, and best of all you can use it indoors, where you’re working.

Not shown: honking culture of yeast and lots of other things.

The first thing I noticed about the bucket of grains was how dark and rich the liquid in the mash looked, and how much fine material had settled out.

Clear, non-enzymatic wort above a layer of floury fines

I got busy, pulled and squeezed the grain bag and cold-sparged into the bucket.

Cloudy as can be.

Here’s where I made a technical error that would have been prevented by 90 seconds of search time or a less impulsive personality. After pouring the hazy goop into the Grainfather . . .

I noticed that the bottom of the bucket had a lot of stuff in it. “Hmm”, I thought to myself, “That stuff is probably good things that need to go into the wort for when it goes through mashing temperature!”

That looks like concrete! I should pour it into the kettle immediately!

Yeah, no. I set the controller to ramp up to 152F to hit my mash temp and left to do some errands. This is the beauty of this setup: no danger in leaving it unattended during the mash, because it will take care of itself. The bad news is, when I got back, the temperature was just over 100F and the breaker had popped on the unit. I popped it back on, and it promptly clicked off again. Any electrician will tell you that if a breaker pops right back after you reset it, you have an issue that can’t be dealt with my tying the breaker down with duct tape or a bungee cord.

I realised that this situation was why the unit has a breaker in the first place: material had built up on the bottom and was preventing heat from transferring into the rest of the wort. It was scorching, in fact, and that was tripping the breaker. I decanted the wort out of the unit, and sure enough:

Nothing a quick scrub with a Scotch-Brite pad didn’t take care of in a minute.

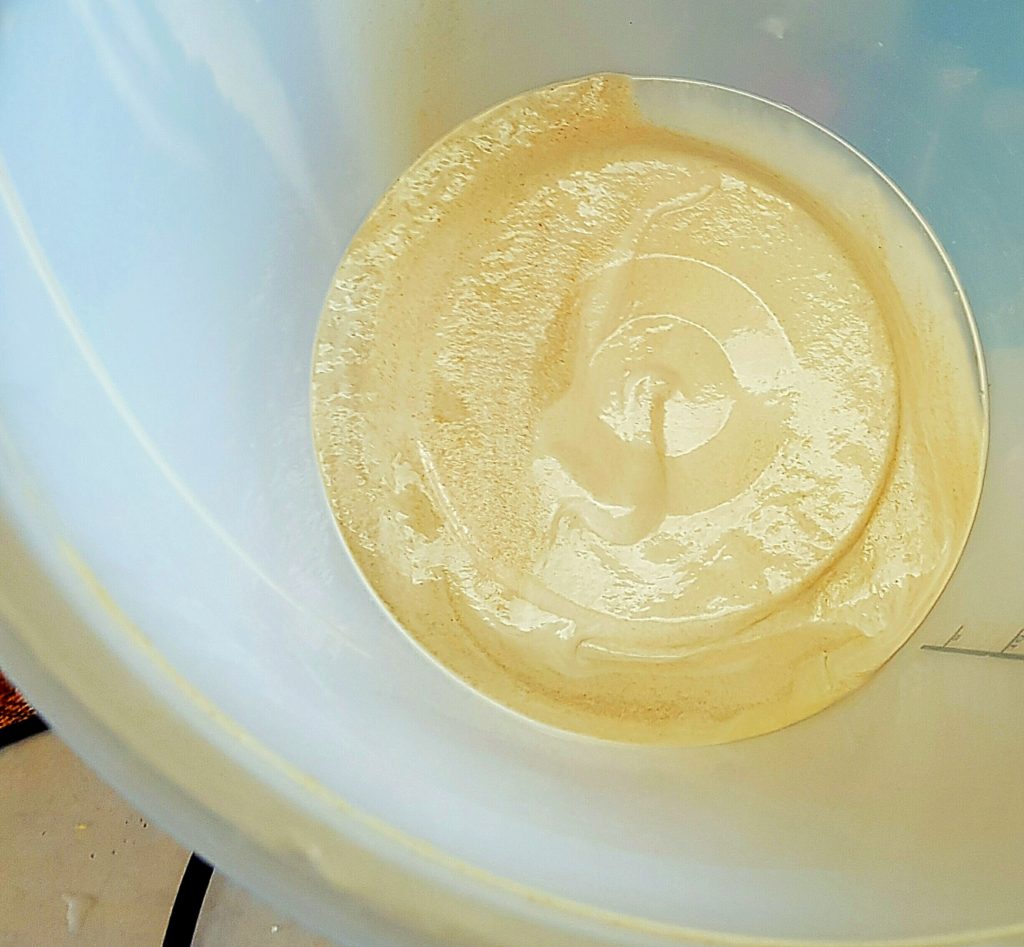
Well, phoo. Obviously those fines were like flour and cooked onto the bottom like library paste. I let the bucket settle for a half hour and wound up with this:

That’s better

I racked the settled wort back into the Grainfather, re-set the program, mashed the liquid to 152F, punched the afterburners and boiled for an hour. At flame-out there were hop additions, and after the wort dropped to 180F, more hop additions. Seriously, there were ridiculous hop additions. Luckily, I had used my favourite Grainfather trick, slipping a Titan False Bottom into the unit before the wort went in. After a proper rest for the hops, I ran it off as chilly as possible.

Got down to 70 after a minute

Here’s the Titan False Bottom holding back all of those hops.

Best add-on to the GF ever.

You may ask why I didn’t just do the soak in the Grainfather if the false bottom is so great? Those fines would have clogged it up like crazy: it holds back hop particles and delivers a beautifully clear wort, but gums straight up with floury grain particles.

I checked my SG in the carboy.

That’s low–excellent!

Corrected for temperature, that’s an SG of 1.024. With the Beerie Smalls grain bill and my usual efficiency I would have expected an SG in the range of 1.047–1.049. If the beer ferments down to 1.010 (the usual, again) I’m going to wind up with a beer just under 2% ABV!

If it retains the grain/malt character, this could be terrifically interesting. I’m even having trouble wrapping my head around it. I pitched a stonkin’ great culture of yeast and let ‘er rip.

Pretty!

Less than two hours later I had a great krausen going, and by the next morning the foam on top was solid as a rock.

A thing of unearthly beauty.

I wish you could smell it: it’s so insanely peachy-fruity-juicy and lush I can barely stand it. My only concern is that this particular style of beer might have too much bitterness for the relatively low level of sweetness in this beer–we’ll just have to see.

Best Laid Plans

As for my plan of making a second Beerie Smalls clone and lumping the spent N-E mash grain into it, I wound up burning so much time fiddling with the breaker on the Grainfather and cleaning it, racking off the fines, etc. I didn’t have time to make a second batch.

HOWEVER, I do have two batches of a relatively low-gravity Oatmeal Stout recipe right at hand. Not only does it have a starting gravity of 1.042, it also has a fairly low hop rate. I’m going to run this again, and make a session Oatmeal Stout and an Imperial, all out of two recipes!

I’ll throw in a quick update on this beer when I rack it in a day or so (and add more hops!) and if you’re in the Vancouver area, I’ll be bringing it to the next Vanbrewers meeting and to the Tri-Cities Brew Club as well.

If this is your first time reading my blog, consider following me on Twitter, Facebook, Instagram, Linked-In, Pinterest and home from the bar. I swear everything I do has a reason. Sometimes that reason is I’m weird and make poor choices. 

If you like wine, check me out at Master Vintner. It’s all cool.

The Word of the Day is ‘Spunding’

krautI know a little German . . .

I’ve been incredibly busy with my Master Vintner project–have a look at some of the things we’ve got going on over here–making wine, tasting wine, talking about wine, and generally loving the whole Master Vintner concept.

In all my time in the consumer wine kit business I wanted to make a kit that I was completely responsible for, not so much because I’m a shiny-eyed control freak, but because I wanted to share something where everything was done exactly the way I wanted it, at each step. I get to do that now, and it’s a rare privilege in business to make something this good, and then to see people making the kits and loving them.

But, I do have other interests–cooking, gardening, photography, travel, motorcycles, hunting, shooting, hiking, reading and generally messing around learning stuff, and, as it happens, suddenly going into deep geek mode when something catches my imagination (I have been  accused of having ‘Attention Surplus Disorder’).

Which leads me to one of my latest offshoots: I was doing research on the Charmat Method, a process for making sparkling wine in pressure tanks, rather than carbonating in the bottle. It’s an interesting compromise: force carbonating, like the way they get the fizz into most mass-market beers, leaves large bubbles that are described as ‘coarse’, but it’s very inexpensive to do. Bottle conditioning is the traditional method for making champagne, and it uses a dose of sugar and yeast inside a sealed bottle to produce carbon dioxide in situ. That makes for fine, creamy bubbles, but it’s expensive and time-consuming. Do the conditioning in a tank and bottle it from there the theory goes, and you’ve got a decent product at a reasonable price.

The thing is, letting yeast have their way with sugar in a sealed vessel is tricky. Most homebrewers have had, or been present for a ‘bottle-bomb‘, where the carbonation was so high that either the bottle gushed foam like a fountain as soon as it was opened, pouring out until it was empty, or it actually exploded right where it was sitting. Glass is not a flawless choice for pressure applications.

Stainless steel tanks are pretty good, but past a certain point, unless they’re built like scuba tanks, they’re nearly as dangerous as a bottle bomb going off. What you need is a pressure relief valve that you can set accurately to hold in the amount of pressure you want, but will vent anything past that. Sounds easy, and it is, if you’re a gas-fitter or a millwright, but for home beverage applications those things aren’t just lying around.

Except all the bits are there, right in front of you, if you speak German.

A Spundapparat is a pressure relief valve used in the process of krausening (those wacky Germans, it’s like they have a word for everything!). Krausening is exactly the same process as the Charmat method, but more German and less French. Tootling around on the internets gave me a good idea of what the deal was: while the classic use was krausening, spunding valves are also used to ferment beer under pressure, allowing beers to finish faster while producing fewer off flavours and undesirable characters.

I didn’t have any appropriate candidate wine for a Charmat process on hand, but I did have access to a sample of WLP 925 High Pressure yeast, designed to be fermented at 14 PSI, and the ingredients for a Pre-Prohibition Pilsner on hand (didn’t know I made beer? Well, it’s yet another hobby . . .)

A beer? A pressure yeast? An interesting apparatus to play with? What ho! In geek heaven, I hatched a plan and immediately launched it!

And then I immediately stopped because the parts I needed for the spunding assembly wouldn’t arrive for a couple of weeks. Poo. I put out a call to my brewer friends and one of them came through for me. Nathaniel lent me his spunding rig, which he used for transferring beers in his solera (it has to do with soured beers, a fad I’m hopeful will soon go away).  His rig lacked a proper pressure gauge, but it wouldn’t be mission-critical in this application–the pressures were pretty low and I could fiddle around a bit.

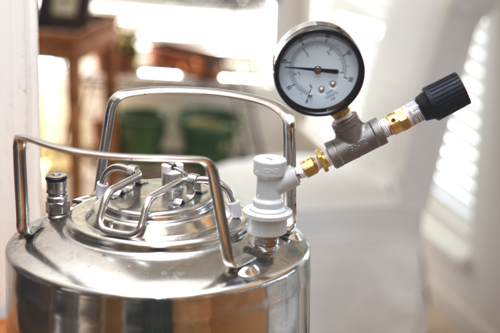
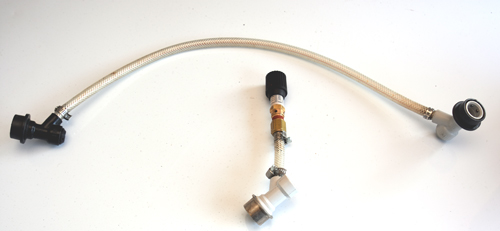
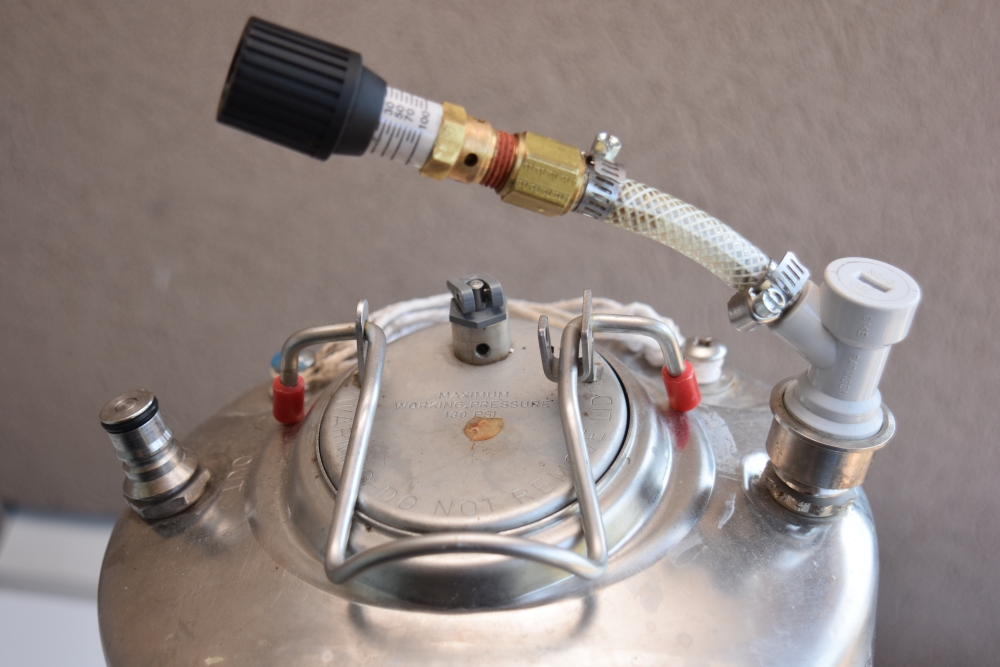
Here’s his rig, and a tricksy little blow-off hose I rigged up. I’ll explain that in a second.

nathan's
Simple, yet effective, much like me.

Attached to my blow-off keg (see below).

spundy 3
Very technical

Here’s why the funny transfer hose: the grey disconnect is a gas-in connector. The black is a product-out connector. Product-out posts on the kegs have a stainless steel tube that runs to the bottom of the keg, allowing the liquid inside (wine or beer) to flow upwards, through the tap, into your glass, while the gas-in posts end right at the top of the keg. Makes sense, right?

spundy-5
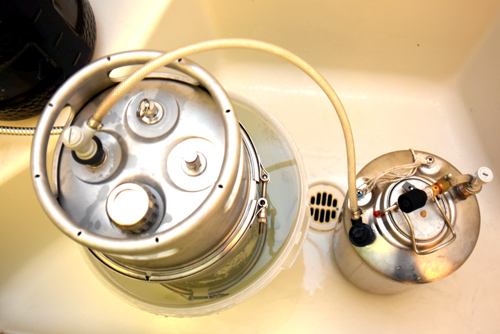
21st century technology vs. old-school

I got a second keg, and set the whole thing up as a blow-off vessel. The very cool and complicated keg on the left is a Big Mouth™ Modular 5 Gallon Keg. Not only does it go from 1-gallon to 5 gallons with a few turns of a wrench, but also it has a port on top that allows you to hang an oak stave from (and retrieve it at will!) or a dry hop bag to flavour your beer. It’s my favoritest thing right now.

In case any foam-up during fermentation would flow through the gas port and travel down the product port in the smaller keg. Both kegs were sealed and purged, the spunding valve set at 14 PSI and the yeast was pitched.

It worked like a charm. The beer fermented dry in five days, and I heard the faintest of muttering from the valve as it uh, passed gas.  I moved it to my keezer (keg refrigerator made from a converted deep freeze) to drop the yeast and chill down.  The beer is quite good, but the yeast is non-flocculent (it doesn’t want to settle down). It’s not a huge flaw, but next time I’ll filter it to make it shiny and bright.

PPPils
I love a tall blonde . . .

Now I had all sorts of ideas. My last round of winemaking with my Winemaker’s Reserve kits had me kegging a lot of them, in accordance with Vandergrift’s Second Principle of Winemaking  (A winemaker’s desire to bottle wines is in inverse proportion to the number of bottles they have filled in their lifetime). In fact, I had a few kegs in the back of my car . . .

car
“What kind of car is that? ” “It’s a Volkswagen Keggerator.”

I wanted to do a pressure transfer of wine from one of my 10 US-gallon (38 litre) kegs to my awesomely excellent Master Vintner® Cannonball® Wine Keg System and the spunding rig would allow me to do a transfer under nitrogen gas, slowly and carefully. All I had to do was rig up a product-product transfer hose, attach a gas line between the big keg and the Cannonball, attach the spundapparatus to the Cannonball gas out, and then slowly dial back the spunding pressure and it would transfer meek as a mouse.

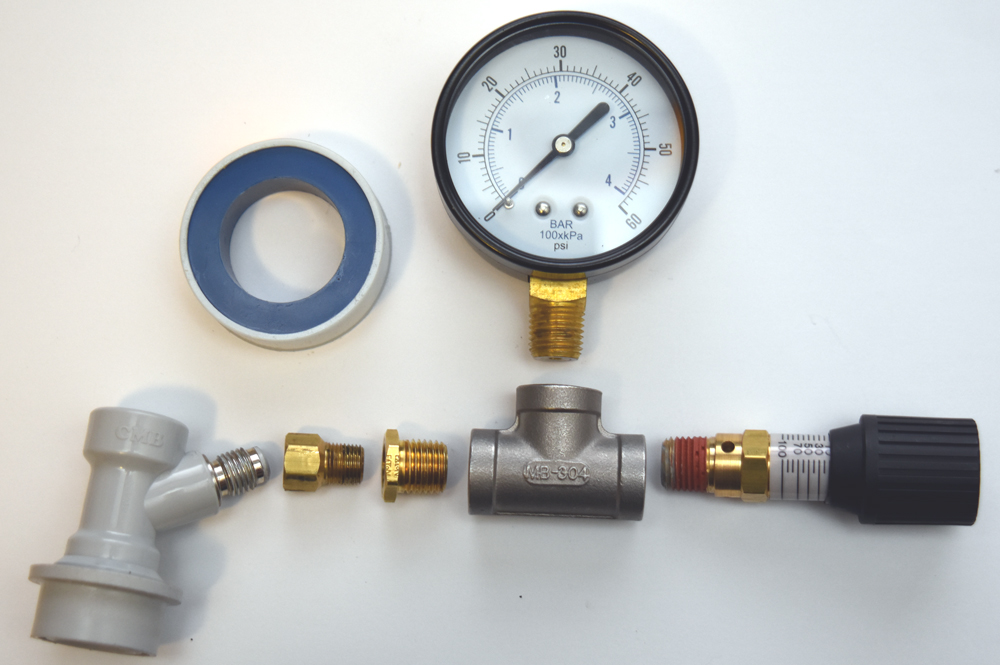
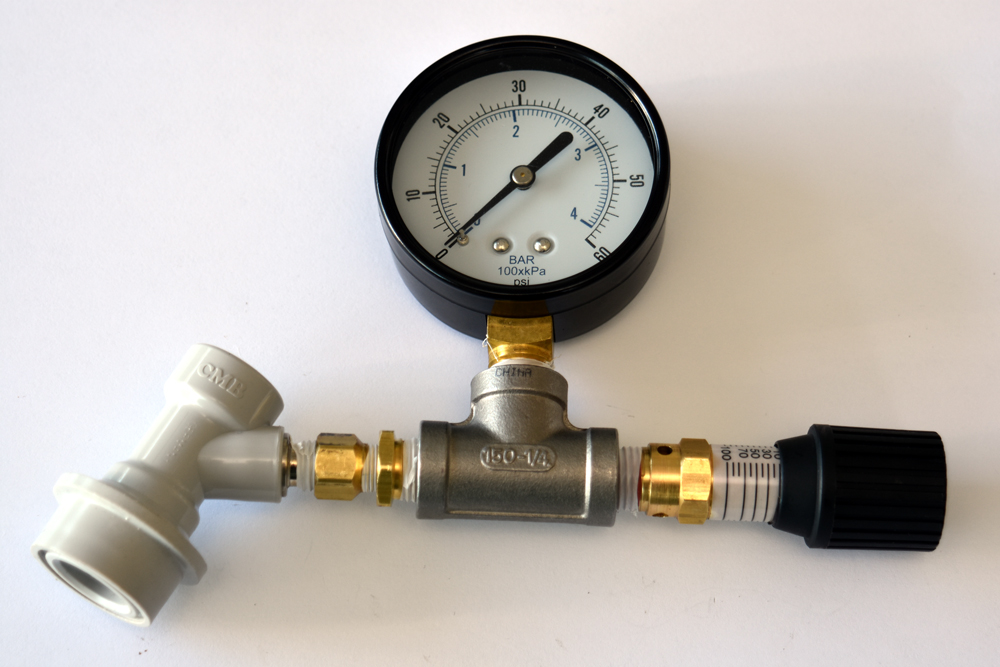
But I wanted a more accurate pressure gauge. the little direct rig was fine, as far as it goes, but I didn’t really trust it to be accurate. Fortunately, by now all of my parts had arrived, and I put my own special rig together.

spunding-02
I had to order the pressure relief valve on the right, and the two brass connectors on the left, but everything else was just lying around the house. Yes, my house is like that.
spunding-01
Neat as a pin. Doesn’t even look like I did it!
pretty-rig
Mr. Spundy in action!

It worked like a charm! Not only did I transfer wine from one container under inert gas to another, but also I did it without racking or pumping. A professional brewer or winemaker would be rolling their eyes at this point, as both of these are standard operations in the industry, but for a home winemaker it’s a pretty cool step, and it only cost around 25 bucks plus some Teflon tape.

What’s next for my little rig? I think it’s time to grab a Winemaker’s Reserve Pinot Grigio and do a Charmat-process sparkling wine–with good management and a little work I should have it ready to drink by the holiday season this year!

Unless, of course, I get distracted and do something even weirder in the meantime. I’ve been meaning to make a high-gravity Belgian beer with Muscat grape juice in it . . .

Captain Video!

mv blog face
A face you can trust! A wine you’ll love!

I’ve been busy! The Master Vintner website has launched and we’re busy filling it up with great wine kits, great deals and lots of cool info about making your own wine–and having lots of fun with it. One of the things I’m pursuing is making a bunch of new videos, right here in Chaos Manor.

Before I started making new videos, I went back and reviewed the stuff I’d done before, some of which is on my YouTube channel, with more on Northern Brewer’s channel. Some of it has even been bootlegged by other people, and much to my surprise some of my videos have gotten hundreds of thousands of views–how does that even work?

I thought I’d curate a bunch of them so you could pick and choose right here if you wanted to have a look at what’s going on with home winemaking right now. If you like ’em, go ahead and subscribed to my channel and you’ll get updates when new stuff is uploaded.

Note that some of these videos are of me from previous employers: don’t worry, the information is still good and you can learn just as much.

Winemaking Techniques

https://www.youtube.com/watch?v=PuoXO5jjWxU

https://www.youtube.com/watch?v=A3jfg2Ri7Bw

Other Winemaking Topics

https://www.youtube.com/watch?v=eGXkxtW2upg

https://www.youtube.com/watch?v=QGhqKCw7HTY

And some silliness

https://www.youtube.com/watch?v=34XzwKqR1jY


The Naked and the Deforested: Unoaked Wine

‘The absence of evidence is not evidence of absence’—Sherlock Holmes

‘If trees could scream, would we be so cavalier about cutting them down? We might, if they screamed all the time, for no good reason.’ –Jack Handy

From little acorns  . . .
From little acorns . . .

I’ve written many times over the years about oaking your wine, including barrels, oak substitutes and élevage techniques for improvements. This time it’s a little different: it’s all about wine without oak.

Of course, not using oak on wine is a time-honoured tradition for many varietals and styles, and often for good reason. There are few things as disconcerting and deeply weird as a heavily oaked Riesling, and few Rosé wines show better with a heavy layer of deeply toasted oak covering their finish.  Oak just doesn’t make sense with many highly floral-aromatic wines, which is why only a few of them get exposed to it, but there are some reds that are happy without oak as well.

That's some mighty fine barrel action
That’s some mighty fine barrel action

Almost all red wines do get at least some oak exposure, and the trend in the last 30 years has been to over-oak lesser wines to increase their price-point and saleability. This is because oak is such an immensely useful tool. It’s often used in a knee-jerk way, both to bring out the character of wine (élevage) to cover flaws (cheating), to add a bit of glamour and sophistication to an otherwise undistinguished vintage (lipstick on a pig), and sometimes, just because ‘that’s the way it’s always been done’ (mechanical winemaking).

Chardonnay? Chardon-YAY!

A happy reversal of this state of affairs has come from one of the usual suspects: Chardonnay. Easy to grow, cropping well, and relatively simple to make into drinkable wine, Chardonnay became a target for Oak Abusers in the 1980’s. Like many terrible things, it was caused by Australians. They found that the more oak they added to their heavy, hot-climate Chardonnay wines, the better they sold. A little math showed them that barrels were too expensive for polishing wine in a plonk price category, so they tended to use granulated oak products—by the shovel full.  Throw in more serious wines (many from California) that used barrels like a weapon, and you had a bunch of expensive Chardonnays that were thick, viscous, creamy and woody.

More recently, ‘unwooded’ Chardonnays have shown up. Some are still in the cheap and cheerful category (under $7 in most places) but others have more serious aspirations—Kendall Jackson, makers of one of the most popular and oaky Chardonnays in America have started making an unoaked version, and the tricksiest and most clever winemakers in the New World have discovered that slightly less over-ripe grapes and no oak can not only make a better wine, one more like an old-world white Burgundy, but also that leaving off a brand new barrel means they’re much cheaper to make—and sell.

Oak isn’t the answer to every winemaking question, and to understand the complexity of the varietal character the grape can bring to a finished wine it can be very useful to taste it without any oak at all. What will happen if we peel back the layers of wood and reveal the form of the wine underneath? To figure that out, it’s important to know what oak actually does. As the man once said, if you want to break the rules, you first have to know them.

Why Oak At All?

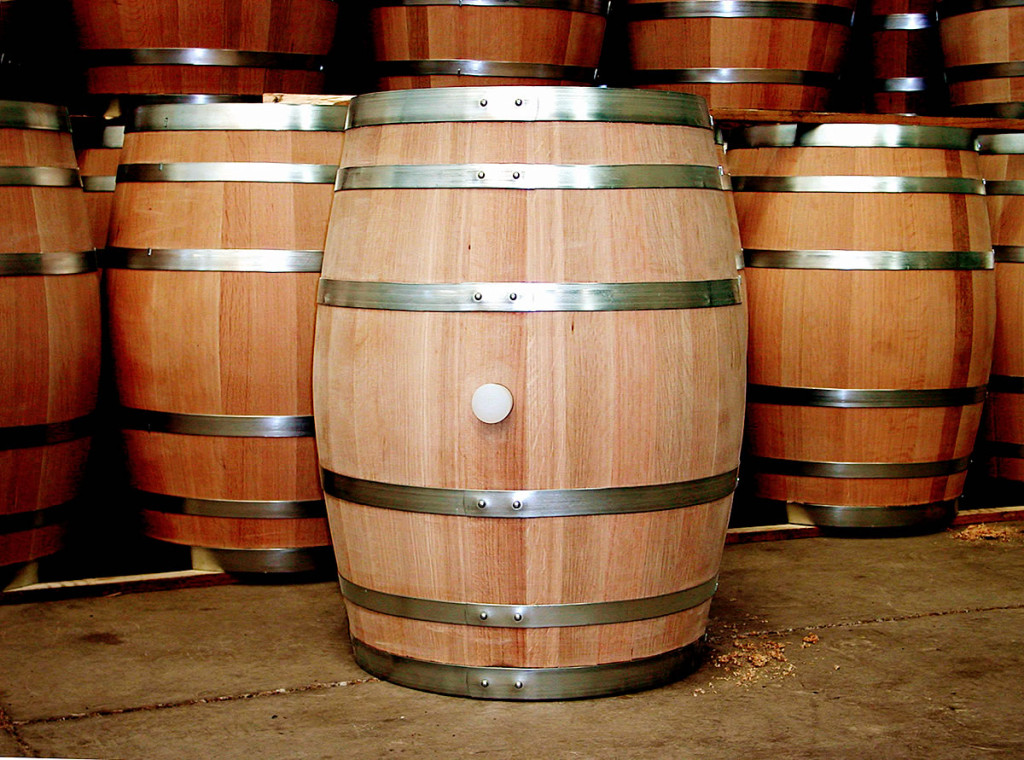
People have enhanced aromas and flavoured wine with various things over the years, from herbs, fruits and honey to pine resin, seawater and lead-based syrup (yes, really), but in the very beginning, oak was never intended as a flavouring agent. It was a container.

Although coopers were making water-tight wooden buckets nearly five thousand years ago, these were all open-topped and wouldn’t seal airtight or stack well. Around 900 BCE technologies improved, and fully-closed, airtight barrels were available to store not only liquids, but also anything that had to be shipped—barrels are impressively light and strong, stack well, and are easy to move and handle, and keep things in good condition.

A fine stack
A fine stack

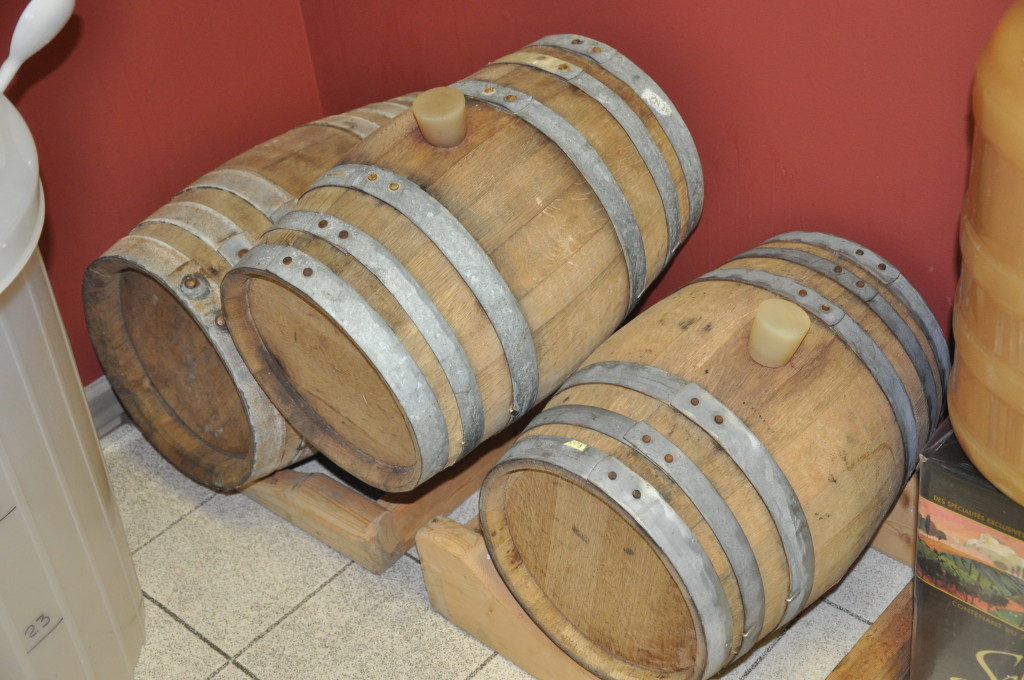
It was probably the very first person who kept wine in a barrel for any length of time who noted the amazing changes the liquid inside underwent: wines kept this way would become rich, complex and more flavourful than wines in clay containers (and way less ‘organic’ than wines kept in animal skins!)

Part of this is due to small amounts of oxygen that get introduced into the wine through barrel handling: racking from barrels and topping up (to keep the airspace in the barrel to a minimum, preventing serious oxidation). More importantly from a gross flavour perspective, toasted oak has many complex chemical compounds, each contributing flavours or textural note to wines.

Most familiar of these are vanillins: phenols in the wood interact with the wine to produce sweet, toasty aromas of honey and tobacco, often described as ‘vanilla’. Barrels also have their own tannins, just as grapes do. Not only do they contribute to astringency, mouthfeel and structural complexity, some of them help protect the maturing wine from oxidation.

Aside from the flavour and aroma of fresh-roasted vanilla bookcase, oak also helps decrease ‘green’ or tart young flavours in wine. Oak is like fine-grit sandpaper to a rough surface, levelling unevenness, taking off burrs, and giving a smooth, lustrous finish to a previously lumpy and scratchy wine.

Why and How to Not-Oak Your Wine Kit

Kit manufacturers are already producing kits that declare their wood-free status, all of which are currently Chardonnays. This is a response to the change in the commercial market, which they track very closely. As the man said, if you would plant a seed, follow the plough; you do not walk ahead of it.

If you’d like to try other varietals au naturel, you first need to consider the way wine kits use subtle procedures to achieve commercial character. Many kits require you to add oak directly into the must, before pitching yeast. This might seem a bit odd to non-winemakers, as pre-fermentation new oak is commonly only emphasised in commercial wine in regards to barrel-fermented Sauvignon Blanc, or Chardonnay. It isn’t unique to kits and kit manufacturers didn’t invent this technique. Like many great ideas, they stole it.

40 or 50 years ago, before stainless steel was ubiquitous, wines were mostly fermented much as they had been for centuries, in wooden vessels. Because of the difficulty (real or perceived) of sanitising wooden fermenters, winemakers who could afford to, adopted stainless steel as soon as they could, reaping the added benefit of much simpler temperature control in the bargain.

This changed in the last 20 years, as some commercial winemakers came to feel that wines fermented to dryness in stainless steel had less harmonious fruit character and seemed less complex even after barrel ageing. This is because during fermentation yeast modifies oak characters, sequestering some of the sharper tannins, making the wine easier to drink much earlier, and interactions between wood and wine during fermentation generates furfural compounds, which promote a coffee/tobacco note.

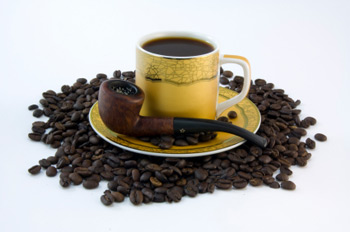
coffee-pipe-tobacco
Please don’t smoke coffee beans

Of course, there are some issues with barrel fermenting red wine: it’s only suited to small lots (if you’ve ever done a red wine from grapes, imagine getting a hundred tons of grapes into and out of your barrels—wow!) and there are difficulties controlling temperature inside the barrels. Fortunately, oak-products are there to rescue the situation: chips, chunks, powders, staves, spirals and beans are used to get oak into wine without having to get the wine into wood, giving the same positive benefits at a much lower cost.  They can be added directly to fermenting musts, even before the yeast, and clean-up is a breeze—they go out with the compost.

Post-fermentation oak has a more direct transfer of wood character, but it has the same outcome: a layer of character on top of the fruit that helps harmonise and smooth the flavour and aroma of the wine and promotes earlier drinking.

Clean, crisp and showing pure fruit

Summing up: without oak your wine will have disjointed fruit character, less mouthfeel, lower complexity, won’t have any notes of spice, vanilla, coffee, or tobacco and will need longer aging before you can drink it—sounds like a winner, doesn’t it? That assessment is only from the point of view of someone who is already oak-positive; a real fruit-head/oak-negative type is more likely to view it as ‘truer varietal fruit, cleaner flavour profile, a finish free of extraneous wood character, and a wine that rewards aging’, which sounds like a lot more fun, and worth taking a swing at.

Which Wine?

You can de-wood any kit you like—any wine your favorite kit producer oaks can be unoaked, from aromatic whites, big reds and little, and anything in between. You’ll have a completely different flavour experience, but there are a couple of things to keep in mind. First, many reds achieve balance between in fruit character with the help of wood tannins. In the absence of those tannins the fruit that shines through might seem very aggressive—what’s called a fruit bomb. On the other hand, since oak can give sweet, vanilla notes the fruit could be in more balance because the acidity of the red will be easier to perceive in the absence of wood.

Hard to drink at that angle

Second, unoaked wine does require more age to come to drinkability. Without the creamy schmear of buttery wood to smooth out aromas and acid, fruit, tannins, alcohol, and any residual sugar, the wine will seem disjointed and jangled long after an oaky version  has knit together. How long? Depends on too many factors to judge, but it’s likely to be 9 to 12 months before it stops being darty and nervous and comes to drinkability.

But when it does turn that corner you’ll be drinking something very different and special: clean and unvarnished varietal fruit, harmonised only by the character the grapes brought to it, the soil it was grown in—and your hand as a winemaker.

Master Vintner Small Batch Part 5: Bottling Day

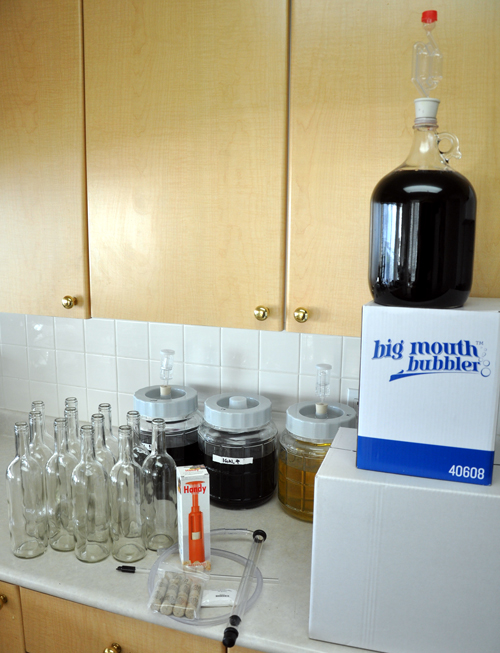
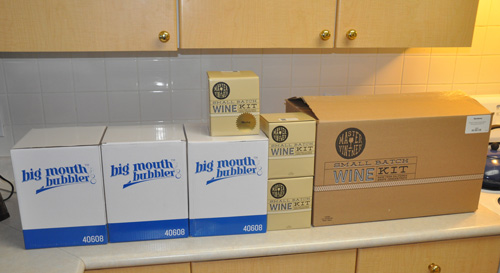
One full equipment kit, three extra Big Mouth Bubblers and three extra wine kits!
Where it all started

It’s finally here! After starting my Master Vintner wines, racking them from the primary fermenter, and doing the fining/stabilising steps, bottling day has arrived, and I’m all about getting my Cabernet Sauvignon, Merlot, Pinot Noir and Chardonnay into the bottles–well, almost all of it into bottles, along with a little of it into a secret project . . . more on that in a minute.

rack-setup
Time to rack off the sediment.

My first step was to clean and sanitise all of the equipment I’d be using, including my autosiphon, bottle filler, jugs and such–as always, cleanliness is next to goodliness in winemaking.

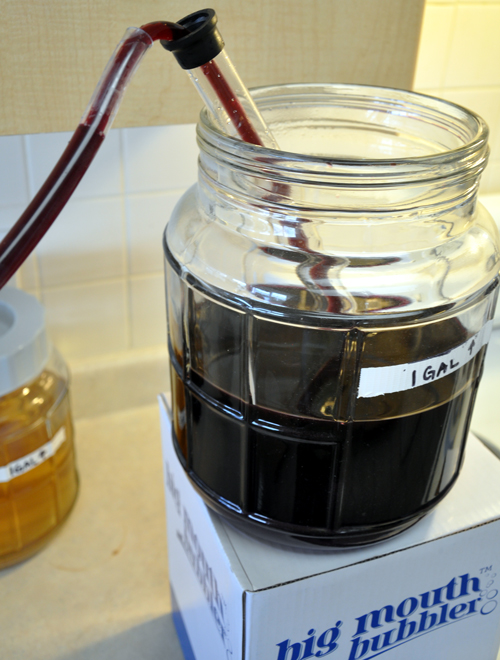
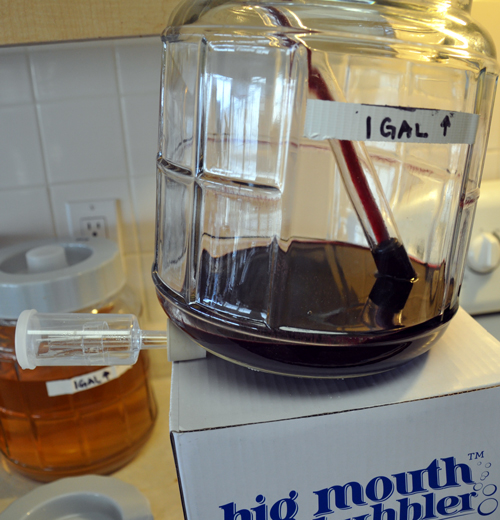
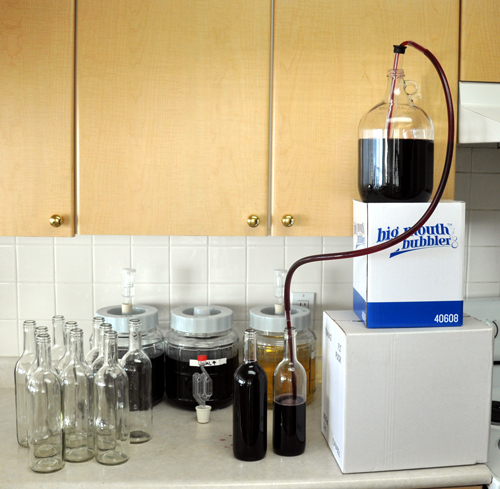
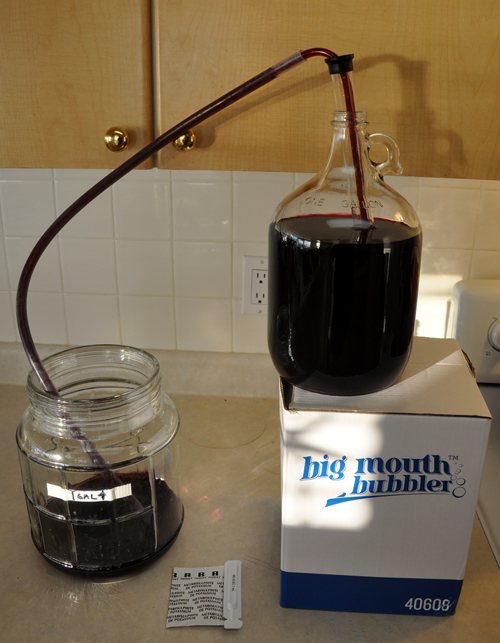
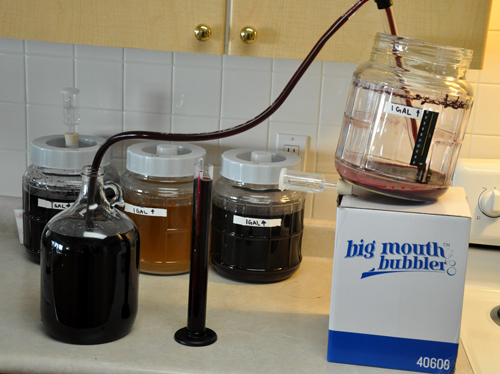
Next, I set up my racking station by the simple expedient of lifting my Little Big Mouth Bubbler on top of a convenient box on my counter. If you haven’t used one of the Master Vintner Small Batch kits yet, it’s hard to convey just what a joy this is. I’m old-school in many ways, having started off making wine in lots anywhere between 23 litres (6 US gallons) and 650 litres (three 60-US gallon barrels) at a time. With truly huge amounts you need a pump to move the wine around. A standard kit wine batch of 23 litres isn’t nearly as demanding, but lifting full carboys from one shelf to another, or putting them up on a high place so you can rack the wine down into a clean carboy on the floor (which then needs to be lifted back into the winemaking area!) starts to wear on the lower back after a few thousand batches. At only a single gallon, you can easily lift the Small Batch kits onto a convenient box or shelf above your kitchen counter, just as easy as getting a gallon of milk out of the refrigerator!

Once the fermenter was in place I racked the wine off of the sediment. Doing this is really helpful, since there’s a decent chance that the siphon will disturb sediment from the bottom of the carboy while your moving the hose from bottle to bottle. Rather than risk getting cloudy wine, it’s better to move all of the clear wine into a new vessel in one go, and then you can relax from there.

rack-from
Note the siphon rod carefully placed on the far side of the fermenter–this will be important as we get to the bottom.

When the wine gets down to the bottom, the level of sediment needs to be carefully monitored. Remember, the point of racking is to get 100% of the clear wine and leave the muck behind, so don’t leave any of that delicious grape nectar behind.

A careful tilt keeps the end of the autosiphon in the wine.

To get and keep that tilt hands-free I usually improvise some kind of prop or wedge. Because I was making wine in my kitchen (another thing Small Batch Kits makes easy!) my carboy wedge wasn’t around. No matter: I just popped a bung under the front of the carboy and watched the levels as they dropped.

Never leave a man, uh, a drop of wine behind.

Just to make sure I was being completely efficient in my racking, I measured the amount of sediment left in the bottom of the Little Big Mouth Bubbler after it racked over. It came to just over couple of tablespoons all in all–which meant I was going to get a total of about 3.75 litres out of my US gallon (3.78 litre) batch, meaning I could fill five bottles, which is exactly what I wanted.

The wine was exceptionally clear on racking.

Limpid and gorgeous.

I could have bottled it right there, but since this was an actual test batch for quality assurance and proof of concept purposes, I pulled out my Buon Vino Minjet filter. Filtering doesn’t actually clear a wine: that’s what fining agents are for. Clearing polishes a wine so that it sparkles with a brilliance like diamonds. A former colleague had the best analogy for wine filtering: it’s the difference between a freshly washed car and a freshly waxed car. Both look great, but your eyes can instantly tell which car was waxed and polished because it glows. Same with wine.

Now that's shiny!
Now that’s shiny!

It’s easy to see this in white wines: you could read the fine print of an EULA through that Chardonnay!

I got all four batches of wine through a single set of Buon Vino #3 pads in about 20 minutes, including sanitising and prep, going from the Chardonnay to the Pinot Noir, then the Merlot and finishing with the Cabernet Sauvignon. Yet another bonus feature of the Small Batch kits: you can make four of them and only need the tiny, convenient BV mini, rather than a much larger filter.

Rest, little filter: you've done a man's work today.
Rest, little filter: you’ve done a man’s work today.

While larger filter systems need a washtub or a laundry sink for cleanup, the Minijet is kitchen sink-friendly for cleanup. Note that the colour you see on those filter pads isn’t anthcyanins (grape pigment) stripped from the wine. It’s suspended material from the wine itself, stained by those pigments. That suspended material, principally yeast cells and colloids, would eventually settle out of the wine on its own. Even though the unfiltered wine was perfectly clear to the eye, after a year or two in the bottle a bit of colour would deposit out on the side or bottom of the bottle. Hurrah for filtering!

Next up, time to fill my wine bottles. I had a mixture of standard wine bottles in Flint (clear) and some swing-tops, also in clear. I like using swing tops for wine that’s going to be analysed and/or destroyed in testing–not because of any technical superiority of swing tops, but because I can never seem to find a dang corkscrew when I’m in the wine lab.

Bottles, autosiphon, siphon tip, impact corker, corks.
Bottles, autosiphon, siphon tip, impact corker, corks and sulphite for sanitising the bottles.
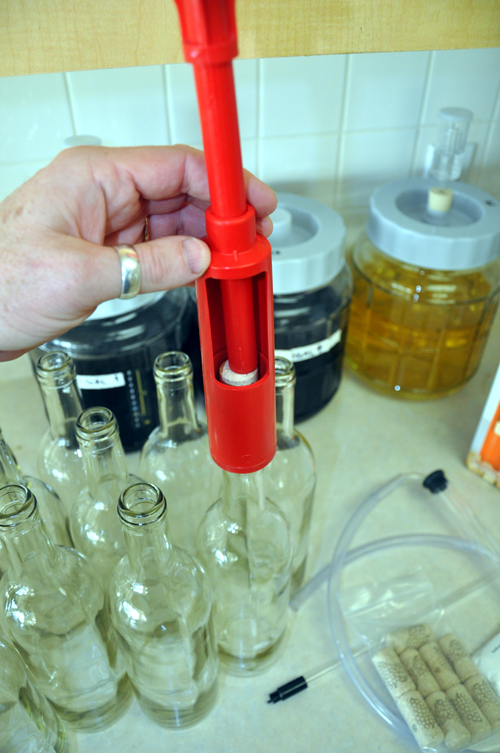
Also shown in the picture above is the Handy corker. It uses a plunger and a compression sleeve to press-fit the corks into the bottles.
Takes a little oomph, but works great.

Because of the forces involved, it’s a good idea to use the (included) #8-sized corks and soak them in a bit of warm water before use. While I’ve used the Handy and it’s a fine unit, I had another plan in mind for my bottles. But first, I had to fill them.

Fast, clean and efficient--now that's good winemaking!
Fast, clean and efficient–now that’s good winemaking!

Getting the bottles filed without splashing, spilling or endlessly fiddling to get the right fill level (very bottom of the neck, to leave the width of two fingers below the bottom of the cork) used to be a drag, but a siphon filler (included in your equipment kit!) makes it a snap.


The one-way needle valve on the tip of the rod stops the flow of wine as soon as you pull it up, while the volume of the rod displaces exactly the right amount of wine–when you fill the bottle to the top and then pull the rod out, the level of wine is perfect to accommodate a cork!

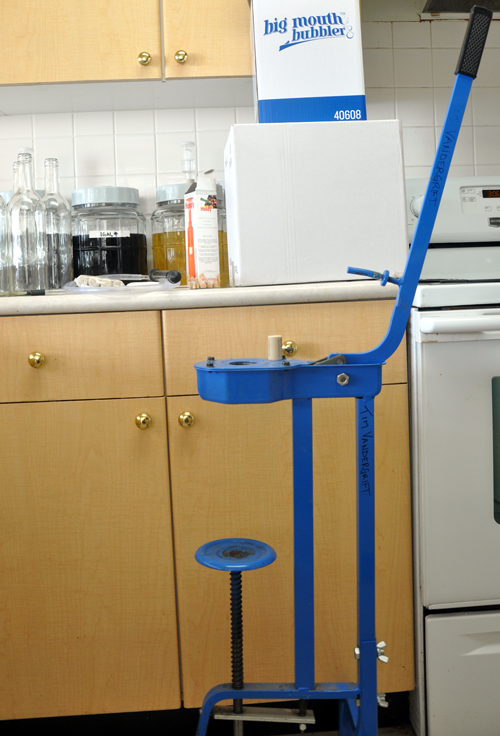
With the bottles filled, it was time to put corks in. My alternate scheme was to use my Italian bronze-jawed floor corker. This mighty beast has been my faithful companion for 25 years and tens of thousands of bottles of wine.

Industrial Age technology at its finest.

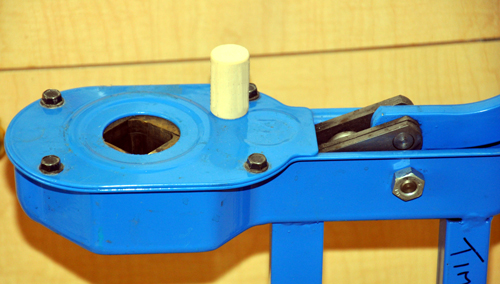
The key to how well this thing works is in the amount of leverage it can bring to bear, and how cleverly it compresses and inserts the cork into the bottles. The heart of the matter is the set of bronze jaws. Not brass–brass is too soft, and corks would wear it away in a short time, and this bronze is the same stuff they make steamship propellers out of.

You're in for a squeezy time, Mr. Cork.
You’re in for a squeezy time, Mr. Cork.

The jaws move as the corking arm is pulled, squeezing the cork down to just slightly larger than the size of a pencil. When it’s at is tiniest, the cork finger comes down. pokes it into the bottle and you’re done.


It’s as easy as that, every time.

After only a few minutes all of the bottles were filled, corked and swing-capped.

snu
Say, what’s with that pink wine?

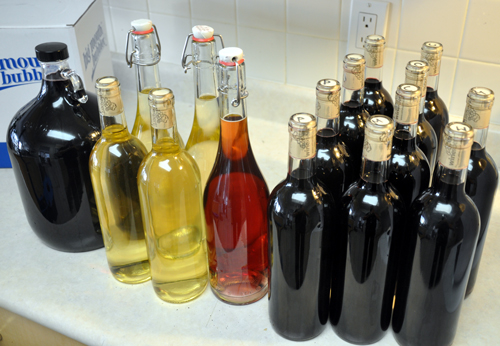
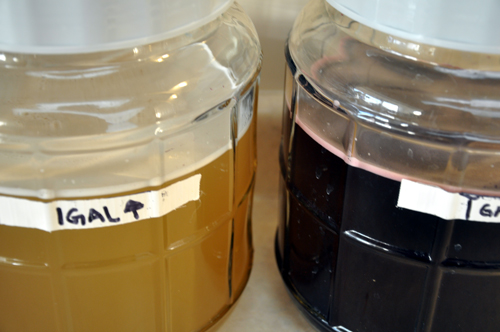
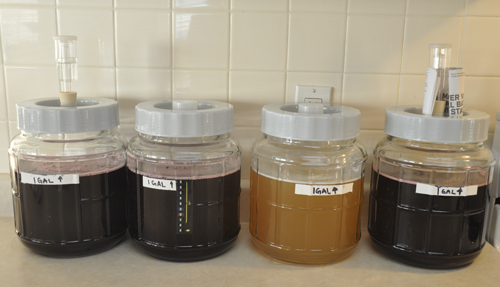
Astute observers will notice that there are 15 bottles, a gallon jug and one bottle of pink wine, which doesn’t match up that well with the whole four batches of five bottles each motif I started with. The gallon jug is a blend of Cabernet Sauvignon and Merlot. I blended it at a rate of 3:2, Cabernet to Merlot, after a few benchtop trials. I’m going to let it marry in the jug for a month or so and taste it before bottling.

The pink wine is slightly notional on my part–it’s my job to do the weird stuff so you don’t have to. Or, more accurately, so I can explain it when you do it without my knowledge! It’s a blend of 4% Pinot Noir into the Chardonnay. That kind of blending is a standard technique in commercial winemaking, and I was curious to see how it would marry up with a little time in the bottle.

How does it taste? Even though it’s very young, it’s everything I’d hoped: good fruit, varietal character, smooth tannin, balanced acid and a long finish, especially for a wine just in the bottle. I’m going to do a more formal taste-test in another three weeks, and then once a month after that to see how it’s progressing.

I’ve already ordered another four kits–I’ve never made wine with so little effort or mess, and I’m going to keep production up. Heck, it’s no more work than keeping a vase of flowers on the counter, with the added bonus, it’s wine!

Master Vintner Small Batch Winemaking Part Four

You may remember Master Vintner from such posts as Master Vintner, Your Personal Wine and Master Vintner Part Two: Racking Day. As such you might well wonder, ‘What happened to part Three?’ Don’t worry, all will be explained.

Laid out and ready to go

Step three and step four kind of run together, so I’m blogging about both of them at once. When we last left our Master Vintner Small Batch wines (Chardonnay, Merlot, Cabernet Sauvignon and Pinot Noir) they were resting comfortably in secondary fermentation. The next step was to . . . READ THE INSTRUCTIONS!

Yes, I keep coming back to the importance of reading. It’s your guarantee of success! A quick read-through let me know that I would have to check the specific gravity and then rack the wine from the secondary to the Little Big Mouth Bubbler again for stirring and fining/stabilizing additions.

I sanitized all of my equipment, took a specific gravity reading (0.992 and rock steady) and then transferred the wine from the jug to the LBMB.

Auto-syphon: how do you live without one?

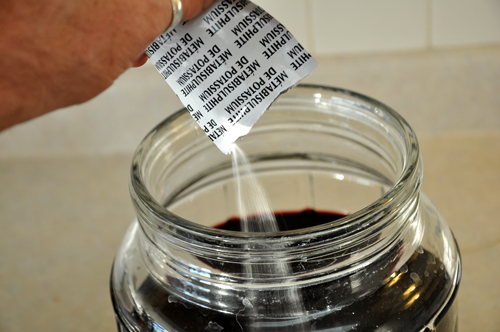
Once all of the wine was transferred over (leaving very little behind in the jug–less than a couple of tablespoons of goo) the next step was to add metabisulphite to prevent oxidation (browning and loss of flavour) and prevent bacterial spoilage (going icky).

Sulphite is your friend, and wants you to be happy.

Let’s talk about sulphite. It’s one of the most common food additives in use today, and it’s been in continuous use in winemaking for many centuries. It’s in every preserved food you buy and in lots of things you wouldn’t expect (noodles? Check. Frozen orange juice? You bet! Pancake syrup? Sure!) It’s safe and almost completely benign. If you don’t believe me, check out the world’s #1 Authority on sulphite use in home winemaking.

So that’s sulphite taken care of. In it goes!

Be sure to tap the packet: a bit of the powder can get caught in the corners.

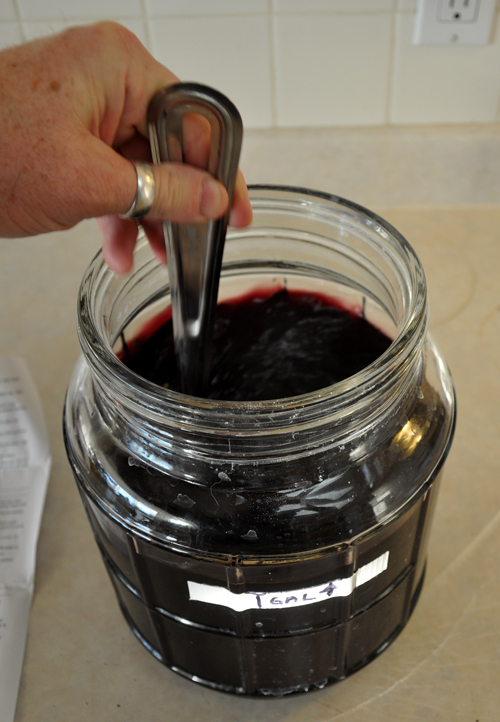
After the sulphite is in we have to stir the wine to distribute it, and to drive off gas in solution. This is crucial to the success of the kit. Carbon dioxide gas is produced by the yeast during fermentation. In a commercial winery this is not much of an issue because they take one or two years to get the wine ready for bottling, and in that time all of the gas escapes. Master Vintner kits are designed to be ready to bottle in just four weeks, so the gas has only a short time to escape from the wine. To stay on schedule we need to aid the process through mechanical agitation.

A stirring experience.

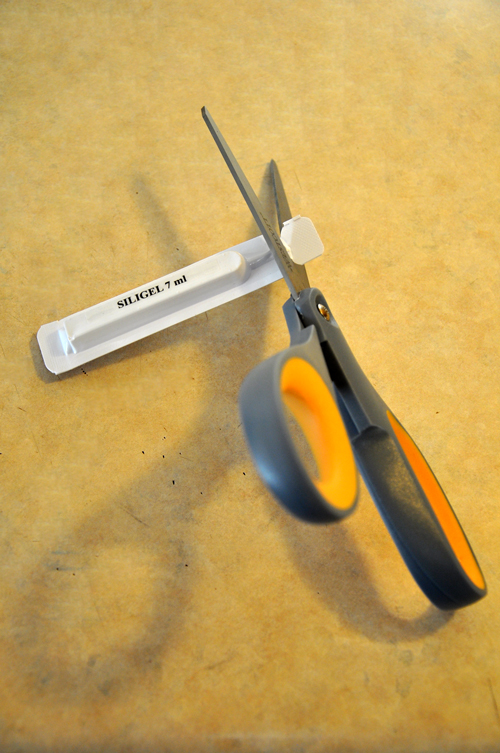
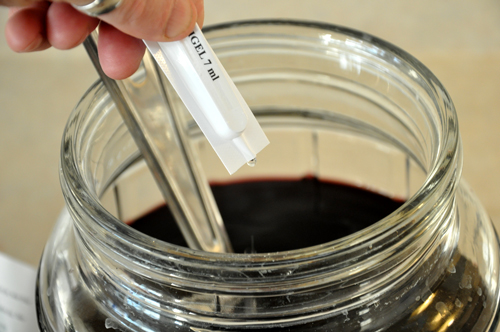
I stirred the wine for a full sixty seconds and then added the first fining agent. Fining is the process of dropping suspended material out of the wine so it’s clear enough for bottling and drinking. Common fining agents are either mineral in nature (Bentonite, Silicon dioxide) or a colloid/gelatine (Isinglass, Chitosan) and in wine kits they’re often used in pairs. The instructions say to add the packet labeled ‘Siligel’, a silicon dioxide solution–essentially really finely pulverised beach sand in a liquid and then stir again.

Sharp scissors are an essential winemaking tool

Cut the tip off of the Siligel packet . . .

Squeeze!
Squeeze!

. . . and then another sixty seconds of stirring.

That's what good stirring looks like--get the fizz out.
That’s what good stirring looks like–get the fizz out.

I popped the lid, bung and airlock on again and over the course of the next two days I kept my spoon in handy and stirred the wine again for sixty seconds at breakfast, lunch and dinner–since it’s right in my kitchen it’s an easy step to take right there when you’re already making a sandwich or preparing your Sunday roast.

After two days of stirring it was time to go on to Step Four, Stabilizing and Clearing. Since it’s almost exactly like the last step, I’m putting it all into this one long post to keep things clear.

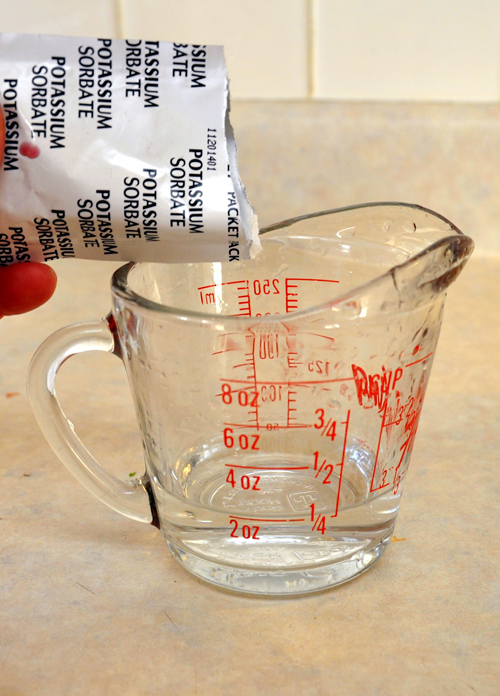
I cleaned and sanitised all of my equipment, checked my specific gravity (yep, still 0.992) and did my next addition, Potassium Sorbate. Sorbate is a bacterial suppressant. It doesn’t kill or even annoy spoilage organisms, but rather keeps them from breeding, which is crucial to the whole process of fining and stabilising: you use sulphite to stun/kill some of the yeast and any other organisms, you use the fining agents to sweep all of the micro-organisms out of the wine, and then you use sorbate to keep any of them from breeding back to the point where they can affect the appearance or flavour/taste of the wine. Sorbate is used in a lot of foods, condiments and even in beauty products and health food supplements, and is found in some berries (blueberries and Mountain Ash) as well. So, in it goes, with the first step being to dissolve it in a tiny amount of warm water.

It's a teeny amount and it dissolves almost instantly.
It’s a teeny amount and it dissolves almost instantly.

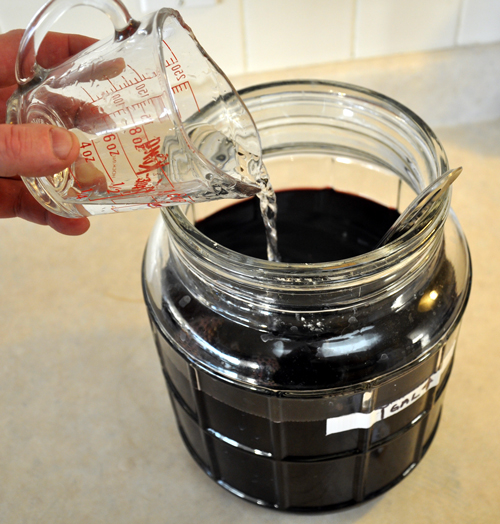
And then to stir that into the wine.

Everybody in the pool!

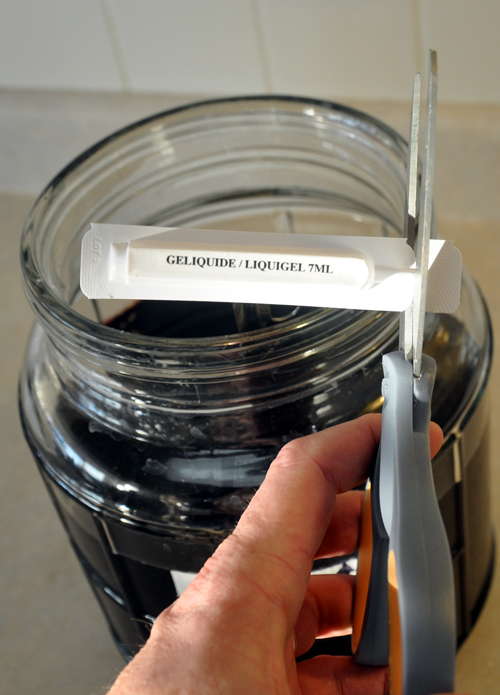
Next step is to add the ‘liquigel’, a clever contraction of ‘liquid gelatine’ and the final fining agent.

Snip!
Snip!

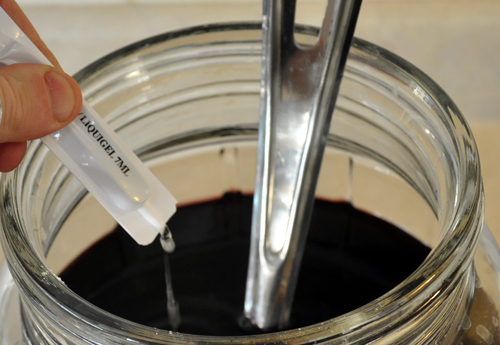
Squirt in carefully.

It's pretty sticky: make sure it all comes out of the packet.
It’s pretty sticky: make sure it all comes out of the packet.

Once everything is stirred up and all additions are done we need to top up the wine to the one gallon mark again. Don’t worry about diluting it: if you’ve been racking correctly you’ll be adding less than a cup and a half (350 ml) and the kit is actually formulated to accommodate this extra water.

Topped right up.
Topped right up.

After that it’s back on with all of the lids and airlocks and onto the counter to rest for six days until the wine is clear.

Soon, my pretties . . .

So far this has been the easiest, smoothest winemaking I’ve ever done: the one-gallon size makes doing one kit so easy, so quick, and so simple that doing three more at the same time doesn’t feel like work at all–it feels like a fun hobby leading to a great end–wine!

Master Vintner Part Two: Racking Day

Small package? Good thing!
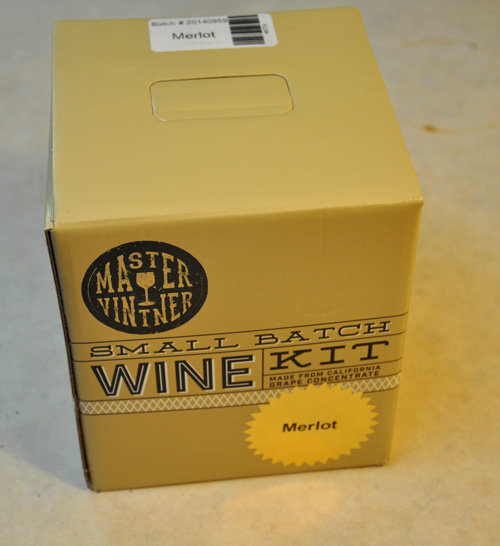
Mmmmerlot!

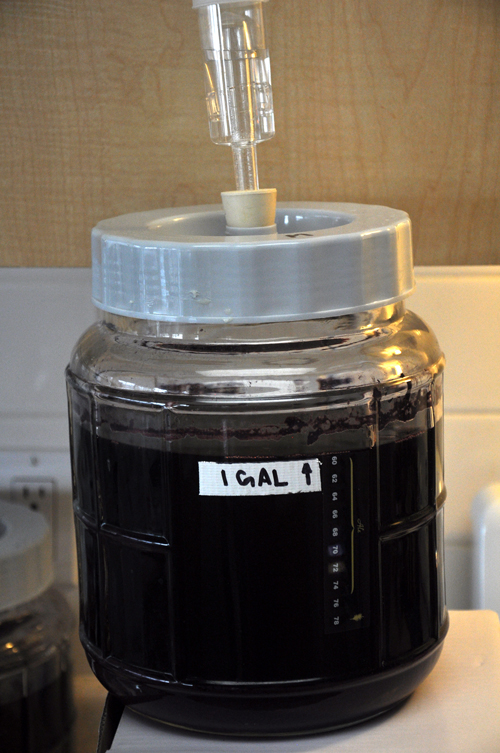
More Master Vintner! I got my Master Vintner equipment and kits going last week and now it’s time to rack them out of primary fermentation and into the I gallon jug.

Oh Little Big Mouth, you so tiny!
US Oh Little Big Mouth, you so tiny! Shmutz around the jug is yeast residue.

One of the cool things about the Master Vintner Small Batch kit is the size. Compared to lugging 6 US-gallon (23 litre) carboys around, the Little Big Mouth fermenter is a breeze. I’m a big, strong brute, but even I get twinges in my lower back when I have four or five full-sized carboys to lift up for racking.

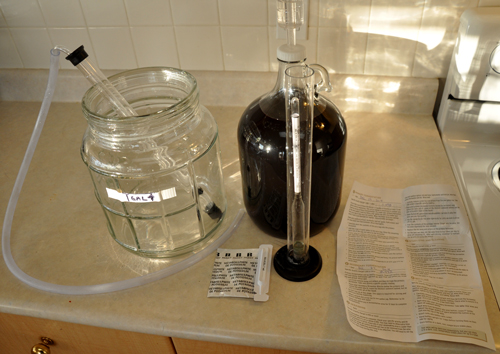
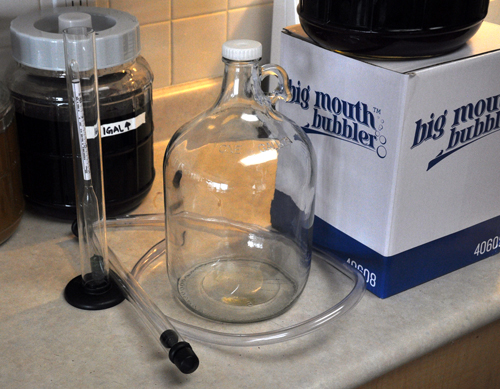
Autosiphon with tubing, hydrometer and test jar, 1 gallon jug and cap.

First things first: I assembled my equipment and double-checked the instructions. Yes, I wrote them, but I’ve become slightly obsessive about double-checking them for accuracy. I’m the only guy I know who can argue with himself about following instructions that he wrote!

Next up I cleaned and sanitised the equipment and jug, following the same procedure with Oxygen wash, rinsing and sulphiting that  I did on day one. Once it was all clean, it was time to rack it over.

Upsy-daisy
Upsy-daisy

Not only are the Small Batch kits easy to lift, you can also place them just about anywhere. Rather than having to rack from a primary fermenter sitting on the counter to a carboy down to the floor, I popped the LBM onto a box on my countertop and put the jug beside it. I love working at counter height! Honestly, this has got to be one of the killer sell features of this kit: light weight, ease-of-use and dead simple, too.

If you’ve never seen an Autosyphon in action, the small version that came with the kit is a great piece of hardware. Plain syphons work fine, but you have to start them either by filling them with water, covering both ends and simultaneously plunging the pick-up rod into the wine and the hose into a bucket to catch the extra water, and then swap when the wine comes through, or by sticking them into the wine and sucking on the hose like you’re stealing gasoline from a car–which is a little unsettling, but sometimes an opportunity to ‘accidentally’ drink from the hose (wine, not gasoline).

Check out the Autosyphon action:

While the Autosyphon took care of racking the wine into the gallon jug, I did two more things. First, I deftly filled my hydrometer jar with wine so I could check the specific gravity, and second, I tilted the Little Big Mouth back towards the side of the jug that the syphon tip was in. Tilting it would allow me to get all of the liquid out of the jug, while the anti-sediment tip on the syphon prevented any yeast-goo from going into the jug.

Rack, because that's how we roll.
Rack, because that’s how we roll.

Checking the hydrometer reading, I saw that it was good.

Remember, look across the surface of the wine, not the edge where it touches the glass.

The reading was 0.992–my wine was finished fermenting. Time to look at the instructions, where I wrote down the gravity from day one.

Every word, poetry.
Every word, poetry.

We started at 1.090 and finished at 0.992. With a little math, we subtract the finishing gravity from the beginning, multiply by 131 and we get 1.090 – .992 = 0.98 and 0.98 x 131 = 12.838, or just shy of 13% alcohol, perfect for our Merlot.

Of course there was also the necessity for a quality control test.

The moment of truth . . .

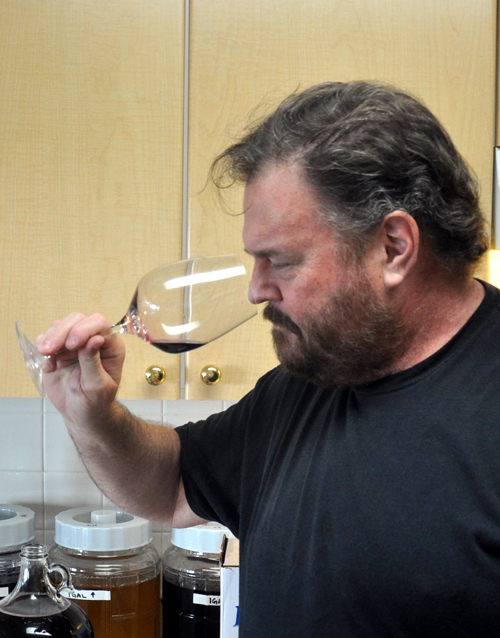
Smelled young, but very good, with nice dark cherry notes. As for the taste . . .

I'd say he's happy. Or getting tasered. One of the two.
I’d say he’s happy. Or getting tasered. One of the two.

The taste was impressive for such a young sample–it’s going to be pretty good!

The last thing to do was to put the cap an airlock onto the jug and clean up all the equipment I used–well, after I finished racking the other three wines!

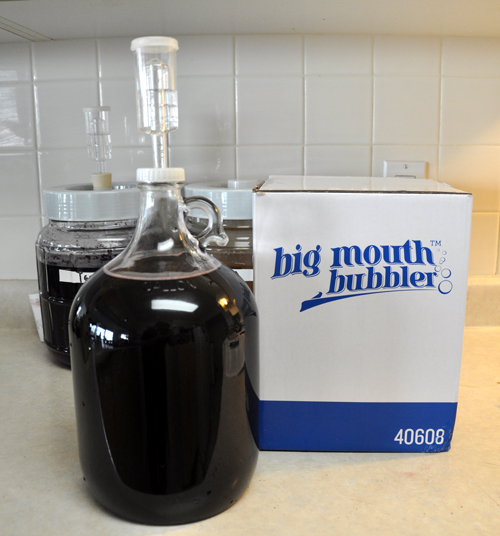
Oh little wine jug how I love thee!
Oh little wine jug how I love thee! Note the small amount of fizz–that’s CO2 gassing off, not fermentation.

I’m sold. It’s one thing to develop a kit in the laboratory and taste bench samples, but it’s another (and completely necessary) thing to do it right in your own kitchen, among the cats and cabbage rolls to see how it’s going to work in the real world. I’m happier with this kit than with anything I’ve done in a long time, and in 12 days I’m going to get it stabilising and cleared and then it’s off to bottling. Hurrah!

Why to Filter

filtered
Well, that clears things up.

You can find any number of articles on filtering wine—a quick search on the inter-webs yields something like forty-four million hits—and probably double that number of opinions on the topic. Winemaker magazine has run many articles on filtering, including an excellent one by their regular kits columnist, what’s-his-name. So there’s no dearth of information on the topic.

What there is, in fact, is a surfeit of information on the mechanics and execution of filtering, the how-to side of the process. What you don’t see very often is the other side, the philosophical, the ‘why-to’ side, or the ‘why-not-to’ side. That’s up three sides now, making it perilously close to geometry, but there are a bunch of issues surrounding filtering that come up over and over again in winemaking discussions.

            1. Do I have to filter my wine?
            2. What are the benefits to filtering, long and short-term?
            3. What are the potential downsides to filtering?
            4. Does filtering strip colour, flavour or aroma from a wine?
            5. Do I have to use fining agents if I’m going to filter anyway?
            6. What’s the best filter to use?

With these questions usually come some very strong opinions. In some cases the strongest opinions come from people who’ have a little knowledge and the proverbial danger that comes with that, but opinion isn’t limited to them: some of the most knowledgeable winemakers, making some of the most expensive and well regarded wines in the world have very strong opinions as well, and some of them directly contradict each other.

In fact, the Oxford Companion to Wine (full disclosure: I’m a contributor to that august tome) even lists filtration as a ‘controversial’ subject. From the OCtW:

Filtration of fine wines is a controversial issue. While it may be a necessity for ordinary commercial wines, it is widely thought that too heavy a filtration can indeed rob a fine wine of some of its complexity and capacity to age, not to mention some loss of colour, particularly a red wine as subtle as some fine red Burgundy. Some commentators and winemakers claim that filtration of any sort is harmful: it is not uncommon to see the term ‘unfiltered’ used as a positive marketing term.

Gadzooks! Loss of complexity! Loss of capacity to age! Any filtering harmful!  Is there no upside to filtering? Well, maybe, as the entry goes on to say:

However, the possible negative effects of filtration should be weighed against the very real risk of microbial contamination or instability, particularly where perfect storage or transport conditions cannot be guaranteed. An unfiltered wine throws a much heavier crust, or sediment, than one that has been filtered.

What to think? Well, first of all, keep in mind that the venerable Oxford is almost exclusively concerned with commercial winemaking. Out of thousands of entries there’s only one on home winemaking, and until I re-wrote it, it never mentioned kit wines and only devoted half a sentence to ‘concentrate’, so their opinion might be a little fluffy around the edges, not close to the rich, meaty centre of winemaking where us consumer winemakers make our bones. We don’t need a marketing department to tell us how our wine tastes when there’s a perfectly good glass right there at our elbow.

Second, I’m discussing only the filtering systems and processes available to home winemakers–yes, cross-flow filters are like amazing magic boxes that can accomplish astounding feats of clarity, but until they drop below $20,000 and require less than 100 gallons to prime the pump, they’re not going to be of any use to real, live home winemakers.

1) Do I have to filter my wine?

Nope, at the end of the day filtration isn’t necessary. In the 10,000 year-plus history of winemaking, filtration has only been possible in the last century or so, after the advent of industrial processing and a firm understanding of the microbiology of wine (thanks, Louis Pasteur!).

With modern winemaking technology, wine kits come almost completely free of suspended solid material. Precisely calculated fining agent use, in the form of bentonite, Chitosan, isinglass and kieselsol, deals with any colloids (like proteins) and 99% of the yeast in a very short time, leaving the wine clean and quite clear.

So you don’t have to filter if you a) don’t have a filter, b) don’t want to go to the trouble, or c) don’t  care. You’ll still have clear, drinkable wine.

2) What are the benefits to filtering, long and short-term?

In the short term, you will be able to expect what the industry calls ‘star bright’ wines. I said the finings leave the wine clean and quite clear, but not completely clear. After fining there can still be tens of thousands or even millions of yeast cells still floating around in your wine. There can also be unstable colloids floating around. These materials will take the edge off of clarity. There are two analogies that fit pretty well here. First, if you’re an eyeglass wearer, you know well that you can look through your spectacles and see clearly almost all of the time. But if you take them off at any random interval and have a look at the lenses, they can be pretty smeary and icky. A quick polish will allow you to see more clearly and accurately.

The second analogy works even for the perfectly-sighted: the difference between a well-fined wine and a filtered wine is the difference between a freshly washed car and a freshly waxed car. They both look good, and they both look shiny, but the waxed car really looks spectacular, and is much more appealing to most people who will look at it.

Long-term you can look forward to greater stability. Stability in this case is defined as the wine not changing in flavour or appearance during storage in the bottle. As the Oxford notes above, there are issues with microbiological stability and with deposits or sediments in unfiltered wine.

Microbiological stability merits a mention, but not too much concern. Since all kit wines are pasteurised at packaging, there are very few potential contamination organisms that will show up in your batch. The one place where filtration provides extra protection is for wines that have residual sugar, or sugar added post-fermentation via ‘F-packs’, ‘sweetening packs’ or ‘Süsse-reserve’. Putting these wines through a filter will help reduce the yeast population below the level at which they can ferment sugar into carbon dioxide and alcohol, keeping your sweet wine from turning into fizzy, bottle-shattering dry wine. Toss in a bit of sorbate to keep the remaining yeast from breeding back to culture strength (from where they can start making fizz-and-booze again) and you’ve got increased stability over the long term.

Another long-term benefit is in the appearance of the wine over time. Deposits and sediments can (and indeed, almost always will) form in fined but unfiltered wines over a long enough timeline. These deposits show up in reds as a thin layer of purple or red material on the bottom of the bottle or in a line along the side. In whites they appear as white-ish or beige. They can be dead yeast cells, polymerised phenols (a kind of tannin that’s gooped up and settled out) or (in reds) pigmented tannins. Pigmented tannins occur when tannins bind with anthocyanins.

If you’re getting a sore head from all the polysyllabic terms here, tannins are (mostly) the compounds in red wine that give astringency and mouth-feel, and anthocyanins are colour compounds. The process is insanely complex, from a chemical point of view, but when they bind together over time they can settle out as a very fine, almost paint-like layer of muck.

Filter, and you’re not likely to see any fall-out in your bottles over the medium (three to 5 years) term, and much lower levels after that.

3) What are the potential downsides to filtering?

Surprisingly, they’re pretty much the same as the downsides for any handling or processing operation in winemaking, from racking to fining and stabilising: the chance that you’ll introduce a contaminant or too much oxygen into the wine, causing an infection or oxidation.

Both of these are easily avoided. First and foremost, as in all aspects of life, with winemaking cleanliness is next to goodliness. Every piece of equipment that comes into contact with your wine must be clean—free of visible dirt or debris—and sanitised—treated with a chemical sanitiser to kill or suppress bacteria. Filter machines often have a lot of hoses, clamps, crevices and irregular surfaces, so be sure to disassemble them and give ‘em a good scrubbing, treat them with sulphite or other suitable winemaking sanitiser/suppressant, and rinse the dickens out of them.

As for oxygen, filtering agitates wine as it travels through pumps, hoses and filter media, but doesn’t necessarily introduce oxygen into it. Most filter set-ups are positively pressurised, meaning they use a pump to force wine down a hose and through the system. If there is a leak somewhere in the filter between the pump and the carboy the wine is going into, it’s going to squirt wine out, not suck air in.

The only real danger that using a filter will add oxygen is if you run the output hose down the side of the receiving carboy, where it can fan out and expose an enormous surface area to oxygen pick up—gently place the output hose directly into the bottom of the carboy instead, and allow the tip to submerge as it fills, keeping everything as quiet as possible.

What you really have to watch is that there is sufficient free sulphur dioxide (metabisulphite) in the wine to protect it during handling. This will be the amount included in the kit, added in full, at the appropriate time. Just a hint: if your kit has a note in the instructions about optional added sulphite for ageing terms over six months, add it before you filter, even if you’re going to drink the wine up sooner. This is prudent because the very small extra amount the instructions ask for, usually a quarter-teaspoon, which is less than a gram and a half, won’t change the flavour or aroma of the wine, but will make sure the extra handling that filtering represents doesn’t cause harm.

3) Does filtering strip colour, flavour or aroma from a wine?

Yes and no. But mostly no, and the aroma and flavour part is strictly temporary, and the colour part is good. I’ll explain, but first I’ll qualify: I’m telling you the strict truth, for people using filters available to people making their own wine at home. You might read contradicting opinions somewhere else but keep in mind two things: first, some of those opinions will be from people who have access to commercial filtering equipment and processes, which can be vastly more effective at removing things from wine. Second, they’re probably wrong.

filters
Magenta wine?

Colour

The kinds of filters available to home winemakers operate on the micron scale, with the tightest, most efficient filters stopping somewhere above 0.2µ, about two-tenths of a micron. Your typical yeast cell is around 0.45µ, and a freshly budded daughter cell (they grow up so fast, sniff) is down at the 0.2µ mark. It’s far more common to see filters that allow the passage of material as large as two to four microns in size.

Colour molecules, the aforementioned anthocyanins, are not on the micron size. They are so very much smaller that their structure can’t be seen with a microscope. They’re so tiny that in fact they will sail straight through a filter pad or cartridge entirely unimpeded—you can’t filter them out.

Which begs the question, for anyone who has ever used a filter on a red wine, why do the pads come out stained with colour? Those stains aren’t pure, happy colour compounds: they are colour compounds that have already bound to other kinds of goo in the wine. When bound to tannin, they’ll fall out later as a deposit (mentioned above) and when bound to a colloid, they’ll fall out as sediment. This is a vast over-simplification (I specialise in those) but the core truth is that you cannot filter out colour with civilian filter pads—not any colour that wouldn’t fall out on its own anyway.

dog nose
  This nose knows nosing–and dogs know filtering doesn’t ‘strip’ aroma. 

Flavour and Aroma

What goes for colour compounds goes for flavour and aroma: they’re just too small to stick to filter pads. And yet anyone who has ever filtered a wine has almost certainly noted that it tastes notably less distinct and aromatic post-filtering.

This is a complex phenomenon wine, referred to under the catch-all phrase ‘bottle shock’. A couple of explanations are popular. First, a dose of sulphite (usually added at bottling or filtering) mutes the flavour and aroma of the wine. Seems plausible enough, and easily observed by anyone who has ever tasted a wine right after sulphiting it.

Second, if a wine gets a significant dose of oxygen during handling, some of the oxygen can combine with ethanol and other alcohols to form aldehydes, which really cramp a wine’s aromatic styling. The good news is, both of these conditions are temporary. Give the wine a few weeks rest, and often only 24 hours will do it, and the aromas and flavours snap back into focus, good as new, with filtering not to blame after all.

I said earlier that anyone who disagrees with me is wrong. I still think that, but there is a way in which they’re reaching towards a sort-of truth about filtering and removing desirable compounds from wine. When a wine, particularly a red one, is very young, you want to get it off of the gross lees and then the fine lees quite rapidly, with several rackings taking place in the first year. This prevents yeast cells from decaying and transferring their flavour into the wine, and prevents all kinds of grape pulp and vineyard muck from getting funky as well. But you don’t want to strip the wine clear of all compounds right away. There are extremely complex chemical reactions and biochemical processes that can benefit from the presence of solid material dissolved and suspended in the wine as it goes through elevage (upbringing).

That doesn’t add up to an indictment of filtering, however, it just means that you should filter as the last step in your process before you go to the bottle—too early and you might cheat an ageing/elevage process of some compounds that could help.

cloudy
This wine should not be filtered–it isn’t clear enough.

5) Do I have to use fining agents if I’m going to filter anyway?

YES! You can’t filter a wine that isn’t already really, really clear. The amount of yeast and good in suspension would clog a filter up so badly that you’d spend more than the cost of the wine kit itself in filter pads before you got to the end.

If we go back to the car analogy, you can’t wax a car that hasn’t already been washed thoroughly: waxing isn’t to remove dirt it’s to put a final polish on the car. Filtering isn’t to clear wine it’s to put a final polish on it right before bottling.

superjet
Buon Vino Super Jet: excellent balance of speed and efficiency

6) What’s the best filter to use?

The most common filters available to home users are depth filters with plate and frames and positive displacement pumps. This means they’ve got some kind of structure of layered plates that trap cellulose pads in between them and the wine is forced through the pads by a pump that pushes it down a tube. There are others, including ones that use a vacuum to pull the wine through a plate and frame, membrane filters that use a setup identical to home water-filter cartridges, either with a pump or a vacuum, and even manual ones that rely on gravity to dribble the wine through a pad set-up.

filter big
Cue Jeremy Clarkson, ‘MORE POWER!’

Commercial wine filters can be much more complex, but most of them you can’t afford to switch on for less than a few hundred gallons of wine—a single 6-gallon/23 litre batch wouldn’t even prime some of the pumps. Things like cross-flow filters, centrifuge decanters, pressure leaf filters and rotary drum vacuum filters are amazing technology, but for most of us rather like swatting a housefly by dropping a mountain range on it.

I’m big on positive displacement plate and frame filters. They’re simple, very easy to set up and use, widely available, and ideal for our purposes. They come in sizes ranging from just smaller than a toaster, suitable for one or perhaps two batches at a go, to models big enough to do 20 gallons in a reasonably short time, and others intended for higher volumes that can filter a carboy sparkling clear in under 30 seconds. I own examples of all three, and they’re fine machines.

They’re called depth filters because the pads used in them act like a sponge, soaking up the wine and wringing it out clean on the other side, with the ‘sponge’ part retaining the cloudy goop. This makes them capable of taking quite a bit of muck out of the wine before they clog up. When they do, you toss ‘em out, because they’re cheap.

There’s no objection I can think of to using a vacuum system, set-up to pull wine from one carboy to another, with a plate and frame in between, other than an incremental increase in complexity while using it—if you’ve got a vacuum pump, more power (power vacuum?) to you.

But I’m not big on membrane filtration. Filter cartridges are best suited to water or air filtering, where they have to deal with fairly low levels of material. The issue is that membrane filters act as a screen-door, rather than a sponge. They usually have a fan-folded cartridge that almost behaves like a two-dimensional object. Anything larger than the holes in the membrane piles up on one side and clear wine passes through.

That is, until the cartridge membrane is completely blocked: because it’s a screen, there’s no depth to soak up lots of goo. After that you have to change it, or clean it before it can filter more wine. This can be done, but handled carelessly, as by backflushing with too much pressure, cartridge integrity can be compromised, allowing material to pass through.

And cartridges are much more expensive than filter pads. There are inexpensive examples, but they won’t be as effective or as strictly rated as more expensive ones. There’s not enough room in this article to discuss the difference between nominal and absolute micron ratings, but when you buy inexpensive cartridges, you’re getting pretty much what you pay for. It’s kind of the ‘toner model’ of computer printers—the money in cartridge filter systems is made in replacement cartridges, not in the actual system itself, so that’s where you pay if you purchase one.

It should be pretty obvious after these points that I’m a fan of filtering, and mostly with positive displacement depth filters. But you would be surprised how often I don’t filter. A lot of the time I’m too lazy. My reds sit for a couple of years before I get around to them, and by that time I’m out of wine and in a hurry, so I just get them in the bottle and pretty immediately into the wine rack. I’m more likely to filter whites, but even then my slack attitude towards a production schedule has me bottling without filtration at least part of the time. But with that, I have to put up with the occasional deposit in the bottle, which is fine for me, but puts a crimp in giving away bottles or sharing with others.

In the end, whether or not you should filter should come down to your own preference, your tolerance for extra processing steps, and the attitudes of those who will be consuming the wine—but don’t worry in any case: filtering won’t hurt your wine in any way, and can help improve the aroma and maintain its appearance over time.