Master Vintner Small Batch Part 5: Bottling Day

One full equipment kit, three extra Big Mouth Bubblers and three extra wine kits!
Where it all started

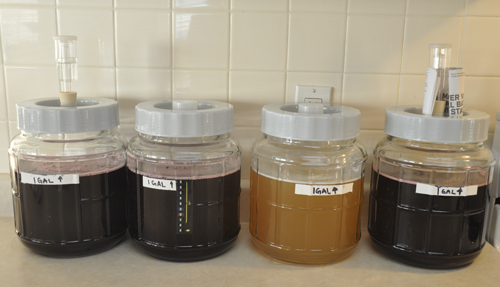
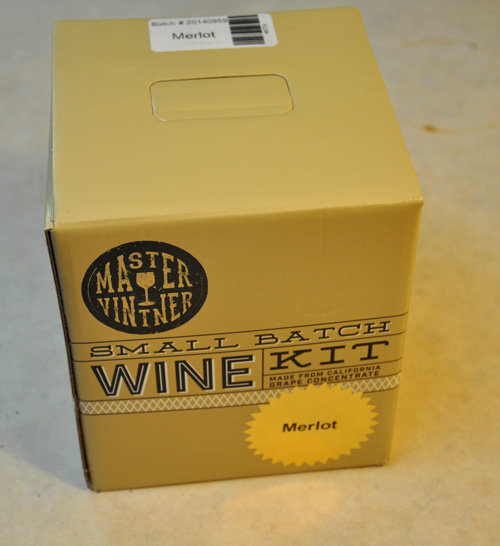
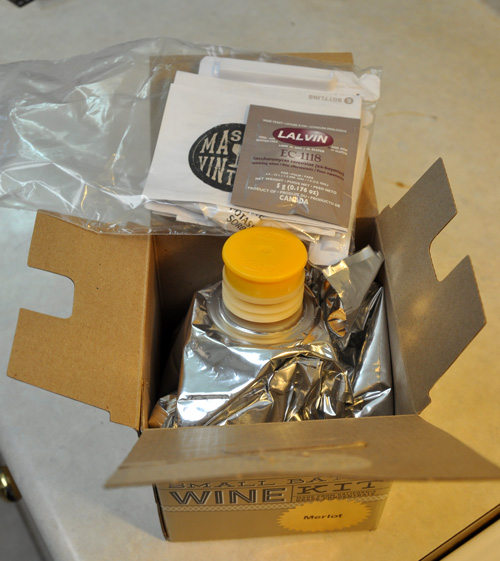
It’s finally here! After starting my Master Vintner wines, racking them from the primary fermenter, and doing the fining/stabilising steps, bottling day has arrived, and I’m all about getting my Cabernet Sauvignon, Merlot, Pinot Noir and Chardonnay into the bottles–well, almost all of it into bottles, along with a little of it into a secret project . . . more on that in a minute.

rack-setup
Time to rack off the sediment.

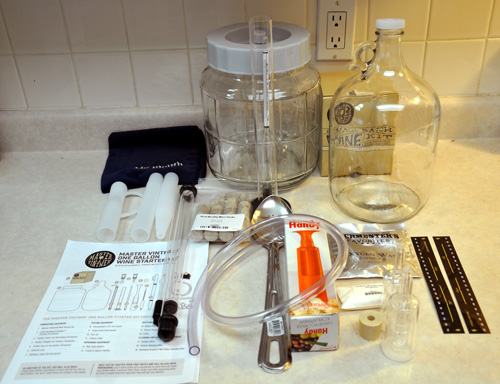
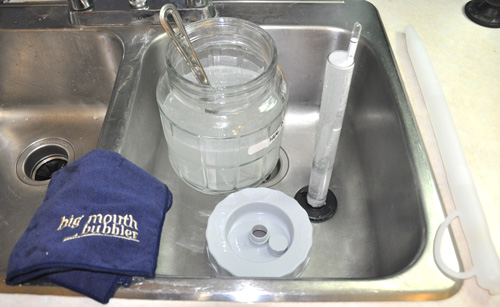
My first step was to clean and sanitise all of the equipment I’d be using, including my autosiphon, bottle filler, jugs and such–as always, cleanliness is next to goodliness in winemaking.

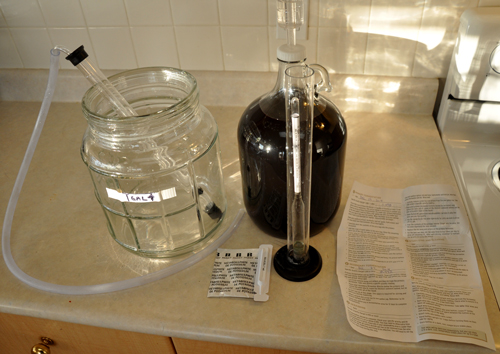
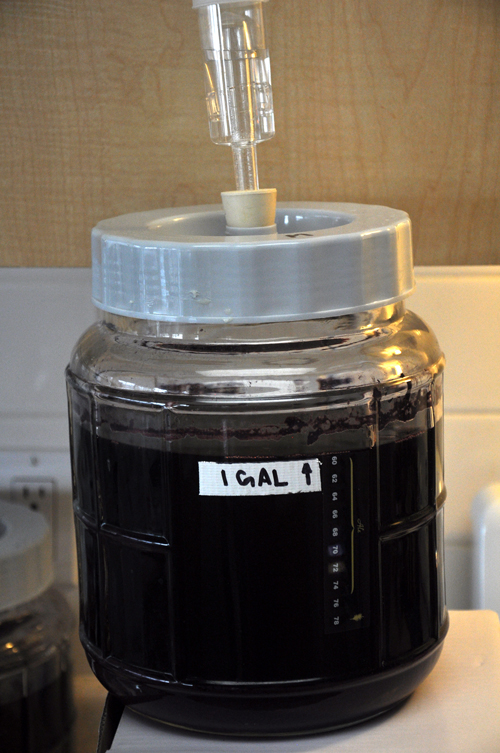
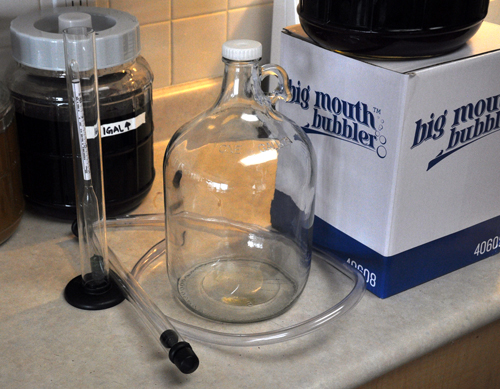
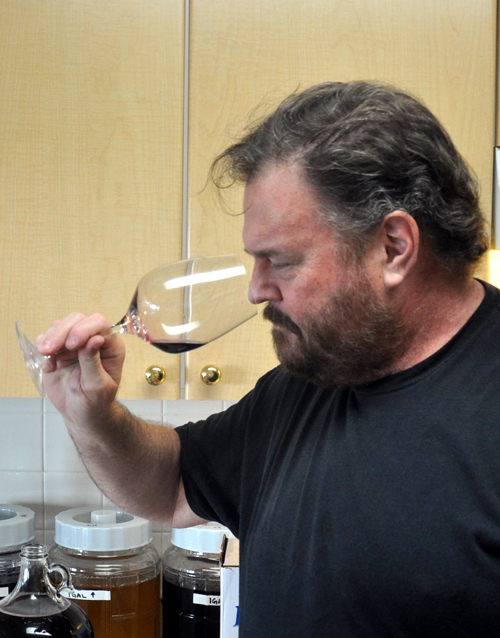
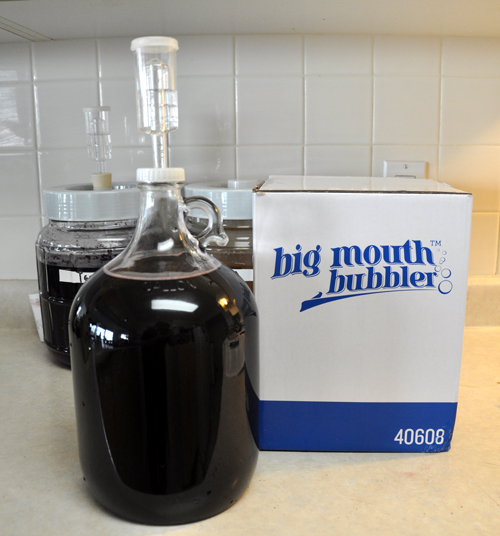
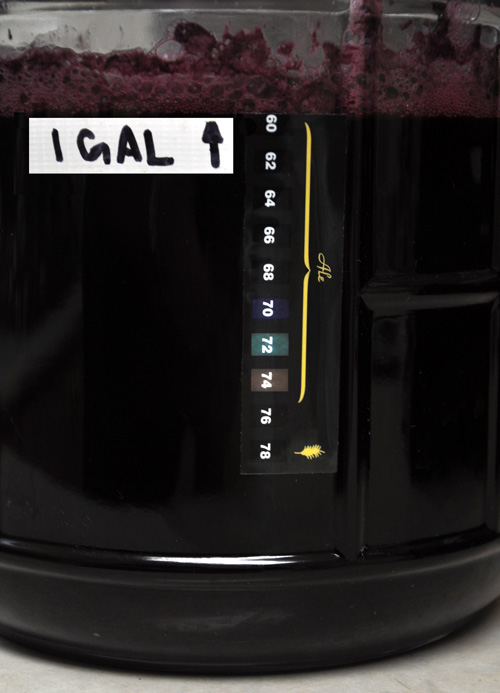
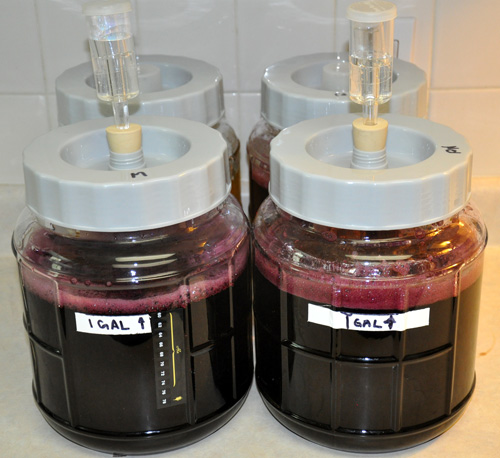
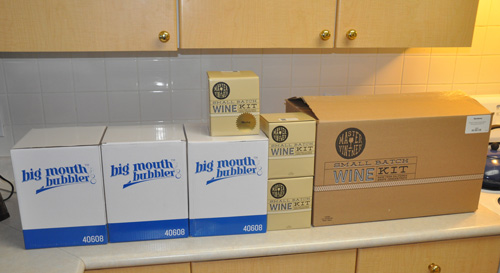
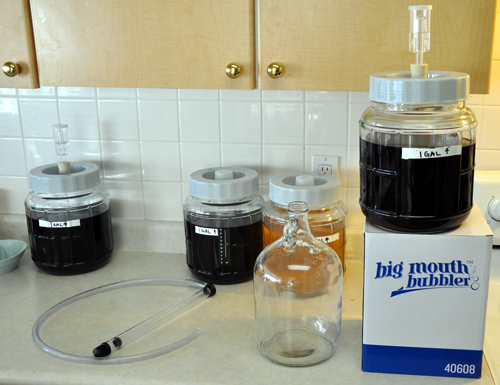
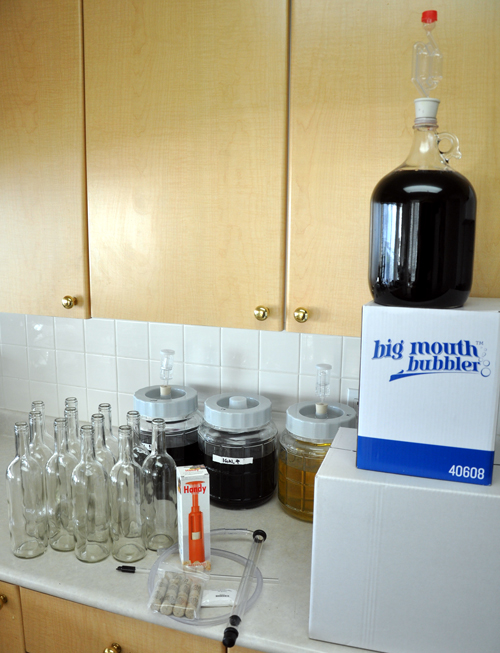
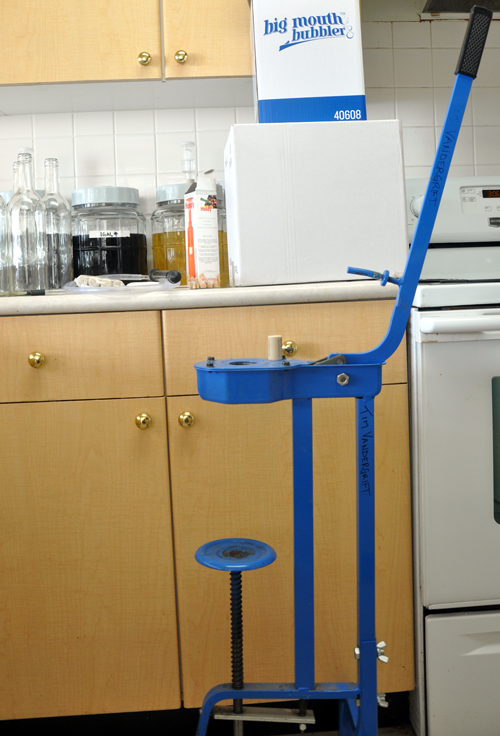
Next, I set up my racking station by the simple expedient of lifting my Little Big Mouth Bubbler on top of a convenient box on my counter. If you haven’t used one of the Master Vintner Small Batch kits yet, it’s hard to convey just what a joy this is. I’m old-school in many ways, having started off making wine in lots anywhere between 23 litres (6 US gallons) and 650 litres (three 60-US gallon barrels) at a time. With truly huge amounts you need a pump to move the wine around. A standard kit wine batch of 23 litres isn’t nearly as demanding, but lifting full carboys from one shelf to another, or putting them up on a high place so you can rack the wine down into a clean carboy on the floor (which then needs to be lifted back into the winemaking area!) starts to wear on the lower back after a few thousand batches. At only a single gallon, you can easily lift the Small Batch kits onto a convenient box or shelf above your kitchen counter, just as easy as getting a gallon of milk out of the refrigerator!

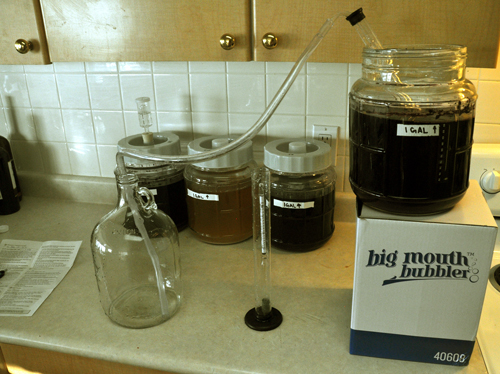
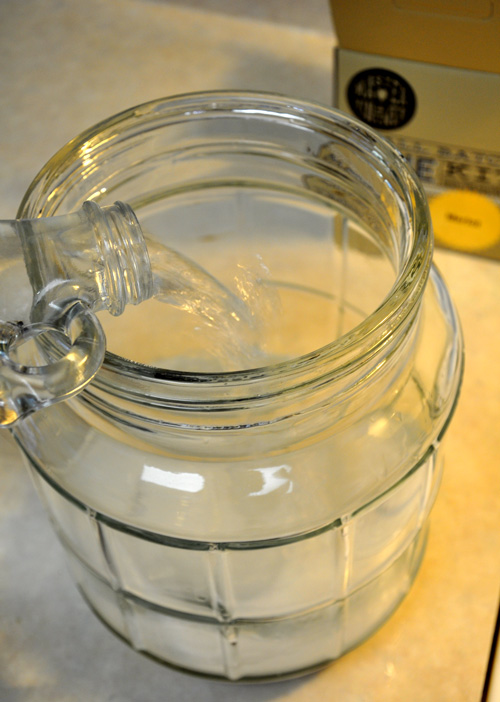
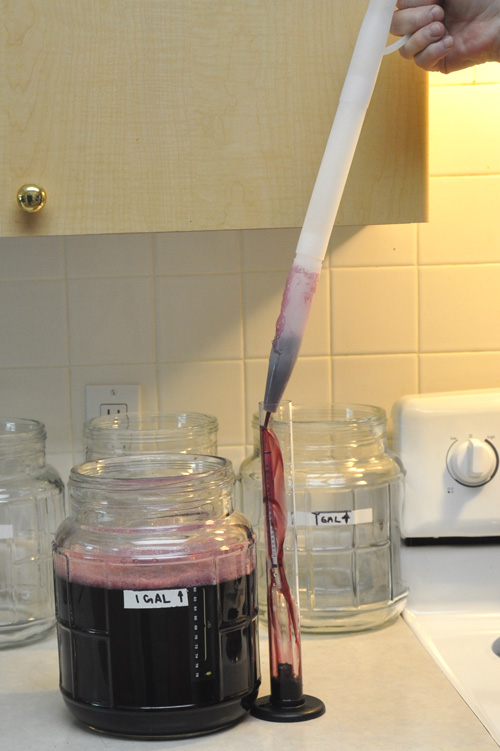
Once the fermenter was in place I racked the wine off of the sediment. Doing this is really helpful, since there’s a decent chance that the siphon will disturb sediment from the bottom of the carboy while your moving the hose from bottle to bottle. Rather than risk getting cloudy wine, it’s better to move all of the clear wine into a new vessel in one go, and then you can relax from there.

rack-from
Note the siphon rod carefully placed on the far side of the fermenter–this will be important as we get to the bottom.

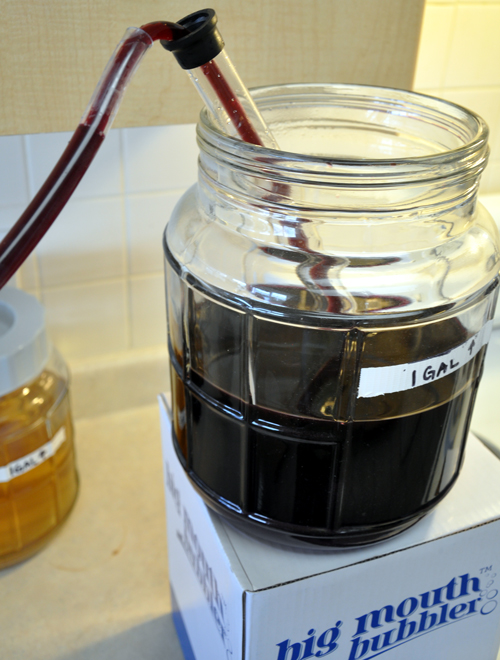
When the wine gets down to the bottom, the level of sediment needs to be carefully monitored. Remember, the point of racking is to get 100% of the clear wine and leave the muck behind, so don’t leave any of that delicious grape nectar behind.

A careful tilt keeps the end of the autosiphon in the wine.

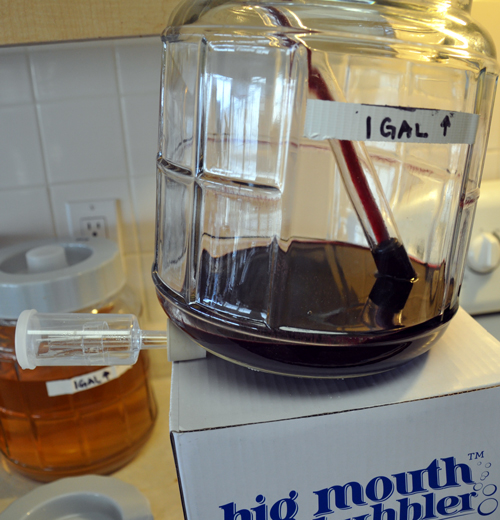
To get and keep that tilt hands-free I usually improvise some kind of prop or wedge. Because I was making wine in my kitchen (another thing Small Batch Kits makes easy!) my carboy wedge wasn’t around. No matter: I just popped a bung under the front of the carboy and watched the levels as they dropped.

Never leave a man, uh, a drop of wine behind.

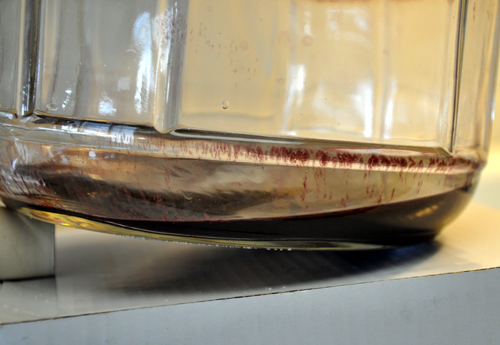
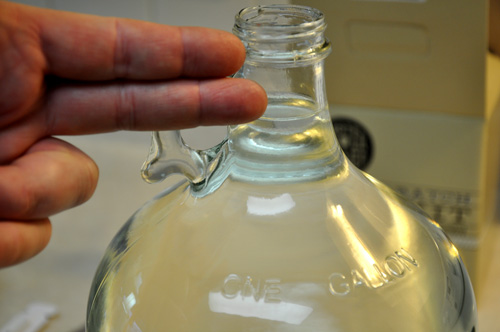
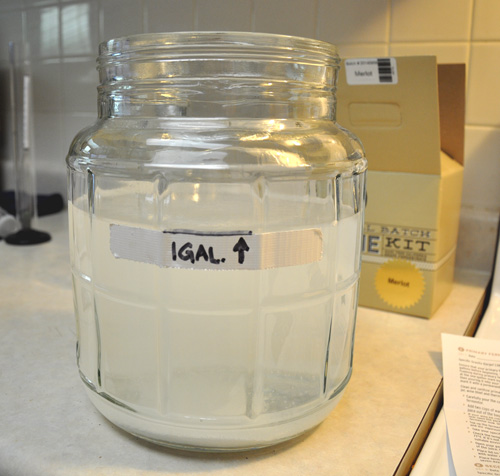
Just to make sure I was being completely efficient in my racking, I measured the amount of sediment left in the bottom of the Little Big Mouth Bubbler after it racked over. It came to just over couple of tablespoons all in all–which meant I was going to get a total of about 3.75 litres out of my US gallon (3.78 litre) batch, meaning I could fill five bottles, which is exactly what I wanted.

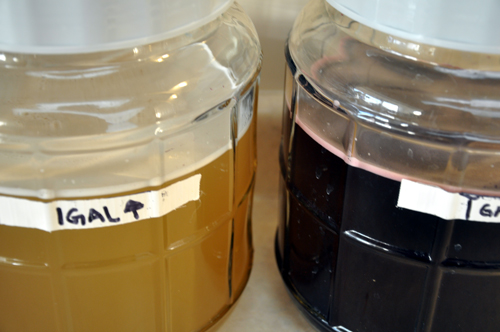
The wine was exceptionally clear on racking.

Limpid and gorgeous.

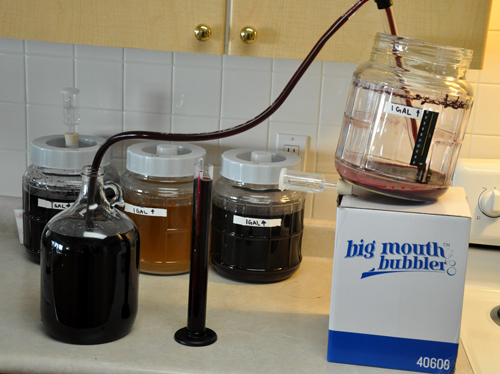
I could have bottled it right there, but since this was an actual test batch for quality assurance and proof of concept purposes, I pulled out my Buon Vino Minjet filter. Filtering doesn’t actually clear a wine: that’s what fining agents are for. Clearing polishes a wine so that it sparkles with a brilliance like diamonds. A former colleague had the best analogy for wine filtering: it’s the difference between a freshly washed car and a freshly waxed car. Both look great, but your eyes can instantly tell which car was waxed and polished because it glows. Same with wine.

Now that's shiny!
Now that’s shiny!

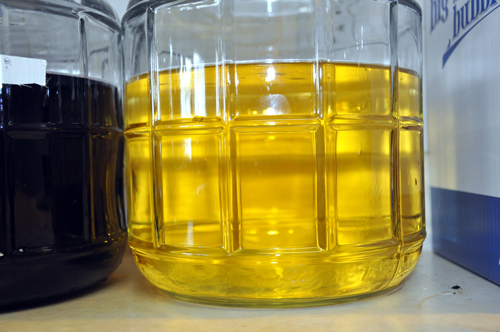
It’s easy to see this in white wines: you could read the fine print of an EULA through that Chardonnay!

I got all four batches of wine through a single set of Buon Vino #3 pads in about 20 minutes, including sanitising and prep, going from the Chardonnay to the Pinot Noir, then the Merlot and finishing with the Cabernet Sauvignon. Yet another bonus feature of the Small Batch kits: you can make four of them and only need the tiny, convenient BV mini, rather than a much larger filter.

Rest, little filter: you've done a man's work today.
Rest, little filter: you’ve done a man’s work today.

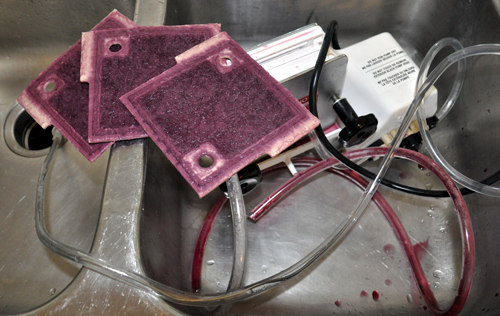
While larger filter systems need a washtub or a laundry sink for cleanup, the Minijet is kitchen sink-friendly for cleanup. Note that the colour you see on those filter pads isn’t anthcyanins (grape pigment) stripped from the wine. It’s suspended material from the wine itself, stained by those pigments. That suspended material, principally yeast cells and colloids, would eventually settle out of the wine on its own. Even though the unfiltered wine was perfectly clear to the eye, after a year or two in the bottle a bit of colour would deposit out on the side or bottom of the bottle. Hurrah for filtering!

Next up, time to fill my wine bottles. I had a mixture of standard wine bottles in Flint (clear) and some swing-tops, also in clear. I like using swing tops for wine that’s going to be analysed and/or destroyed in testing–not because of any technical superiority of swing tops, but because I can never seem to find a dang corkscrew when I’m in the wine lab.

Bottles, autosiphon, siphon tip, impact corker, corks.
Bottles, autosiphon, siphon tip, impact corker, corks and sulphite for sanitising the bottles.

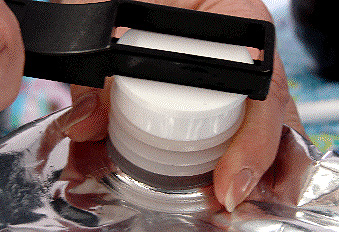
Also shown in the picture above is the Handy corker. It uses a plunger and a compression sleeve to press-fit the corks into the bottles.

Takes a little oomph, but works great.

Because of the forces involved, it’s a good idea to use the (included) #8-sized corks and soak them in a bit of warm water before use. While I’ve used the Handy and it’s a fine unit, I had another plan in mind for my bottles. But first, I had to fill them.

Fast, clean and efficient--now that's good winemaking!
Fast, clean and efficient–now that’s good winemaking!

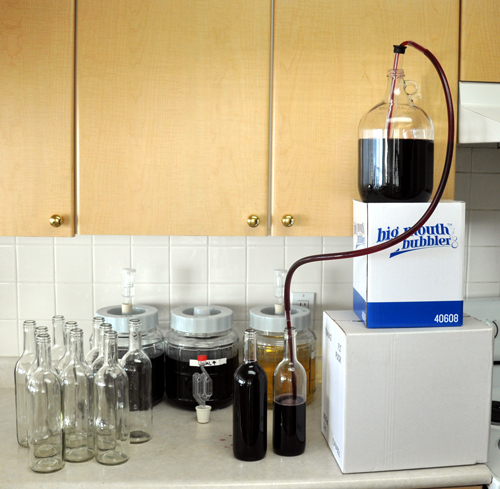
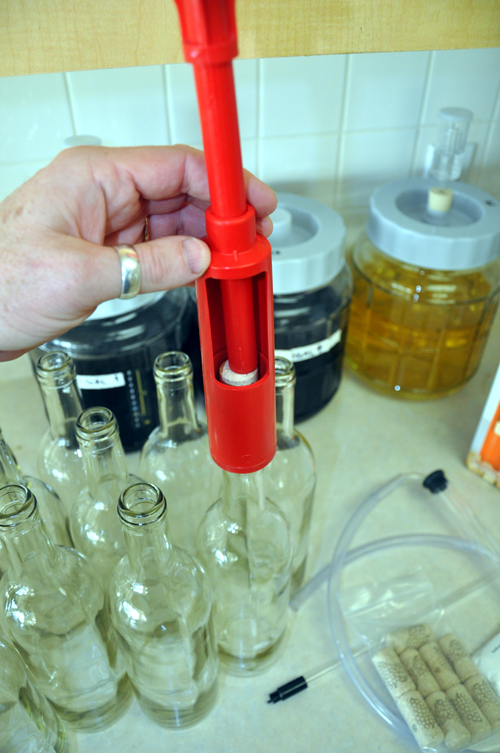
Getting the bottles filed without splashing, spilling or endlessly fiddling to get the right fill level (very bottom of the neck, to leave the width of two fingers below the bottom of the cork) used to be a drag, but a siphon filler (included in your equipment kit!) makes it a snap.


The one-way needle valve on the tip of the rod stops the flow of wine as soon as you pull it up, while the volume of the rod displaces exactly the right amount of wine–when you fill the bottle to the top and then pull the rod out, the level of wine is perfect to accommodate a cork!

With the bottles filled, it was time to put corks in. My alternate scheme was to use my Italian bronze-jawed floor corker. This mighty beast has been my faithful companion for 25 years and tens of thousands of bottles of wine.

Industrial Age technology at its finest.

The key to how well this thing works is in the amount of leverage it can bring to bear, and how cleverly it compresses and inserts the cork into the bottles. The heart of the matter is the set of bronze jaws. Not brass–brass is too soft, and corks would wear it away in a short time, and this bronze is the same stuff they make steamship propellers out of.

You're in for a squeezy time, Mr. Cork.
You’re in for a squeezy time, Mr. Cork.

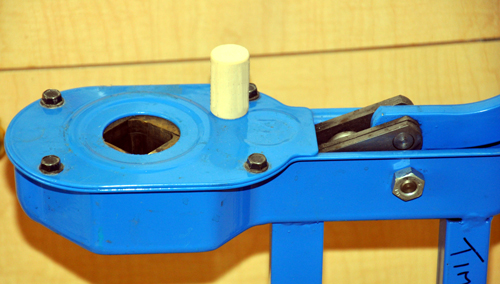
The jaws move as the corking arm is pulled, squeezing the cork down to just slightly larger than the size of a pencil. When it’s at is tiniest, the cork finger comes down. pokes it into the bottle and you’re done.


It’s as easy as that, every time.

After only a few minutes all of the bottles were filled, corked and swing-capped.

snu
Say, what’s with that pink wine?

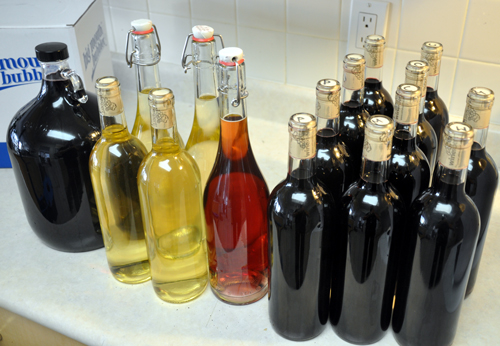
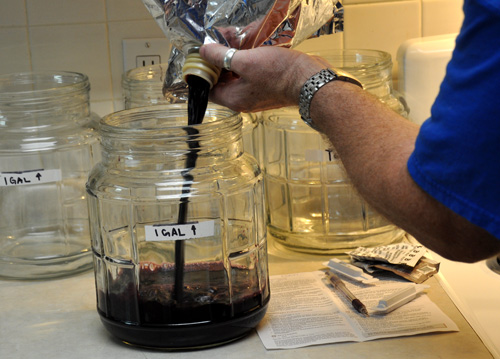
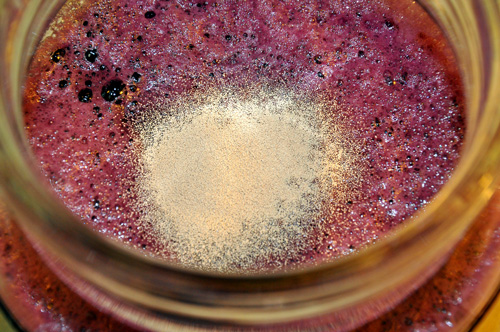
Astute observers will notice that there are 15 bottles, a gallon jug and one bottle of pink wine, which doesn’t match up that well with the whole four batches of five bottles each motif I started with. The gallon jug is a blend of Cabernet Sauvignon and Merlot. I blended it at a rate of 3:2, Cabernet to Merlot, after a few benchtop trials. I’m going to let it marry in the jug for a month or so and taste it before bottling.

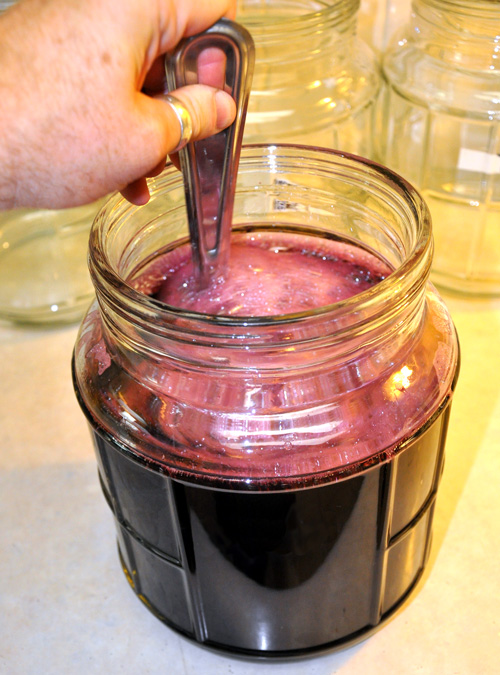
The pink wine is slightly notional on my part–it’s my job to do the weird stuff so you don’t have to. Or, more accurately, so I can explain it when you do it without my knowledge! It’s a blend of 4% Pinot Noir into the Chardonnay. That kind of blending is a standard technique in commercial winemaking, and I was curious to see how it would marry up with a little time in the bottle.

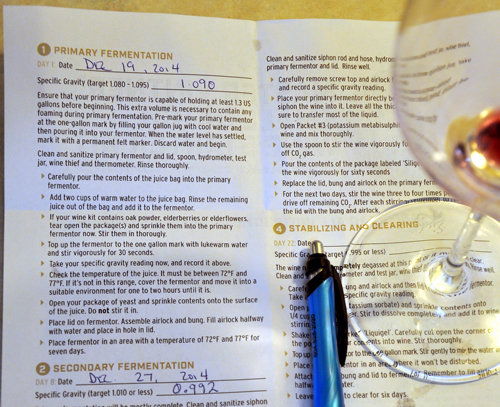
How does it taste? Even though it’s very young, it’s everything I’d hoped: good fruit, varietal character, smooth tannin, balanced acid and a long finish, especially for a wine just in the bottle. I’m going to do a more formal taste-test in another three weeks, and then once a month after that to see how it’s progressing.

I’ve already ordered another four kits–I’ve never made wine with so little effort or mess, and I’m going to keep production up. Heck, it’s no more work than keeping a vase of flowers on the counter, with the added bonus, it’s wine!

Wine and Fraud

But he seems so nice!

If you follow my other blog at Winemaker Magazine, you may have read my recent treatise making fun of rich idiots being defrauded by scammers. At the rarefied prices that vintage Bordeaux and ultra-rare Burgundy command, it’s often a simple matter to take money from people desperate to believe they’re getting something too good to be true, like a 220 year-old bottle from Thomas Jefferson’s cellar.

Seems legit--after all, it's a picture of Jefferson with the bottle.
Seems legit–after all, it’s a picture of Jefferson with the bottle.

But it turns out that you don’t even need to go that high to find a way to scam wine consumers. According to the New York Times, the Hill Wine Company in Napa not only sold cheap Central Valley grapes as premium Napa Cabernet Sauvignon, they also stole premium grapes from clients they made wine for.

. . . Del Dotto formally accused Hill Wine of stealing the first batch of grapes and sought repayment of nearly $42,000 it had paid for vineyard management services. Tony Ventura, Del Dotto’s attorney, said in an interview that the grapes it claimed were stolen from Howell Mountain were intended for a wine that his client planned to sell for $195 a bottle. “If you’re going to steal, steal the good stuff,” Mr. Ventura said.

Oy. You have to wonder where this leaves us as wine drinkers, and as wine makers. In my opinion, first and foremost we should not seek out wine that relies on charm or exclusivity to sell itself. There are almost no wines in the world that cost more that $75 a bottle to put into the market. Prices much beyond that either indicate fanatical dedication to lowered yields, insane pick-over strategies, 100% new barrels every year and other, equally ridiculous levels of attention to detail and quality. That covers maybe half a dozen vineyards on earth. The rest can come in cheaper.

When they come in at vastly higher prices you’re either living in a crazy-high alcohol tax zone or the winery is relying on non-quantifiable (and thus cost-free) gimmicks to push their product. From the NYT article,

“Most Napa wines to me are way overpriced,” said Tony Westfall, co-founder and chief executive of Invino, an online wine seller based in Sonoma. “A lot of people would say Lake County is just as good as or better terroir than Napa.”

To persuade someone to spend $30, $50 or $100 for a bottle of wine, wineries need to not just produce quality juice, but also build an emotional connection with the customer.

While I feel that all wine should be experiential, that we should drink in places we love, with people we cherish, and for reasons of celebration, I have enough emotional connections in my life that I don’t need one with a winery. I’d rather get honestly-made, fairly-priced wine–and I’d also like to get what I paid for, not the disarming charm of con artists.

Now if anybody needs me, I’ll be making my own wine–and I know exactly where those grapes came from.

Drinking With Your Mind

Here comes the airplane!

It’s an old saying in the restaurant industry that diners eat with their eyes first. I always thought this would make spicy food vastly less appealing, but I learned that it’s a metaphor for how perception informs reality: if you think something is going to taste good, it’s going to taste good to you. Seems clear enough, but here’s the kicker: apparently we actually drink with our preconceived notions and our expectations.

Free? I'll take two!
Free? I’ll take two!

In a 2003 study by Dr. Brian Wansink of the Cornell Food and Brand Lab, diners were given free glasses of wine with their meal. Some were told it was a French wine, others were told it was a local (North Dakota) bottle. It was, in fact, Two-Buck Chuck in both cases. But the people who were shown a French label ate more dinner, and rated the food higher. Those who thought they were getting ND wine ate less and rated the meal ‘average’. Same wine, same food, different perception.

This really struck me, because over the years I’ve had a lot of calls from retailers asking for help finding a particular kind of wine for a customer. Typically they’ve had a bottle of wine on a vacation, or in a great restaurant somewhere, and they’re looking for a wine kit closest to it in flavour and aroma. I have to suppress feelings of despair at these calls, not because we don’t have something that’s stylistically close to the wine (we might even have a kit that’s nearly identical, or can be made so with a little tweaking) but because it isn’t the wine that they want to replicate. It’s the experience.

The wine tasted like crisp air, beautiful mountains, and fresh powder . . .

It’s even worse when the retailer starts off with, ‘They just got back from Switzerland . . .’. Typically the people were sitting on a patio on Lake Geneva, or in a ski lodge in Gstaad, and they had a wonderful white wine called ‘Fendant’. Fendant is the Swiss name for Chasselas, a grape with long history and short flavour. It’s slightly citrusy and the best examples hint at grassiness, but mostly it’s really, really neutral (hah, Swiss wines taste neutral, who would’a thought?) which is to say, bland.

But the folks were in the mountains, in a wonderfully well-organised, clean country, enjoying the fresh air and perhaps some wonderful cheeses, at peace with themselves in the center of a grand and magnificent setting. They could have been drinking lighter fluid and would have enjoyed the bouquet and ordered a second bottle. Many times people will bring a bottle home and when they open it, find it very disappointing. This is the origin of the phrase, ‘It doesn’t travel well’ . That actually means, ‘I couldn’t bring the setting and the experience home along with the wine.’

What's good wine? It's any wine you like, no matter it's price or what other people think of it.
What’s good wine? It’s any wine you like, no matter it’s price or what other people think of it.

What to do? Nothing, really. There isn’t anything wrong with letting a whole experience wash over you, having it enhance your perceptions. One of the most incredibly delicious bottles of wine I ever had was a bottle of Louis Martini Cabernet Sauvignon. While there’s nothing wrong with that wine, I recall it as being utter ambrosia. But then, I was falling in love at the time, and the sky was bluer, the air was fresher, and I was the person I always wished I could be at that moment.

We can all take a bit of wisdom away from experience versus actuality: it’s always good to be mindful of what we eat and drink of itself, and to be present at every moment of our lives. As the sage once said, “Life moves pretty fast. If you don’t stop and look around once in a while, you could miss it.”

I couldn’t agree more.

Master Vintner Small Batch Winemaking Part Four

You may remember Master Vintner from such posts as Master Vintner, Your Personal Wine and Master Vintner Part Two: Racking Day. As such you might well wonder, ‘What happened to part Three?’ Don’t worry, all will be explained.

Laid out and ready to go

Step three and step four kind of run together, so I’m blogging about both of them at once. When we last left our Master Vintner Small Batch wines (Chardonnay, Merlot, Cabernet Sauvignon and Pinot Noir) they were resting comfortably in secondary fermentation. The next step was to . . . READ THE INSTRUCTIONS!

Yes, I keep coming back to the importance of reading. It’s your guarantee of success! A quick read-through let me know that I would have to check the specific gravity and then rack the wine from the secondary to the Little Big Mouth Bubbler again for stirring and fining/stabilizing additions.

I sanitized all of my equipment, took a specific gravity reading (0.992 and rock steady) and then transferred the wine from the jug to the LBMB.

Auto-syphon: how do you live without one?

Once all of the wine was transferred over (leaving very little behind in the jug–less than a couple of tablespoons of goo) the next step was to add metabisulphite to prevent oxidation (browning and loss of flavour) and prevent bacterial spoilage (going icky).

Sulphite is your friend, and wants you to be happy.

Let’s talk about sulphite. It’s one of the most common food additives in use today, and it’s been in continuous use in winemaking for many centuries. It’s in every preserved food you buy and in lots of things you wouldn’t expect (noodles? Check. Frozen orange juice? You bet! Pancake syrup? Sure!) It’s safe and almost completely benign. If you don’t believe me, check out the world’s #1 Authority on sulphite use in home winemaking.

So that’s sulphite taken care of. In it goes!

Be sure to tap the packet: a bit of the powder can get caught in the corners.

After the sulphite is in we have to stir the wine to distribute it, and to drive off gas in solution. This is crucial to the success of the kit. Carbon dioxide gas is produced by the yeast during fermentation. In a commercial winery this is not much of an issue because they take one or two years to get the wine ready for bottling, and in that time all of the gas escapes. Master Vintner kits are designed to be ready to bottle in just four weeks, so the gas has only a short time to escape from the wine. To stay on schedule we need to aid the process through mechanical agitation.

A stirring experience.

I stirred the wine for a full sixty seconds and then added the first fining agent. Fining is the process of dropping suspended material out of the wine so it’s clear enough for bottling and drinking. Common fining agents are either mineral in nature (Bentonite, Silicon dioxide) or a colloid/gelatine (Isinglass, Chitosan) and in wine kits they’re often used in pairs. The instructions say to add the packet labeled ‘Siligel’, a silicon dioxide solution–essentially really finely pulverised beach sand in a liquid and then stir again.

Sharp scissors are an essential winemaking tool

Cut the tip off of the Siligel packet . . .

Squeeze!
Squeeze!

. . . and then another sixty seconds of stirring.

That's what good stirring looks like--get the fizz out.
That’s what good stirring looks like–get the fizz out.

I popped the lid, bung and airlock on again and over the course of the next two days I kept my spoon in handy and stirred the wine again for sixty seconds at breakfast, lunch and dinner–since it’s right in my kitchen it’s an easy step to take right there when you’re already making a sandwich or preparing your Sunday roast.

After two days of stirring it was time to go on to Step Four, Stabilizing and Clearing. Since it’s almost exactly like the last step, I’m putting it all into this one long post to keep things clear.

I cleaned and sanitised all of my equipment, checked my specific gravity (yep, still 0.992) and did my next addition, Potassium Sorbate. Sorbate is a bacterial suppressant. It doesn’t kill or even annoy spoilage organisms, but rather keeps them from breeding, which is crucial to the whole process of fining and stabilising: you use sulphite to stun/kill some of the yeast and any other organisms, you use the fining agents to sweep all of the micro-organisms out of the wine, and then you use sorbate to keep any of them from breeding back to the point where they can affect the appearance or flavour/taste of the wine. Sorbate is used in a lot of foods, condiments and even in beauty products and health food supplements, and is found in some berries (blueberries and Mountain Ash) as well. So, in it goes, with the first step being to dissolve it in a tiny amount of warm water.

It's a teeny amount and it dissolves almost instantly.
It’s a teeny amount and it dissolves almost instantly.

And then to stir that into the wine.

Everybody in the pool!

Next step is to add the ‘liquigel’, a clever contraction of ‘liquid gelatine’ and the final fining agent.

Snip!
Snip!

Squirt in carefully.

It's pretty sticky: make sure it all comes out of the packet.
It’s pretty sticky: make sure it all comes out of the packet.

Once everything is stirred up and all additions are done we need to top up the wine to the one gallon mark again. Don’t worry about diluting it: if you’ve been racking correctly you’ll be adding less than a cup and a half (350 ml) and the kit is actually formulated to accommodate this extra water.

Topped right up.
Topped right up.

After that it’s back on with all of the lids and airlocks and onto the counter to rest for six days until the wine is clear.

Soon, my pretties . . .

So far this has been the easiest, smoothest winemaking I’ve ever done: the one-gallon size makes doing one kit so easy, so quick, and so simple that doing three more at the same time doesn’t feel like work at all–it feels like a fun hobby leading to a great end–wine!

Master Vintner Part Two: Racking Day

Small package? Good thing!
Mmmmerlot!

More Master Vintner! I got my Master Vintner equipment and kits going last week and now it’s time to rack them out of primary fermentation and into the I gallon jug.

Oh Little Big Mouth, you so tiny!
US Oh Little Big Mouth, you so tiny! Shmutz around the jug is yeast residue.

One of the cool things about the Master Vintner Small Batch kit is the size. Compared to lugging 6 US-gallon (23 litre) carboys around, the Little Big Mouth fermenter is a breeze. I’m a big, strong brute, but even I get twinges in my lower back when I have four or five full-sized carboys to lift up for racking.

Autosiphon with tubing, hydrometer and test jar, 1 gallon jug and cap.

First things first: I assembled my equipment and double-checked the instructions. Yes, I wrote them, but I’ve become slightly obsessive about double-checking them for accuracy. I’m the only guy I know who can argue with himself about following instructions that he wrote!

Next up I cleaned and sanitised the equipment and jug, following the same procedure with Oxygen wash, rinsing and sulphiting that  I did on day one. Once it was all clean, it was time to rack it over.

Upsy-daisy
Upsy-daisy

Not only are the Small Batch kits easy to lift, you can also place them just about anywhere. Rather than having to rack from a primary fermenter sitting on the counter to a carboy down to the floor, I popped the LBM onto a box on my countertop and put the jug beside it. I love working at counter height! Honestly, this has got to be one of the killer sell features of this kit: light weight, ease-of-use and dead simple, too.

If you’ve never seen an Autosyphon in action, the small version that came with the kit is a great piece of hardware. Plain syphons work fine, but you have to start them either by filling them with water, covering both ends and simultaneously plunging the pick-up rod into the wine and the hose into a bucket to catch the extra water, and then swap when the wine comes through, or by sticking them into the wine and sucking on the hose like you’re stealing gasoline from a car–which is a little unsettling, but sometimes an opportunity to ‘accidentally’ drink from the hose (wine, not gasoline).

Check out the Autosyphon action:

While the Autosyphon took care of racking the wine into the gallon jug, I did two more things. First, I deftly filled my hydrometer jar with wine so I could check the specific gravity, and second, I tilted the Little Big Mouth back towards the side of the jug that the syphon tip was in. Tilting it would allow me to get all of the liquid out of the jug, while the anti-sediment tip on the syphon prevented any yeast-goo from going into the jug.

Rack, because that's how we roll.
Rack, because that’s how we roll.

Checking the hydrometer reading, I saw that it was good.

Remember, look across the surface of the wine, not the edge where it touches the glass.

The reading was 0.992–my wine was finished fermenting. Time to look at the instructions, where I wrote down the gravity from day one.

Every word, poetry.
Every word, poetry.

We started at 1.090 and finished at 0.992. With a little math, we subtract the finishing gravity from the beginning, multiply by 131 and we get 1.090 – .992 = 0.98 and 0.98 x 131 = 12.838, or just shy of 13% alcohol, perfect for our Merlot.

Of course there was also the necessity for a quality control test.

The moment of truth . . .

Smelled young, but very good, with nice dark cherry notes. As for the taste . . .

I'd say he's happy. Or getting tasered. One of the two.
I’d say he’s happy. Or getting tasered. One of the two.

The taste was impressive for such a young sample–it’s going to be pretty good!

The last thing to do was to put the cap an airlock onto the jug and clean up all the equipment I used–well, after I finished racking the other three wines!

Oh little wine jug how I love thee!
Oh little wine jug how I love thee! Note the small amount of fizz–that’s CO2 gassing off, not fermentation.

I’m sold. It’s one thing to develop a kit in the laboratory and taste bench samples, but it’s another (and completely necessary) thing to do it right in your own kitchen, among the cats and cabbage rolls to see how it’s going to work in the real world. I’m happier with this kit than with anything I’ve done in a long time, and in 12 days I’m going to get it stabilising and cleared and then it’s off to bottling. Hurrah!

Master Vintner, Your Personal Wine

The day I was waiting for finally came: my shiny new Master Vintner Small Batch winemaking supplies arrived!

One full equipment kit, three extra Big Mouth Bubblers and three extra wine kits!

How happy am I? I’m ecstatic! How proud am I of the Master Vintner project? So proud that I put my name right on the box!

My mother is so proud
My mother is so proud!

I’ve been working with my friends at Northern Brewer for the last year to make this happen. It’s been an amazing time, and a lot of fun working with the crew there. Designing a new wine kit might seem easy at first blush. After all it’s just a matter of putting some stuff in a box and a bag of grape juice and away you go.

Only not really: there’s a lot of logistical and technical issues that need to be solved. Ordering grape materials has to precede the harvest by months in order to ensure you get the best of the vineyard. Then you need to formulate, get the juices cold stabilised and ready to blend, make and test blends (like all wineries, kit manufacturers blend for character and consistency) and then test your packaging protocols to make sure they will arrive to customers in good condition.

Beyond that, it’s a whole new world of equipment, specific to the 1 US-gallon size, that needs to be integrated to make sure it works well together and makes the best wine possible. Lucky for me there’s a great team doing the sourcing and manufacturing, making me look good!

It's like a treasure chest for winemakers
It’s like a treasure chest for winemakers

My Master Vintner equipment and supplies arrived this week and I got cracking right away. Step one, unbox and check the contents.

box-contents
All present and accounted for!

The equipment kit contains almost everything you need to make a one US-gallon (5-bottle) batch of wine. You’ll have to supply the wine bottles, which can be saved from the recycling (hurrah environment!) and labels, which are fun to make for yourself.

The first step is to read the equipment list, make sure everything is there–pretty much a sure thing from Northern Brewer. Next, we need to pull out our wine kit and check out that puppy. The first one I laid hands on was a Merlot.

Small package? Good thing!

California Merlot is going to be rich and soft, with warm berry and dark cherry fruit and supple tannins. Mmm!

Next, let’s take a look at the ingredients, and most especially the instructions.

The good stuff
The good stuff

The wine kit has yeast, finings, stabilisers and a fabulous set of well-written and lucid instructions (yes, I wrote them).

Hi-yo Mylar! It's shiny, but I'm more interested in those brilliant instructions
Hi-yo Mylar! It’s shiny, but I’m more interested in those brilliant instructions

I dove into making the kit immediately, but that’s only because I wrote (and re-wrote, and edited and re-wrote) the instructions myself. Everyone else should immediately put everything back in the box, seal it up and sit down and carefully and slowly read the instructions from beginning to end–if you’re not sure of anything, don’t start until you get it straight!

But don’t worry about that too much: ultimately, if you can make a cup of coffee or a bowl of cereal, you’re qualified to make your first batch of wine without any problem–I promise.

After reading the instructions, the first step is to mark off Little Big Mouth at the one-gallon line. LBM’s aren’t pre-marked because it’s a tricky process, and some folk’s jugs might not be completely standard, or the markings might get altered in shipping and handling. Better to do it in your own winemaking area so you’re confident you’ve got it right.

The best way to do it is to fill your gallon jug right up to  the neck, about two fingers below the tippy-top.

Any fingers will do: mine are fat, but skinny fingers work equally well.

You then pour the jug into your LBM.

Note the water mixing with Oxygen Cleanser in the bottom of the LBM.

Because the next step is to get things clean and sanitised (cleanliness is next to goodliness for winemaking), I put my winemaking cleaner right into the LBM, to save a step.  The Oxygen Cleanser included in the equipment kit a great product–you can’t use home cleaners because they have too much perfume and other weird chemicals, which can leach into the wine and leave strange flavours.

Next step is to mark off the 1-gallon level. I used some white Duct Tape and a permanent marker.

That's the spot.
That’s the spot.

And then it’s into the sink with the other items needed for day one: hydrometer and test jar, wine thief, lid, spoon, bung and airlock.

Scrubbing and soaking, the Tim Vandergrift way

While the equipment comes brand-new, so it’s not stained or dirty, it’s still a good idea to give it a very good cleaning before you use it–just like you would any new plates, glasses or cups you brought into your kitchen.

After a 20 minute soak and a scrub to remove all surface debris, I rinsed everything thoroughly and then sanitised with a metabisulphite solution.

Now that's a product shot
Now that’s a product shot

Metabisulphite solutions are the second part of cleaning and sanitising. While Oxygen Cleanser leaves your equipment clean enough to eat off of, it’s not ready to use for winemaking. For that you need to treat the surfaces with a solution that will suppress bacterial activity, and in winemaking the easiest stuff to use is a solution of three tablespoons (50 grams) of crystalline sulphite powder in 4 litres (one gallon) of water. Note that absolute accuracy isn’t crucial here, because you’re shooting for a solution that will yield 1250 Parts Per Million of free sulphite and the difference between one gallon and 4 litres or three tablespoons and 50 grams won’t move it more than a few dozen PPM.

I didn’t take any pictures of sulphiting the equipment because a) I didn’t know how to make that look exciting, and b) I always have a spray bottle of the stuff under the counter and I just grabbed it and sluiced everything down, waited 5 minutes and rinsed. By the time I remembered I was photoblogging I had already started the wine. Whoopsie. In any case, I went on to the next step, grabbing the bag of winemaking concentrate.

juice-bag
Grey and wrinkled, but still has a sparkle, like the winemaker

The caps on these bags fit extremely tight–they have to to exclude oxygen and spoilage organisms. If you’ve got long fingernails, or issues with grip strength (which is to say, if you’re not built like an ogre like me) you can pry them up with the edge of a butter knife (nothing sharp, please!) or use a bottle opener on the edge (works like a charm) or invest in a bag decapper. This doohickey fits exactly over the standard cap and levers it off in a jiffy.

Works like a charm, and saves that manicure

Fortunately for me, I am built like an economy-version ogre, so I just pull it straight off. I am also good with opening pickle jars and other applications of brute-force and ignorance.

Yoink!
Yoink!

Careful, though: the juice is very high in sugar and red varietals can really stain fabrics–easy does it.

Next, pour the bag contents into the LBM.

Smells fantastic
Smells fantastic.

Rinse the bag out with two cups of lukewarm water and add it to the LBM as well.

Good to the last drop.

An important word on temperature: the kit has to be between 72°F and 77°F (22°C and 25°C for non-Americans). This is crucial for the success of the kit, because the yeast need to get fermenting quickly so your wine can stay on schedule. That means a bit of management: if the kit is coming in from a cold garage you’ll need a bit warmer water to make it up. If you’re in a heat wave in Florida, you’ll need to cool that water down a bit.

But it’s not terribly tricky. To hit my target temperature I ran the water in my sink for a minute until it hit 77°F and topped up the fermenter to the 1 gallon mark with that. When it was at the right level, it was time to stir.

Stir like it's 1999.
Stir like it’s 1999.

You have to stir hard. Pouring the water into the juice makes it look like everything is well mixed, but that’s an illusion: concentrate and water have very different coefficients of viscosity and left to themselves, they’ll settle out. I gave it a darn good whipping with the shiny stainless steel spoon that came with the kit.

Next up, some measurements. First, the temperature check. I pasted on the Fermometer on the LMB and had a look.

Looking good!
Looking good!

With the temperature well in hand, it was time to check the specific gravity. I assembled the three piece wine thief and used it to fill the test jar.

Fill 'er up.
Fill ‘er up.

With the level of the wine relatively low, it takes about three trips with the thief to fill the test jar. When it was full enough to float the hydrometer I popped it in and checked it.

Sight along the surface of the wine--that's where the reading is accurate.
Sight along the surface of the wine–that’s where the reading is accurate.

If you’ve never read a hydrometer before, there’s a trick to it: don’t look at the wine where it meets the hydrometer. Surface tension will pull it up the glass tube and give a false reading. Instead, look across the surface of the juice and draw an imaginary line from that surface across the hydrometer markings. In this case it was a solid reading at 1.090–perfect.

Next up, time to pitch the yeast. There’s a lot of information out there about rehydrating yeast and stirring it in and suchlike. For the Master Vintner wine kit, follow the instructions and just rip the package open and pour the yeast onto the surface of the juice.

As soon as the yeast goes in, the juice is considered to have become wine.
Go my little yeasts! Be fruitful and multiply and make wine.

And that’s it for day one. The only thing left to do is to wait 8 days for the next step.

Well, not quite. I had three more kits to make up!

So beautiful.
So beautiful, each in their own ways

I’ll update when it’s time to rack the wine from the LBM’s to the jugs. In the meantime they’re bubbling away merrily, making alcohol and smelling better every day. Yum!

Catching Up

Oh, I’ve been a bad blogger.

hopunion-interior
I’m smiling because I’m in the middle of a factory that processes hops–reason enough for a lunatic’s grin.

It’s been a full month since I last blogged. But to my defense, I’ve been a bit busy. In addition to my partnership with Midwest Supplies  and our cool new Master Vintner line of winemaking products, I’ve been busy doing a few other things. First, I shot some videos:

And then I did a little bit of travelling. Since the end of August I’ve been to:

  • Minneapolis
  • Houston
  • Atlanta
  • Victoria
  • Denver
  • Seattle
  • Yakima
  • Boston
  • Virginia
  • Philadelphia
  • Minneapolis (again!)
  • Detroit
  • Chicago
  • Kelowna
  • Summerland

In that time I’ve been to Hop and Brew School, done wine opportunity seminars for consumer beverage retailers, Limited Edition wine and food pairing events, shot many videos, attended the Great Canadian Beer Festival, helped plan catalogues, merchandised stores, drank beer and laughed a lot.

And now I’m typing this up in an airport lounge waiting to jet off to Winnipeg. I’ve had some exceptionally good luck with local weather on my travels, and had a lot of fun working with my friends in all of the cities I’ve visited, and I’m looking forward to the same over the next week.

I’ve got three or four blogs lined up, and soon I’ll have some very exciting news to share, but that’ll have to wait another few days: I’ve got some sales training to do, another couple of Limited Edition wine tastings and a webinar session for the members of the Canadian Craft Winemakers Association.

Uh-oh, it’s wheels-up. Hold the door, I’m coming!

Tim Vandergrift: Master Vintner and Midwest Supplies

midwest-announcement
I can’t remember why I was so mad at that wine glass . . .

The big news is finally here! Midwest Supplies and Tim Vandergrift are working together! I’m really happy with the fit between us and excited to introduce new products and to work on advancing home winemaking. I became an independent consultant early in 2014. My biggest concern about my new career was where I could apply myself to make a difference in the consumer-produced beverage industry (aka Homebrewing and Winemaking).

midwest-logo

While I connected with many small clients and really love the interaction I have with them, I looked around and realised that one of the most dynamic and exciting places in the industry was right in front of me, Midwest Supplies. I’ve worked with them for more than a decade on behalf of Winexpert and always loved how they ‘got’ the industry, understood home beer and winemakers, and generally felt they were my kind of folks. Of course, this didn’t keep me from thinking that they could probably use a guiding hand on the wine side, but I always had other priorities. Now that I’m their Technical Winemaking Advisor I feel incredibly fortunate to have the opportunity to work with them to introduce some new ideas to home winemaking and do educational and promotional activities as well. I’ve even got a couple of videos up to start, one on the benefits of using a floor corker,

And one on the savage joy of using a three-pronged stirring whip! The Great! Big! Deal! that I’m really happy about is some of the new products we’ll be bringing out in the future. No hints just yet, but I’m pretty stoked about sharing them, and won’t hide that light under a bushel. If you’re already a Midwest customer, thanks! If you’re not yet, check ‘em out, and check out My Ten Favorite Wine Kits—nine of which are on sale for a limited time! Use the secret coupon code (hint: it’s WINEGURU) at checkout and you’ll save 15%. How’s that for a hello? Lots more to come, and so much to do, and I couldn’t be happier or more proud.

The Enemy Without

fruit-fly
A face only nobody could love

Summer is here and for winemakers that means one thing: the inevitable return of our sworn enemy, Drosophila melanogaster, the common fruit fly. Minute little flying monkeys of doom, they’re hard to exclude from your winemaking areas, and while they’re easy to kill, by the time you’ve swatted one thirteen more have materialised out of thin air, looking for a free meal—females lay 400 eggs each, and they mature in as little as 7 days!

The reason why we need to be concerned over the little monsters isn’t just that they’re unsightly and chewy when you discover one inside a mouthful of Chardonnay. No, it’s their other name we need to think of, ‘Vinegar Fly’. The little blighters are filthy with acetobacteria, the organism that turns our delicious alcohol in to vinegar.

fly infestation
Time flies like an arrow. Fruit flies like a banana.

How to combat ‘em? First, understand that they don’t eat fruit: they eat mainly yeast. When they smell carbon dioxide and alcohol, they think it’s a piece of rotting fruit where they can lay eggs and get a delicious meal. When they smell a fermenting carboy, it’s their equivalent of a Vegas buffet ten thousand miles long.

Anybody who has ever worked as a bartender over the summer months knows the sad and icky truth: you come in for the first shift of the day and any bottles that have been left with an open pour-spout (‘speed spout’) overnight will need to be poured through a coffee filter to extract the little winged corpses from their watery graves. If a fermenting carboy smells a buffet, and bottle of vodka smells like ten tons of chocolate cake.

Step one in managing these horrific little pests is exclusion. You can’t keep them out of your house and your fermenting area, so you’ll need to exclude them from the wine itself. Always do covered fermentations. The commonest fermentation vessel used to start kit wines in the US is a 7.9 gallon (30 litre) bucket with a tight fitting lid and a port to plug in an airlock. By keeping the wine sealed and airlocked, you’ll deny entry.

Second, when your wine goes to the carboy, make sure you keep that airlock topped up with water. Some folks use sulphite, and while that’s mostly harmless the sulphite usually oxidises off in a few days into plain water. Other folks want the sanitising power of alcohol and load the airlock up with Everclear or grain alcohol—this only attracts the enemy!

Third, you’ll need to wipe up every single little tiny spill of wine or juice immediately, and sulphite the area to prevent any residue from getting a yeast film going on it. Then make sure you wash your cloths or discard your paper towels in a tightly sealed receptacle—the cloth used to wipe up the juice will become a source of attraction.

Fourth, if you have to wash all racked primary fermenters or carboys (those with lees and even a small amount of cloudy wine in them) immediately. If you can’t get to the right away, pop the bung and airlock on again.

Fifth, if you filter your wine (always a good idea—I’ll talk about that in a later blog) break down and clean your filter right away, and seal the used pads in a plastic bag before discarding them: they smell just dandy to fruit flies.

Flypaper only works on fruit flies by accident. Plus, some of the stuff is toxic as all get-out, and not good for winemaking areas. You can set up a wasp trap (available from hardware stores) for them. Normally they’re filled with fruit juice or other sweet liquid, but that doesn’t impress a fruit fly. Fill it with the magic formula: apple cider vinegar with a couple of drops of liquid dish soap. The apple cider vinegar drives them to a gustatory frenzy, while the dish soap removes the surface tension of the liquid: when they fly in and hit it, they drown right away—poof!

You can also, check out natural pyrethrin-based insecticides: they’re made from plant oils, are mostly safe and can be used in food prep areas. Never use any other kind of insecticide around wine or food prep areas! Triple-check to make sure you’ve got pyrethrin and not the synthetic pyrethroid, which is much more persistent and killier. Pyrethroids are bad for the environment and can be toxic to children and pets, especially kitty-cats, who lack the enzyme to break them down, and can rapidly succumb to pyrethroid toxicity. No kitty should be collateral damage to a fruit fly!

It should be noted that cleanly made wines that have fully fermented and are sulphited to an appropriate level (follow the manufacturer’s instructions) are fairly resistan against colonisation by acetobacteria. Sulphite in particular is a good bacterial inhibitor for this organism.

But there’s always that chance: a missed sulphite addition, a little extra oxygen pick-up in fermentation, one lone fruit fly wings in and . . . well, that’s thirty bottles of wine you can’t even pour on your salad (wild acetobacter fermentations make a kind of vinegar that tastes mostly like nail-polish remover).

Cellaring: Digging a Hole

cellar 01
Looks like a great place to spend the weekend

One of the things that’s rarely discussed when the subject of cellaring comes up is the cellar itself. As the name implies, people used to put their wine in a hole in the ground, under their dwelling or winery. As long as human beings have striven to preserve food they’ve known that cool, steady temperatures, combined with moderate humidity would keep fruits, vegetables and meat from spoiling as quickly as it would in other conditions. Wine kept in these conditions not only lasts longer but also improves with time.

Cellars and caves work to conserve and age wine because they offer the perfect combination of environmental factors including:

  • Cool temperatures, usually in the 10-12C range (52-55F). Wine held here ages in a very slow and controlled manner. For every ten degree increase in the temperature, the speed of the chemical and biochemical reactions that govern ageing doubles, and some get out of control, causing the wine to die of old age while still young in years.
  • Steady temperatures. Variations of less than one degree per day, or five degrees between winter and summer are best. Every time a bottle of wine warms and cools, the wine inside it expands and contracts, alternately pushing and pulling on the cork. Some wine could leak out, or penetrate the cork, and air can enter the bottle. Obviously, neither of these is desirable.
  • Darkness—if not complete blackness then at least the absence of direct sources of UV radiation. While wine doesn’t go skunky in minutes like beer does in direct sunlight, it does age quicker and suffers from ‘photodegradation’.
  • Humidity—steady, around 70%. Any drier and corks can dry out. Once the end of a cork becomes dry, it wicks wine along just like the edge of a paper towel dipped in liquid. Eventually the wine level in the bottle drops, or the cork dries out completely and crumbles. Too much humidity and your corks will get mould, and your labels will disintegrate.
  • No vibration. Wine is a living thing, so constant jostling, thumping and vibrating unsettles it. Store a bottle of wine in an active paint-shaker and it will go bad in only a few minutes. Store it on top of the washing machine, and it won’t take many loads of delicates before it falls apart.
  • A ‘clean’ environment. Wine is a food product, and just like not storing angel-food cake next to garlic, you don’t want your precious wine snuggled up to paint thinner, compost or any other food or non-food item that could transfer flavours or aromas.

When asking how long wine will keep – that is, how long you can age it and still have it be drinkable – you’ll find that the answers can become quite complex. Most ageing recommendations tend to be very general, because there are so many variables to consider, including the type of wine, the storage conditions, and the quality of the cork (I’ll talk a lot about corks in an upcoming blog).

What is inside a bottle of wine often has less to do with how well it may age than the external conditions that it will be stored in. Under ideal conditions even inexpensive wines will age for years under a good cork. But those ‘ideal’ storage conditions include the absence of electromagnetic radiation (both visible and UV light), very high relative humidity, a temperature of 11C/52F, not varying by more than 1/10th of a degree over the course of one year, and an absence of any sort of vibration. Any divergence from these conditions could reduce a wine’s ageing potential.

scary cave
And over here is the guest bedroom . . .

Cool, stable, quiet, humid, dark and clean—sounds pretty simple. But most of us aren’t going to be comfortable digging a big hole under the house, and if our home had all those attributes, it’s a pretty sure thing that we’re living in a cave or under a bridge with trolls. You could buy a fancy climate-controlled wine cabinet, but those can be expensive, especially if you’re making your own wine and building up a good collection. Alternatively, you can make do with what you’ve got on hand, and extend the life and cellaring potential of all of your wine. Easiest is to start by storing your wine in the coolest part of your home, away from direct light sources, off-odours or vibrations.

basement-cellar
Time to fill this place up!

You can minimize the impact of temperature changes by keeping the wine up against a north-facing wall. Sunlight striking a foundation or the earth around it can cause a temperature flux, so steer clear of south-facing walls. You might also want to build an enclosure around your wine rack if it’s out in the open: this can help diminish convection currents, and increase thermal inertia. The enclosure doesn’t have to be anything fancy; you can create it from things as simple as Tyvek (the foam-board house insulating material), duct-tape and corner brackets.

In colder, drier climates like the north and the midwest, humidity can drop quite low, especially in winter. Too low and your corks will dry out, allowing oxidation and, potentially, leakage. Humidifiers sold for home use are not a good answer; they work too well, and can cause a build-up of mold and mildew in places like the basement, where air circulation is low. It makes more sense to set up a passive humidifier. Essentially this is a pan of water, a clean dishcloth and a cinderblock. Set the pan of water on top of the cinderblock in your wine cellar, drape the dishcloth half-in and half-out of the pan, and tuck the bottom end on top of the block. This will allow the towel to wick the moisture out of the pan and increase the evaporation into the air. The cinder block will hold any excess moisture and release it slowly, helping keep the humidity steady, even in a cellaring area a large as a thousand cubic feet.

Some wines are more susceptible than others to poor storage conditions. In general, white wines–particularly off-dry wines and Champagne – are frailer than reds. Grape variety can also make a difference to how well the wine does in storage; so you would find that a robust variety like Cabernet Sauvignon is generally more resilient than delicate one like Pinot Noir.

press-wine
Looks fine, but it could probably use a bit of ageing.

With a newly bottled wine, it’s tempting to start consuming it right after bottling. While there are many wines that can be consumed young and be everything you want them to be, if you really would prefer to maximize your wine’s potential, a little time in the bottle can make an enormous difference. Most red wines begin life with obvious fruity aromas and some degree of astringency or bite, but with ongoing ageing, they develop softer, gentler, more complex aromas and flavours. The wines become richer as the fruit mellows and as the astringent tannins relax and contribute to the body and character.

old-bottles
Maybe not this long . . .

Cellaring wine used to be a rich man’s game. In centuries past, only wine merchants storing stock for future sale, or the very wealthy could afford to purchase age-worthy wines in large volumes, and then wait as the years passed to sample them as they approached their peak. The French used to say that you didn’t buy Bordeaux for yourself, you bought it for your children, while you drank the wine your father had bought. Things are a little easier with modern wines. Most of them are designed to be more drinkable sooner and even a moderate amount of cellaring will help bring out their best.