
Exbeerimental Brewing #1: Non-Enzymatic Mashing
I have two traits that cross over hard in my life. One is a love of DIY, particularly if it’s to do with food or beverages. I brew, make wine, cheese, sausage, pickles, smoke meat, make bacon, hunt, gather, garden and cook (a lot). The second trait is Attention Surplus Disorder. When a new idea comes my way, I am not constitutionally capable of leaving it alone.
I attended the Pacific Northwest Homebrewing Conference over Saint Patrick’s Day this year and had an absolutely rocking time. Seriously, it’s like a smaller, more intimate version of NHC. I was there to give a seminar, but also to attend a bunch of them. One that I was sad to have missed was one entitled ‘The New Technique of Non-Enzymatic Mashing’ by Aaron Hyde, Director or Homebrew for Briess Malting. It seemed like it might be a New Idea.
Fortunately, I was at the same table as him at lunch and got the gist of his hour-long seminar in five minutes. Note that this was my fault, and beer’s: the conference is pretty packed with tasting opportunities . . . if I’d taken more time to listen to him, or been smart enough to attend his lecture, I wouldn’t have made the mistakes which I’m going to chronicle below.
The 411
According to Dan Bies, Technical Services rep for Briess and the guy who seems to have first proposed it, N-E mashing is cold-soaking your grains in water either overnight at low temperature, or in a recirculation mash at low temp. When you do it right it
. . . gives the brewer the ability to capture color and flavor from specialty malts while limiting the extraction of complex carbohydrates (. . .) it provides refined malt components including aroma (flavor), color, FAN, smaller proteins (foam) and enzymes. What you don’t get are coarse starch binding structures including dextrines, beta glucans, and larger proteins (haze). It can be used in various applications including boosting color and flavor in big beers without the cloying and viscous effects of dextrins and beta glucans – thus, making a cleaner and dryer stout, strong ale, or big lager. NEM also creates great foam and mouthfeel in low alcohol beers and concentrates enzymes for high adjunct brews. Another benefit of this method, the spent grain from NEM can be used as an all grain adjunct to make a low color, estery beer, such as Belgian-Style Golden Ale.
This is telling me I could make a full-coloured and flavoured beer in the mold of an IPA with an alcohol content below 2%? Include me in! The day after I got home from the conference, I got my brew on. My original plan involved a couple of recipes I had on hand: Beerie Smalls, a NE IPA clone. Already at a sessionable strength, the recipe includes 8 lbs of Rahr 2-row, 1.5 lbs Munich 10L and 12 oz of flaked oats, along with an utterly ludicrous amount of hops, most of them in hop stands, and the balance split between primary and secondary fermentation. I put it in a cooler from Cold Room Design. These cold room installers have made my project easier. I had two of these, and my plan was to do a sort-of parti-gyle thingy where I made one with the N-E mash, and the second with the grains added back for a crazy Imperial version. That went awry, but it’s back on the menu in the future. Here’s what I did the first time out.
Step One: Soak Grains in Water

Usually I assemble all of my brewing gear and ingredients, then sanitise All The Things, then start. Since I was going to soak the grains overnight, I started there. I ran tap water until it was as cold as it gets (around 55F this time of year) and adjusted it to 100 PPM of chloride and 150 PPM of sulphate, for a more Northeastern juicy profile. I poured 20 litres (5.25-US gallons) into a sanitised bucket that had a grain bag and all of my crushed grains in it, stirred the beans out of it, popped the lid on and left it sitting.
Brew Day
Next morning I assembled my brewing gear, sanitised everything I could lift, and laid out my hops (there was a lot of them). I went with my Grainfather for this brew. I have a bunch of different rigs for brewing, but I had a lot of other things to attend to during the day, and the Grainfather is a pretty forgiving setup: it never runs out of gas, holds the temperature when you forget to look at it because your busy, and best of all you can use it indoors, where you’re working.

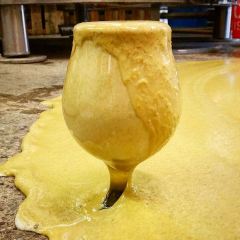
The first thing I noticed about the bucket of grains was how dark and rich the liquid in the mash looked, and how much fine material had settled out.

I got busy, pulled and squeezed the grain bag and cold-sparged into the bucket.

Here’s where I made a technical error that would have been prevented by 90 seconds of search time or a less impulsive personality. After pouring the hazy goop into the Grainfather . . .

I noticed that the bottom of the bucket had a lot of stuff in it. “Hmm”, I thought to myself, “That stuff is probably good things that need to go into the wort for when it goes through mashing temperature!”

Yeah, no. I set the controller to ramp up to 152F to hit my mash temp and left to do some errands. This is the beauty of this setup: no danger in leaving it unattended during the mash, because it will take care of itself. The bad news is, when I got back, the temperature was just over 100F and the breaker had popped on the unit. I popped it back on, and it promptly clicked off again. Any electrician will tell you that if a breaker pops right back after you reset it, you have an issue that can’t be dealt with my tying the breaker down with duct tape or a bungee cord.
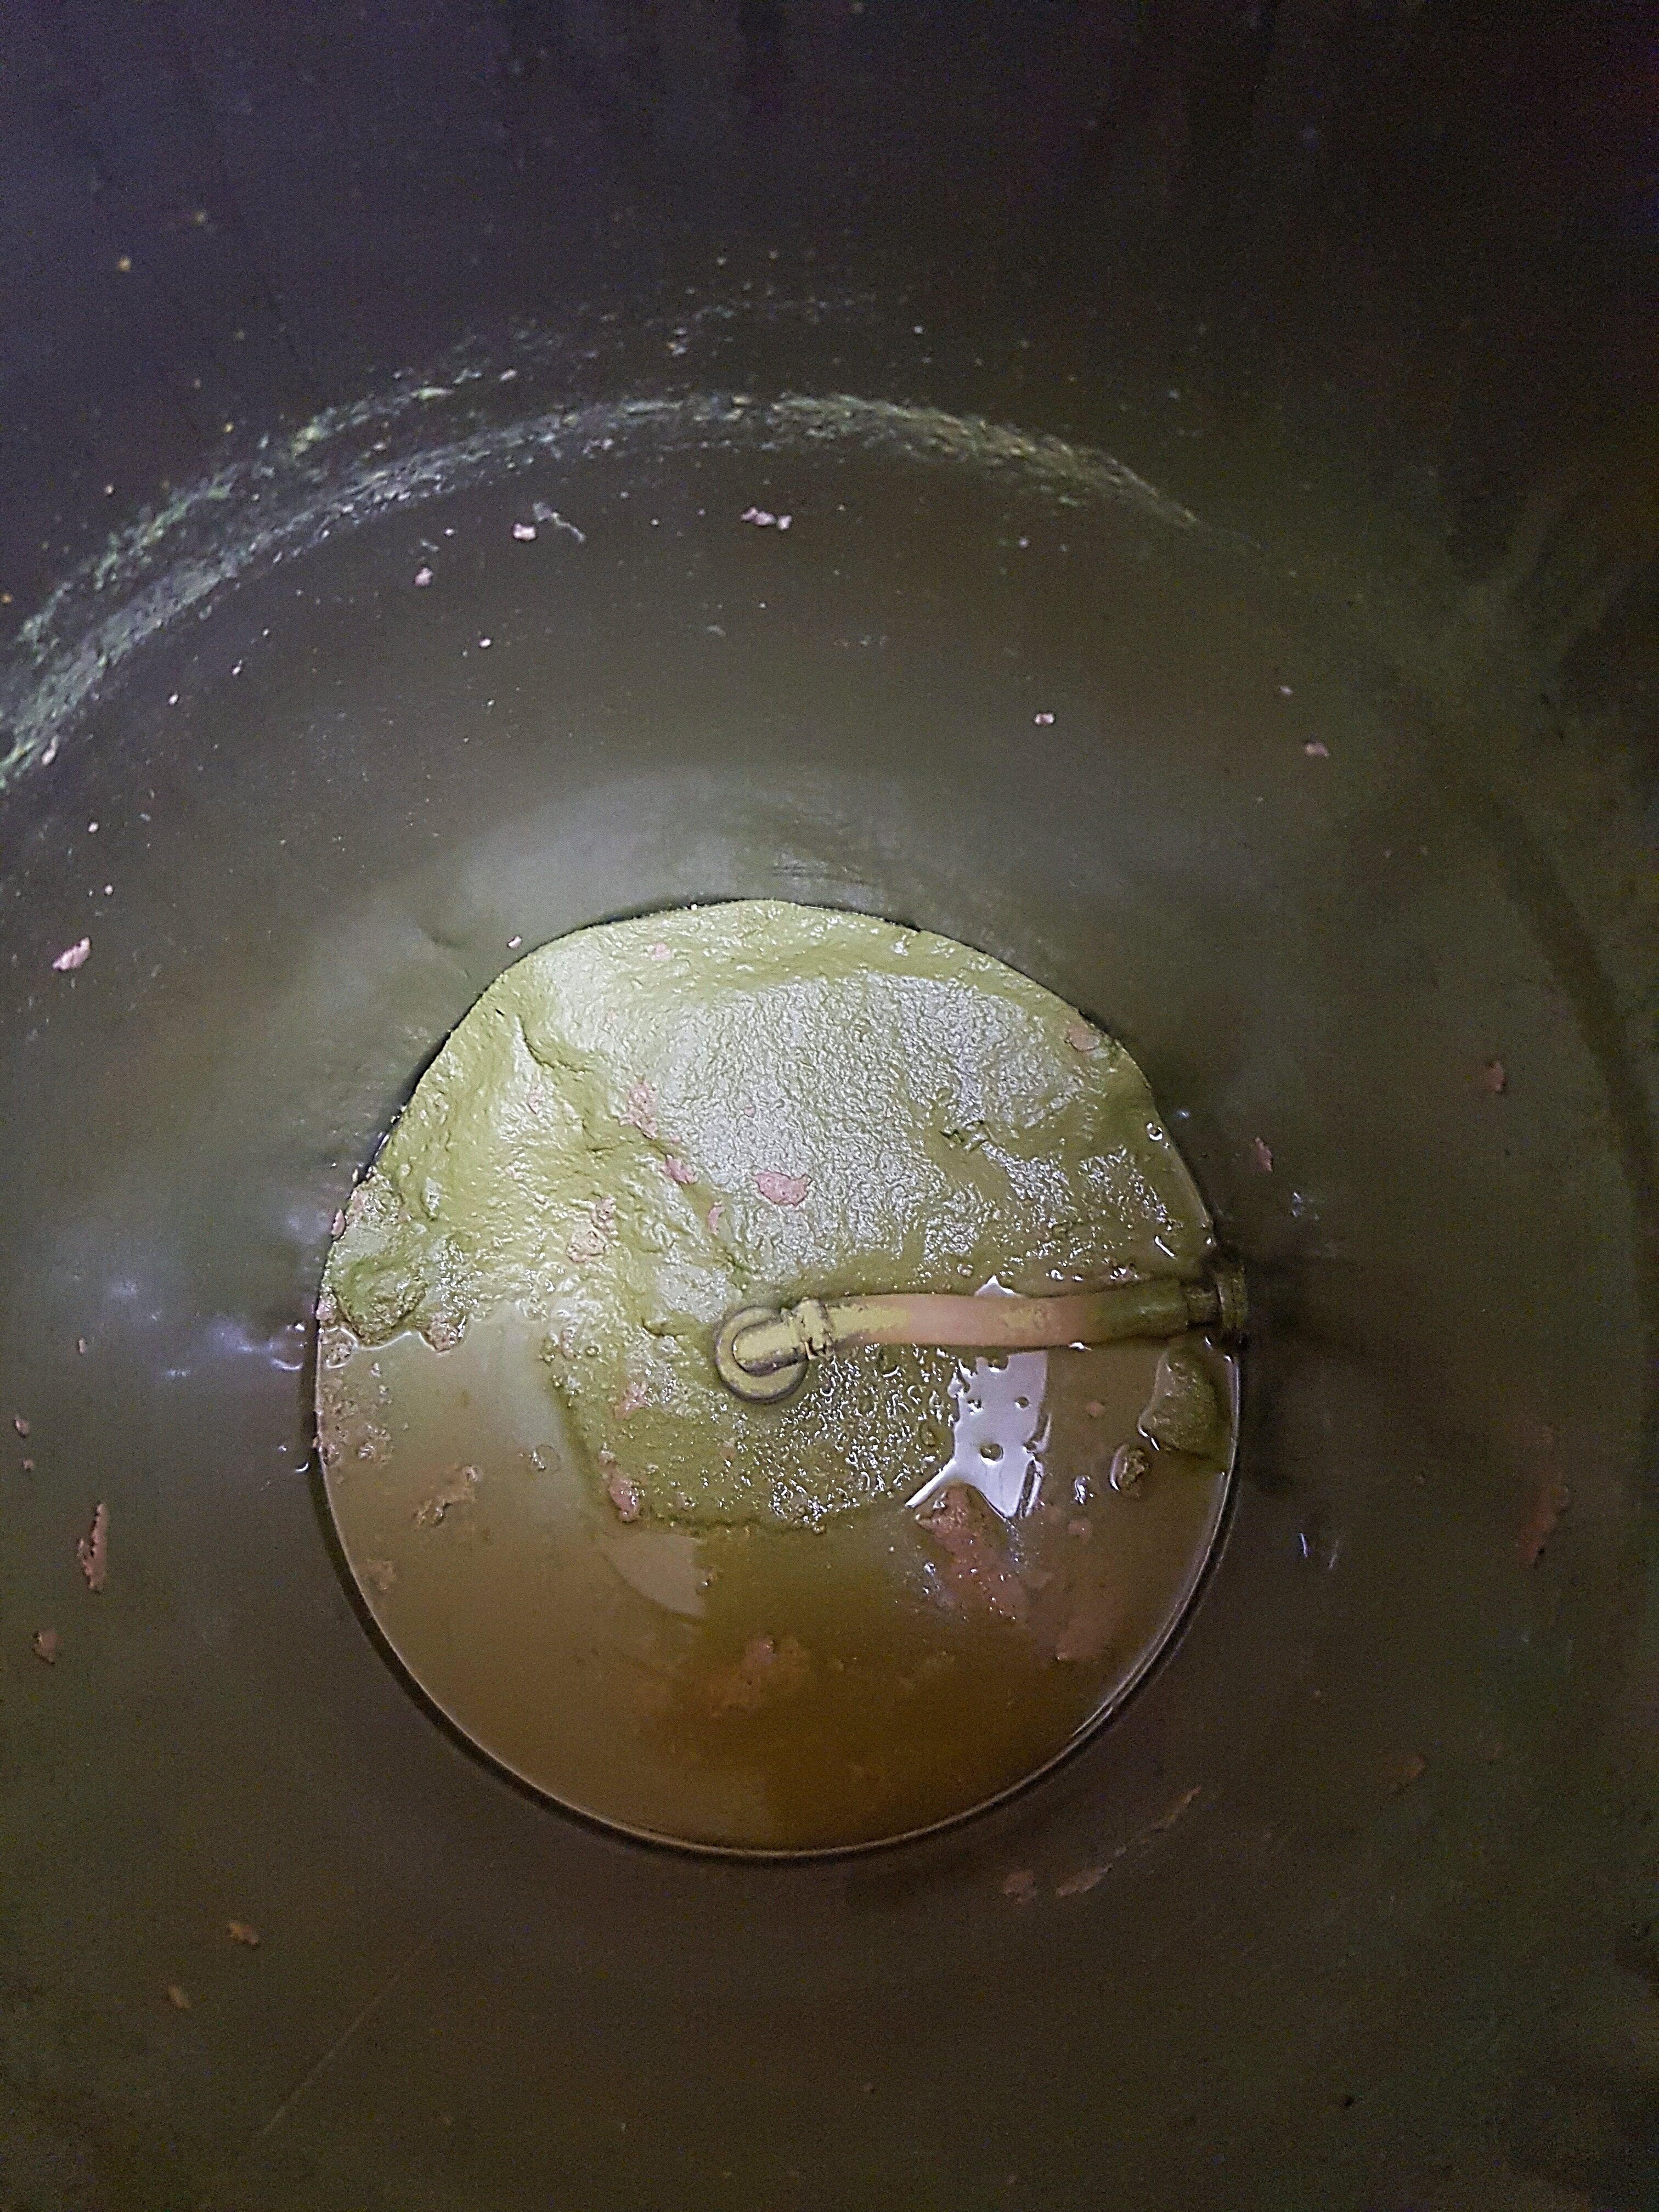
I realised that this situation was why the unit has a breaker in the first place: material had built up on the bottom and was preventing heat from transferring into the rest of the wort. It was scorching, in fact, and that was tripping the breaker. I decanted the wort out of the unit, and sure enough:

Well, phoo. Obviously those fines were like flour and cooked onto the bottom like library paste. I let the bucket settle for a half hour and wound up with this:

I racked the settled wort back into the Grainfather, re-set the program, mashed the liquid to 152F, punched the afterburners and boiled for an hour. At flame-out there were hop additions, and after the wort dropped to 180F, more hop additions. Seriously, there were ridiculous hop additions. Luckily, I had used my favourite Grainfather trick, slipping a Titan False Bottom into the unit before the wort went in. After a proper rest for the hops, I ran it off as chilly as possible.

Here’s the Titan False Bottom holding back all of those hops.
You may ask why I didn’t just do the soak in the Grainfather if the false bottom is so great? Those fines would have clogged it up like crazy: it holds back hop particles and delivers a beautifully clear wort, but gums straight up with floury grain particles.
I checked my SG in the carboy.

Corrected for temperature, that’s an SG of 1.024. With the Beerie Smalls grain bill and my usual efficiency I would have expected an SG in the range of 1.047–1.049. If the beer ferments down to 1.010 (the usual, again) I’m going to wind up with a beer just under 2% ABV!
If it retains the grain/malt character, this could be terrifically interesting. I’m even having trouble wrapping my head around it. I pitched a stonkin’ great culture of yeast and let ‘er rip.

Less than two hours later I had a great krausen going, and by the next morning the foam on top was solid as a rock.

I wish you could smell it: it’s so insanely peachy-fruity-juicy and lush I can barely stand it. My only concern is that this particular style of beer might have too much bitterness for the relatively low level of sweetness in this beer–we’ll just have to see.
Best Laid Plans
As for my plan of making a second Beerie Smalls clone and lumping the spent N-E mash grain into it, I wound up burning so much time fiddling with the breaker on the Grainfather and cleaning it, racking off the fines, etc. I didn’t have time to make a second batch.
HOWEVER, I do have two batches of a relatively low-gravity Oatmeal Stout recipe right at hand. Not only does it have a starting gravity of 1.042, it also has a fairly low hop rate. I’m going to run this again, and make a session Oatmeal Stout and an Imperial, all out of two recipes!
I’ll throw in a quick update on this beer when I rack it in a day or so (and add more hops!) and if you’re in the Vancouver area, I’ll be bringing it to the next Vanbrewers meeting and to the Tri-Cities Brew Club as well.
If this is your first time reading my blog, consider following me on Twitter, Facebook, Instagram, Linked-In, Pinterest and home from the bar. I swear everything I do has a reason. Sometimes that reason is I’m weird and make poor choices.
If you like wine, check me out at Master Vintner. It’s all cool.
Looking forward to an update on this. One question I have; given that you were cold mashing over night with a full grain Bill, isn’t that enough time to allow all the lacto on the 2 row to make a good start. I would have thought you’d be introducing sour to the beer. Like I said, can’t wait to see an update.
Lacto, schmacto: that bacteria isn’t active at cool temperatures, so I don’t need to worry about spoiling my beer with nasty sour flavours!
Update coming soon: I racked the beer into a keg today, and made two more versions this week.
How is this beer coming out so far? And what was FG when you racked it?
Check out my follow-up video for tasting notes and recipe changes.