Master Vintner Small Batch Part 5: Bottling Day

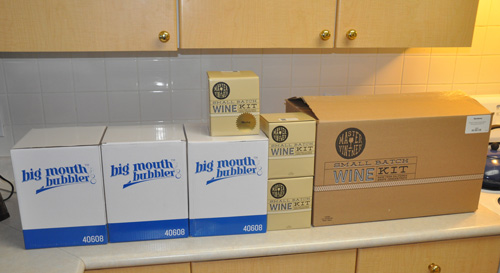
One full equipment kit, three extra Big Mouth Bubblers and three extra wine kits!
Where it all started

It’s finally here! After starting my Master Vintner wines, racking them from the primary fermenter, and doing the fining/stabilising steps, bottling day has arrived, and I’m all about getting my Cabernet Sauvignon, Merlot, Pinot Noir and Chardonnay into the bottles–well, almost all of it into bottles, along with a little of it into a secret project . . . more on that in a minute.
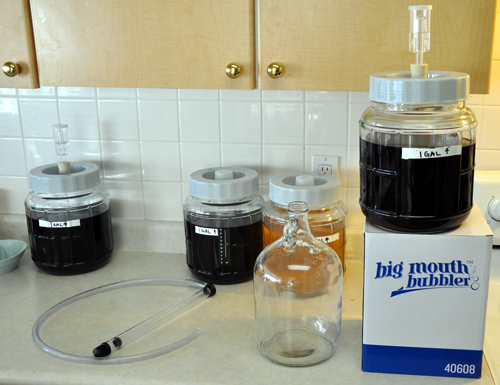
rack-setup
Time to rack off the sediment.

My first step was to clean and sanitise all of the equipment I’d be using, including my autosiphon, bottle filler, jugs and such–as always, cleanliness is next to goodliness in winemaking.

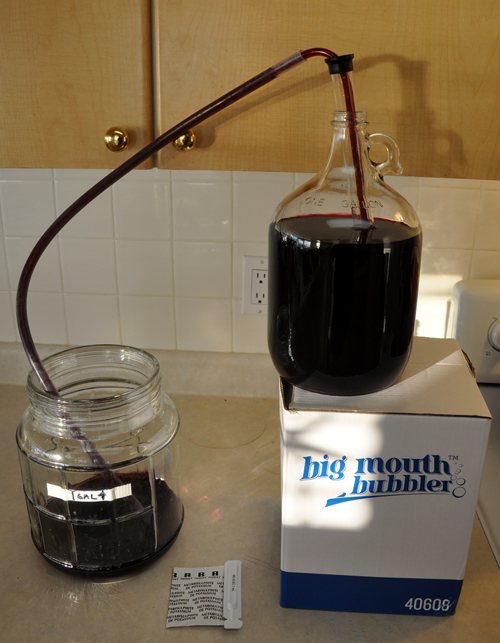
Next, I set up my racking station by the simple expedient of lifting my Little Big Mouth Bubbler on top of a convenient box on my counter. If you haven’t used one of the Master Vintner Small Batch kits yet, it’s hard to convey just what a joy this is. I’m old-school in many ways, having started off making wine in lots anywhere between 23 litres (6 US gallons) and 650 litres (three 60-US gallon barrels) at a time. With truly huge amounts you need a pump to move the wine around. A standard kit wine batch of 23 litres isn’t nearly as demanding, but lifting full carboys from one shelf to another, or putting them up on a high place so you can rack the wine down into a clean carboy on the floor (which then needs to be lifted back into the winemaking area!) starts to wear on the lower back after a few thousand batches. At only a single gallon, you can easily lift the Small Batch kits onto a convenient box or shelf above your kitchen counter, just as easy as getting a gallon of milk out of the refrigerator!

Once the fermenter was in place I racked the wine off of the sediment. Doing this is really helpful, since there’s a decent chance that the siphon will disturb sediment from the bottom of the carboy while your moving the hose from bottle to bottle. Rather than risk getting cloudy wine, it’s better to move all of the clear wine into a new vessel in one go, and then you can relax from there.
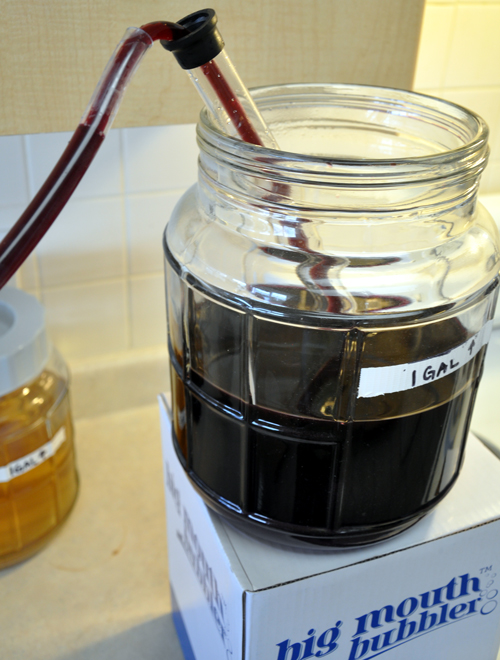
rack-from
Note the siphon rod carefully placed on the far side of the fermenter–this will be important as we get to the bottom.

When the wine gets down to the bottom, the level of sediment needs to be carefully monitored. Remember, the point of racking is to get 100% of the clear wine and leave the muck behind, so don’t leave any of that delicious grape nectar behind.
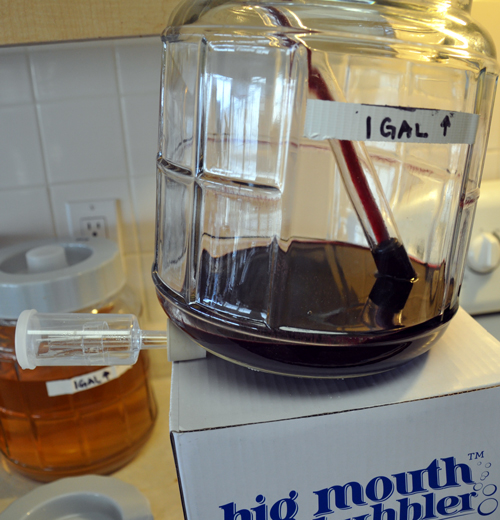
A careful tilt keeps the end of the autosiphon in the wine.

To get and keep that tilt hands-free I usually improvise some kind of prop or wedge. Because I was making wine in my kitchen (another thing Small Batch Kits makes easy!) my carboy wedge wasn’t around. No matter: I just popped a bung under the front of the carboy and watched the levels as they dropped.
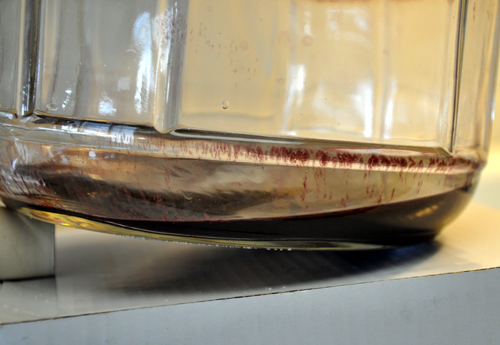
Never leave a man, uh, a drop of wine behind.

Just to make sure I was being completely efficient in my racking, I measured the amount of sediment left in the bottom of the Little Big Mouth Bubbler after it racked over. It came to just over couple of tablespoons all in all–which meant I was going to get a total of about 3.75 litres out of my US gallon (3.78 litre) batch, meaning I could fill five bottles, which is exactly what I wanted.

The wine was exceptionally clear on racking.
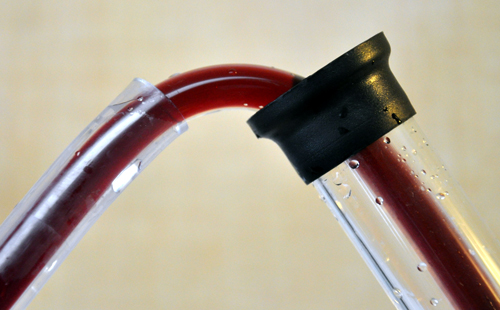
Limpid and gorgeous.

I could have bottled it right there, but since this was an actual test batch for quality assurance and proof of concept purposes, I pulled out my Buon Vino Minjet filter. Filtering doesn’t actually clear a wine: that’s what fining agents are for. Clearing polishes a wine so that it sparkles with a brilliance like diamonds. A former colleague had the best analogy for wine filtering: it’s the difference between a freshly washed car and a freshly waxed car. Both look great, but your eyes can instantly tell which car was waxed and polished because it glows. Same with wine.
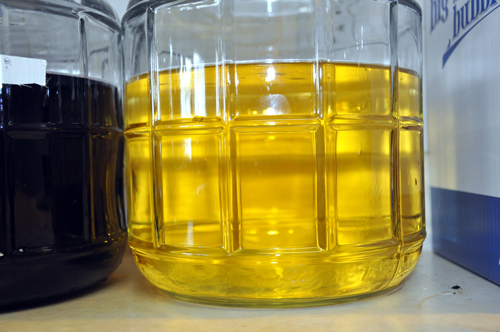
Now that's shiny!
Now that’s shiny!

It’s easy to see this in white wines: you could read the fine print of an EULA through that Chardonnay!

I got all four batches of wine through a single set of Buon Vino #3 pads in about 20 minutes, including sanitising and prep, going from the Chardonnay to the Pinot Noir, then the Merlot and finishing with the Cabernet Sauvignon. Yet another bonus feature of the Small Batch kits: you can make four of them and only need the tiny, convenient BV mini, rather than a much larger filter.

Rest, little filter: you've done a man's work today.
Rest, little filter: you’ve done a man’s work today.

While larger filter systems need a washtub or a laundry sink for cleanup, the Minijet is kitchen sink-friendly for cleanup. Note that the colour you see on those filter pads isn’t anthcyanins (grape pigment) stripped from the wine. It’s suspended material from the wine itself, stained by those pigments. That suspended material, principally yeast cells and colloids, would eventually settle out of the wine on its own. Even though the unfiltered wine was perfectly clear to the eye, after a year or two in the bottle a bit of colour would deposit out on the side or bottom of the bottle. Hurrah for filtering!

Next up, time to fill my wine bottles. I had a mixture of standard wine bottles in Flint (clear) and some swing-tops, also in clear. I like using swing tops for wine that’s going to be analysed and/or destroyed in testing–not because of any technical superiority of swing tops, but because I can never seem to find a dang corkscrew when I’m in the wine lab.
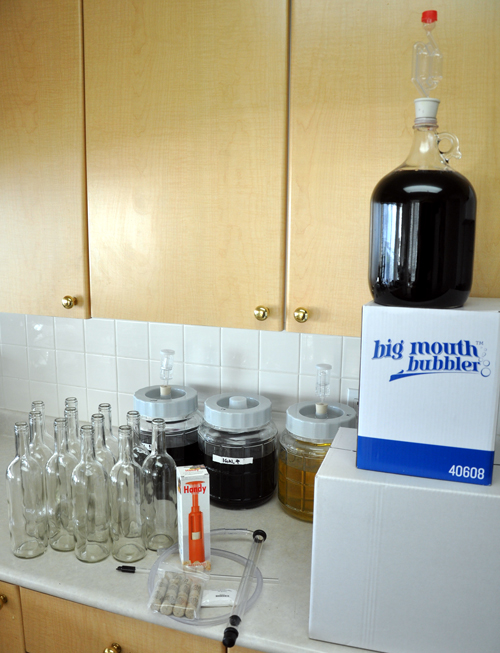
Bottles, autosiphon, siphon tip, impact corker, corks.
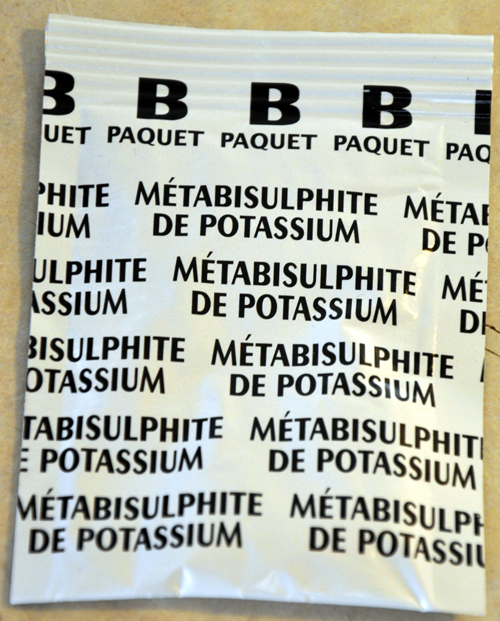
Bottles, autosiphon, siphon tip, impact corker, corks and sulphite for sanitising the bottles.

Also shown in the picture above is the Handy corker. It uses a plunger and a compression sleeve to press-fit the corks into the bottles.
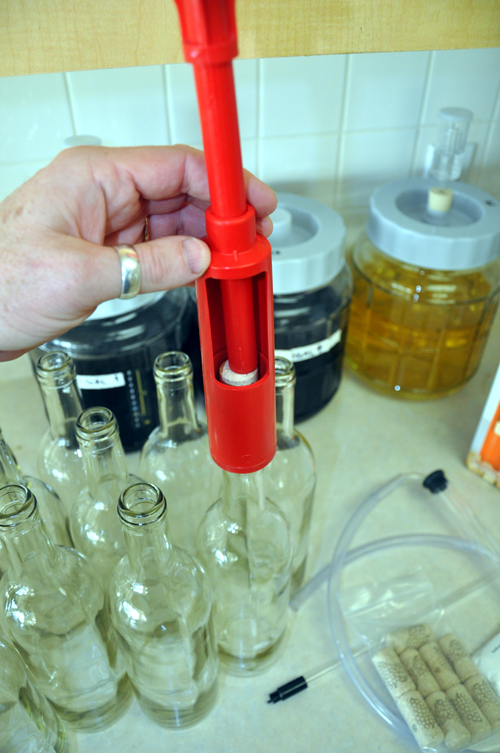
Takes a little oomph, but works great.

Because of the forces involved, it’s a good idea to use the (included) #8-sized corks and soak them in a bit of warm water before use. While I’ve used the Handy and it’s a fine unit, I had another plan in mind for my bottles. But first, I had to fill them.
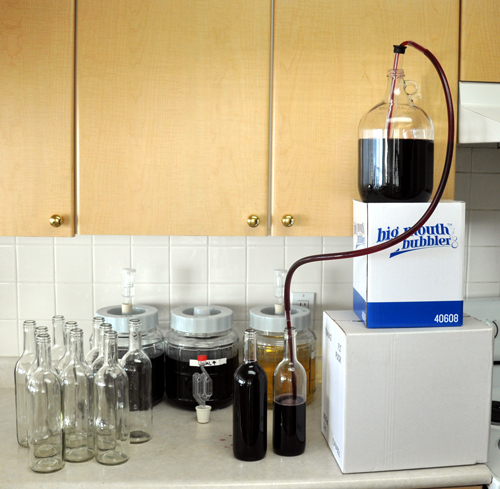
Fast, clean and efficient--now that's good winemaking!
Fast, clean and efficient–now that’s good winemaking!

Getting the bottles filed without splashing, spilling or endlessly fiddling to get the right fill level (very bottom of the neck, to leave the width of two fingers below the bottom of the cork) used to be a drag, but a siphon filler (included in your equipment kit!) makes it a snap.


The one-way needle valve on the tip of the rod stops the flow of wine as soon as you pull it up, while the volume of the rod displaces exactly the right amount of wine–when you fill the bottle to the top and then pull the rod out, the level of wine is perfect to accommodate a cork!

With the bottles filled, it was time to put corks in. My alternate scheme was to use my Italian bronze-jawed floor corker. This mighty beast has been my faithful companion for 25 years and tens of thousands of bottles of wine.
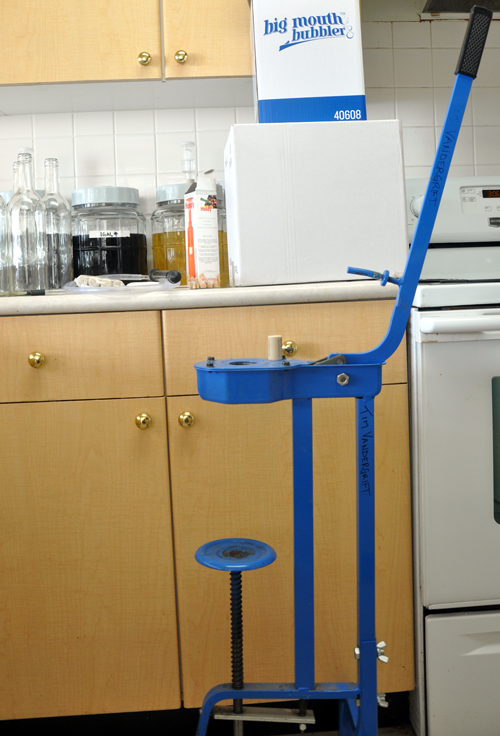
Industrial Age technology at its finest.

The key to how well this thing works is in the amount of leverage it can bring to bear, and how cleverly it compresses and inserts the cork into the bottles. The heart of the matter is the set of bronze jaws. Not brass–brass is too soft, and corks would wear it away in a short time, and this bronze is the same stuff they make steamship propellers out of.
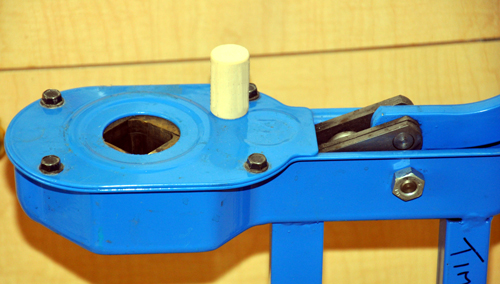
You're in for a squeezy time, Mr. Cork.
You’re in for a squeezy time, Mr. Cork.

The jaws move as the corking arm is pulled, squeezing the cork down to just slightly larger than the size of a pencil. When it’s at is tiniest, the cork finger comes down. pokes it into the bottle and you’re done.


It’s as easy as that, every time.

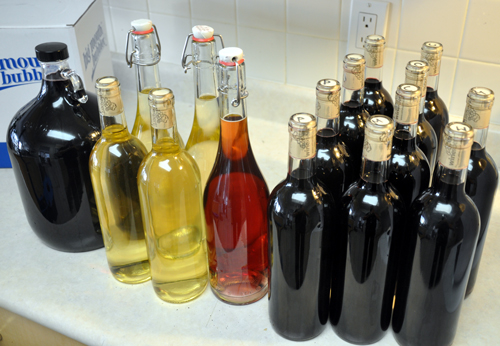
After only a few minutes all of the bottles were filled, corked and swing-capped.
snu
Say, what’s with that pink wine?

Astute observers will notice that there are 15 bottles, a gallon jug and one bottle of pink wine, which doesn’t match up that well with the whole four batches of five bottles each motif I started with. The gallon jug is a blend of Cabernet Sauvignon and Merlot. I blended it at a rate of 3:2, Cabernet to Merlot, after a few benchtop trials. I’m going to let it marry in the jug for a month or so and taste it before bottling.

The pink wine is slightly notional on my part–it’s my job to do the weird stuff so you don’t have to. Or, more accurately, so I can explain it when you do it without my knowledge! It’s a blend of 4% Pinot Noir into the Chardonnay. That kind of blending is a standard technique in commercial winemaking, and I was curious to see how it would marry up with a little time in the bottle.

How does it taste? Even though it’s very young, it’s everything I’d hoped: good fruit, varietal character, smooth tannin, balanced acid and a long finish, especially for a wine just in the bottle. I’m going to do a more formal taste-test in another three weeks, and then once a month after that to see how it’s progressing.

I’ve already ordered another four kits–I’ve never made wine with so little effort or mess, and I’m going to keep production up. Heck, it’s no more work than keeping a vase of flowers on the counter, with the added bonus, it’s wine!

Drinking With Your Mind

Here comes the airplane!

It’s an old saying in the restaurant industry that diners eat with their eyes first. I always thought this would make spicy food vastly less appealing, but I learned that it’s a metaphor for how perception informs reality: if you think something is going to taste good, it’s going to taste good to you. Seems clear enough, but here’s the kicker: apparently we actually drink with our preconceived notions and our expectations.

Free? I'll take two!
Free? I’ll take two!

In a 2003 study by Dr. Brian Wansink of the Cornell Food and Brand Lab, diners were given free glasses of wine with their meal. Some were told it was a French wine, others were told it was a local (North Dakota) bottle. It was, in fact, Two-Buck Chuck in both cases. But the people who were shown a French label ate more dinner, and rated the food higher. Those who thought they were getting ND wine ate less and rated the meal ‘average’. Same wine, same food, different perception.

This really struck me, because over the years I’ve had a lot of calls from retailers asking for help finding a particular kind of wine for a customer. Typically they’ve had a bottle of wine on a vacation, or in a great restaurant somewhere, and they’re looking for a wine kit closest to it in flavour and aroma. I have to suppress feelings of despair at these calls, not because we don’t have something that’s stylistically close to the wine (we might even have a kit that’s nearly identical, or can be made so with a little tweaking) but because it isn’t the wine that they want to replicate. It’s the experience.

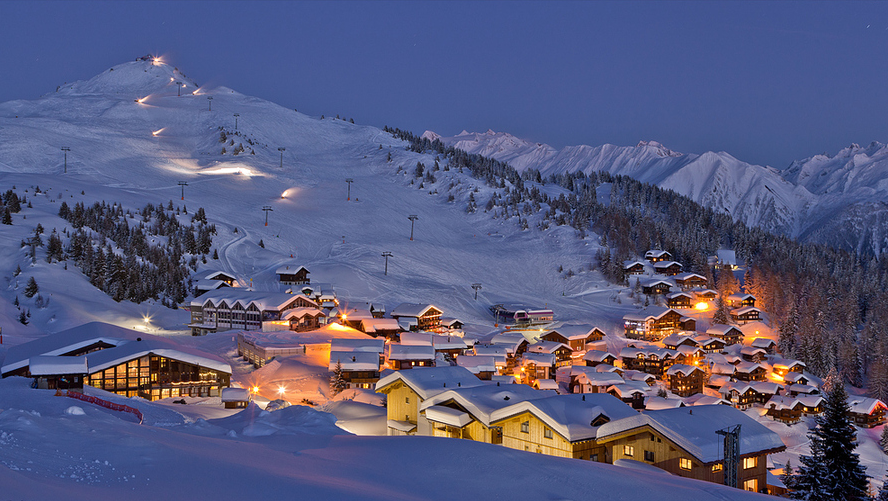
The wine tasted like crisp air, beautiful mountains, and fresh powder . . .

It’s even worse when the retailer starts off with, ‘They just got back from Switzerland . . .’. Typically the people were sitting on a patio on Lake Geneva, or in a ski lodge in Gstaad, and they had a wonderful white wine called ‘Fendant’. Fendant is the Swiss name for Chasselas, a grape with long history and short flavour. It’s slightly citrusy and the best examples hint at grassiness, but mostly it’s really, really neutral (hah, Swiss wines taste neutral, who would’a thought?) which is to say, bland.

But the folks were in the mountains, in a wonderfully well-organised, clean country, enjoying the fresh air and perhaps some wonderful cheeses, at peace with themselves in the center of a grand and magnificent setting. They could have been drinking lighter fluid and would have enjoyed the bouquet and ordered a second bottle. Many times people will bring a bottle home and when they open it, find it very disappointing. This is the origin of the phrase, ‘It doesn’t travel well’ . That actually means, ‘I couldn’t bring the setting and the experience home along with the wine.’

What's good wine? It's any wine you like, no matter it's price or what other people think of it.
What’s good wine? It’s any wine you like, no matter it’s price or what other people think of it.

What to do? Nothing, really. There isn’t anything wrong with letting a whole experience wash over you, having it enhance your perceptions. One of the most incredibly delicious bottles of wine I ever had was a bottle of Louis Martini Cabernet Sauvignon. While there’s nothing wrong with that wine, I recall it as being utter ambrosia. But then, I was falling in love at the time, and the sky was bluer, the air was fresher, and I was the person I always wished I could be at that moment.

We can all take a bit of wisdom away from experience versus actuality: it’s always good to be mindful of what we eat and drink of itself, and to be present at every moment of our lives. As the sage once said, “Life moves pretty fast. If you don’t stop and look around once in a while, you could miss it.”

I couldn’t agree more.

Master Vintner Small Batch Winemaking Part Four

You may remember Master Vintner from such posts as Master Vintner, Your Personal Wine and Master Vintner Part Two: Racking Day. As such you might well wonder, ‘What happened to part Three?’ Don’t worry, all will be explained.

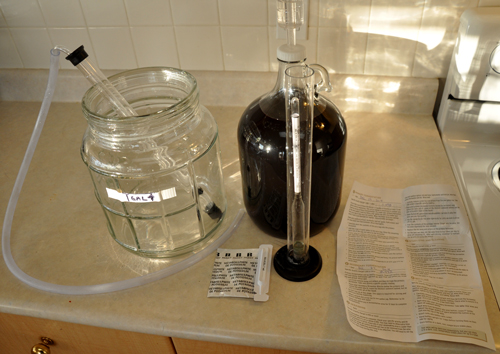
Laid out and ready to go

Step three and step four kind of run together, so I’m blogging about both of them at once. When we last left our Master Vintner Small Batch wines (Chardonnay, Merlot, Cabernet Sauvignon and Pinot Noir) they were resting comfortably in secondary fermentation. The next step was to . . . READ THE INSTRUCTIONS!

Yes, I keep coming back to the importance of reading. It’s your guarantee of success! A quick read-through let me know that I would have to check the specific gravity and then rack the wine from the secondary to the Little Big Mouth Bubbler again for stirring and fining/stabilizing additions.

I sanitized all of my equipment, took a specific gravity reading (0.992 and rock steady) and then transferred the wine from the jug to the LBMB.

Auto-syphon: how do you live without one?

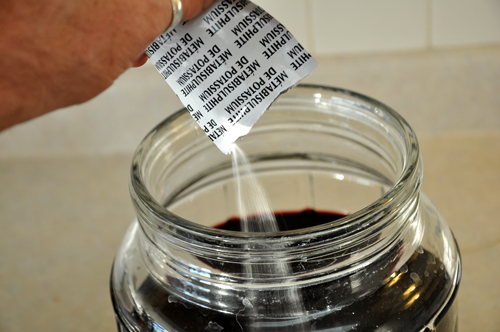
Once all of the wine was transferred over (leaving very little behind in the jug–less than a couple of tablespoons of goo) the next step was to add metabisulphite to prevent oxidation (browning and loss of flavour) and prevent bacterial spoilage (going icky).

Sulphite is your friend, and wants you to be happy.

Let’s talk about sulphite. It’s one of the most common food additives in use today, and it’s been in continuous use in winemaking for many centuries. It’s in every preserved food you buy and in lots of things you wouldn’t expect (noodles? Check. Frozen orange juice? You bet! Pancake syrup? Sure!) It’s safe and almost completely benign. If you don’t believe me, check out the world’s #1 Authority on sulphite use in home winemaking.

So that’s sulphite taken care of. In it goes!

Be sure to tap the packet: a bit of the powder can get caught in the corners.

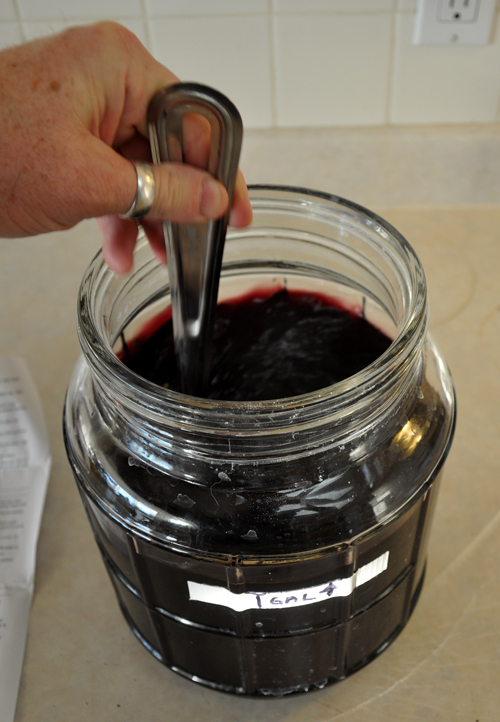
After the sulphite is in we have to stir the wine to distribute it, and to drive off gas in solution. This is crucial to the success of the kit. Carbon dioxide gas is produced by the yeast during fermentation. In a commercial winery this is not much of an issue because they take one or two years to get the wine ready for bottling, and in that time all of the gas escapes. Master Vintner kits are designed to be ready to bottle in just four weeks, so the gas has only a short time to escape from the wine. To stay on schedule we need to aid the process through mechanical agitation.

A stirring experience.

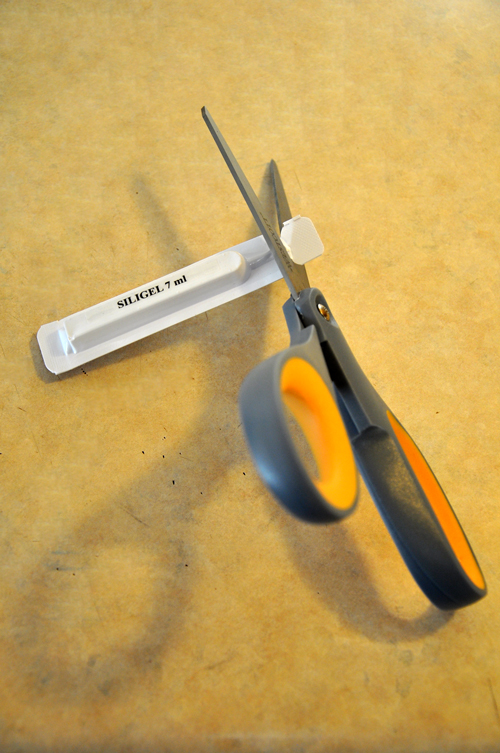
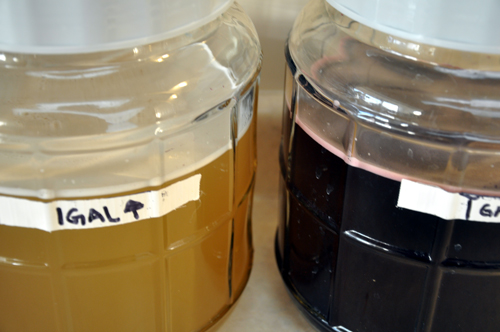
I stirred the wine for a full sixty seconds and then added the first fining agent. Fining is the process of dropping suspended material out of the wine so it’s clear enough for bottling and drinking. Common fining agents are either mineral in nature (Bentonite, Silicon dioxide) or a colloid/gelatine (Isinglass, Chitosan) and in wine kits they’re often used in pairs. The instructions say to add the packet labeled ‘Siligel’, a silicon dioxide solution–essentially really finely pulverised beach sand in a liquid and then stir again.

Sharp scissors are an essential winemaking tool

Cut the tip off of the Siligel packet . . .

Squeeze!
Squeeze!

. . . and then another sixty seconds of stirring.

That's what good stirring looks like--get the fizz out.
That’s what good stirring looks like–get the fizz out.

I popped the lid, bung and airlock on again and over the course of the next two days I kept my spoon in handy and stirred the wine again for sixty seconds at breakfast, lunch and dinner–since it’s right in my kitchen it’s an easy step to take right there when you’re already making a sandwich or preparing your Sunday roast.

After two days of stirring it was time to go on to Step Four, Stabilizing and Clearing. Since it’s almost exactly like the last step, I’m putting it all into this one long post to keep things clear.

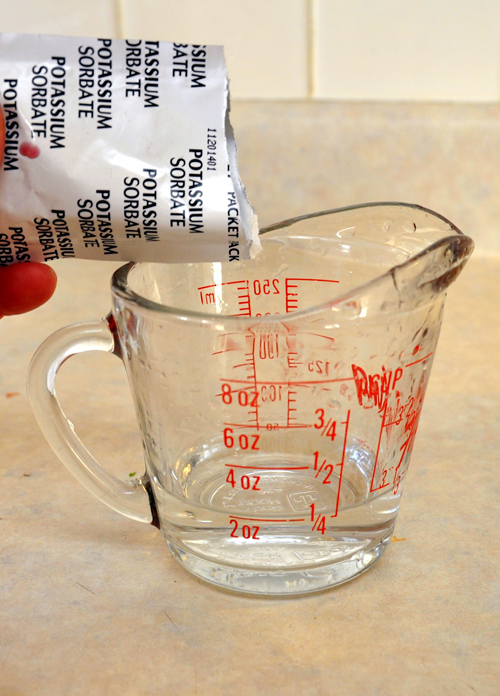
I cleaned and sanitised all of my equipment, checked my specific gravity (yep, still 0.992) and did my next addition, Potassium Sorbate. Sorbate is a bacterial suppressant. It doesn’t kill or even annoy spoilage organisms, but rather keeps them from breeding, which is crucial to the whole process of fining and stabilising: you use sulphite to stun/kill some of the yeast and any other organisms, you use the fining agents to sweep all of the micro-organisms out of the wine, and then you use sorbate to keep any of them from breeding back to the point where they can affect the appearance or flavour/taste of the wine. Sorbate is used in a lot of foods, condiments and even in beauty products and health food supplements, and is found in some berries (blueberries and Mountain Ash) as well. So, in it goes, with the first step being to dissolve it in a tiny amount of warm water.

It's a teeny amount and it dissolves almost instantly.
It’s a teeny amount and it dissolves almost instantly.

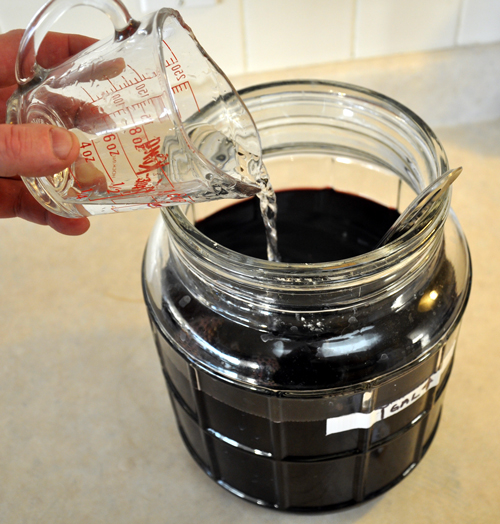
And then to stir that into the wine.

Everybody in the pool!

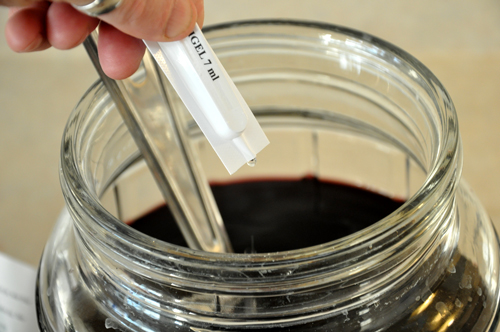
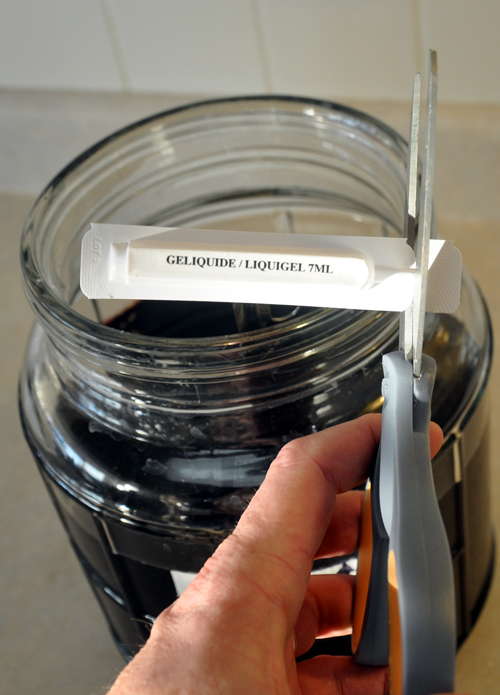
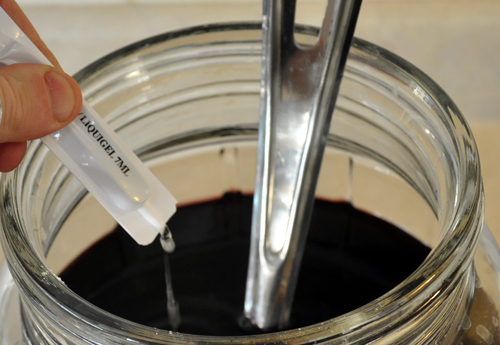
Next step is to add the ‘liquigel’, a clever contraction of ‘liquid gelatine’ and the final fining agent.

Snip!
Snip!

Squirt in carefully.

It's pretty sticky: make sure it all comes out of the packet.
It’s pretty sticky: make sure it all comes out of the packet.

Once everything is stirred up and all additions are done we need to top up the wine to the one gallon mark again. Don’t worry about diluting it: if you’ve been racking correctly you’ll be adding less than a cup and a half (350 ml) and the kit is actually formulated to accommodate this extra water.

Topped right up.
Topped right up.

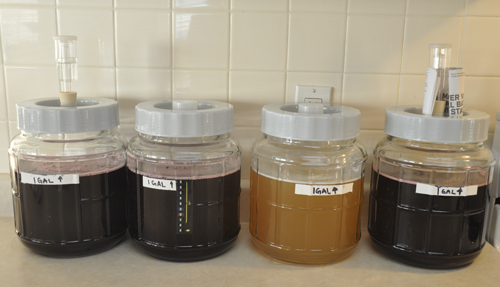
After that it’s back on with all of the lids and airlocks and onto the counter to rest for six days until the wine is clear.

Soon, my pretties . . .

So far this has been the easiest, smoothest winemaking I’ve ever done: the one-gallon size makes doing one kit so easy, so quick, and so simple that doing three more at the same time doesn’t feel like work at all–it feels like a fun hobby leading to a great end–wine!

Catching Up

Oh, I’ve been a bad blogger.

hopunion-interior
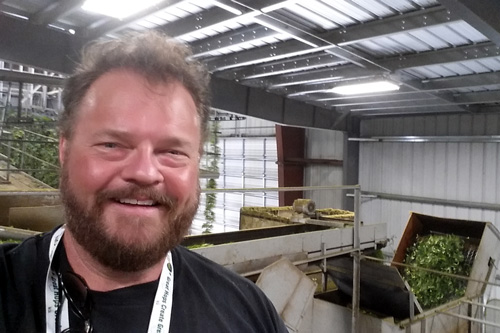
I’m smiling because I’m in the middle of a factory that processes hops–reason enough for a lunatic’s grin.

It’s been a full month since I last blogged. But to my defense, I’ve been a bit busy. In addition to my partnership with Midwest Supplies  and our cool new Master Vintner line of winemaking products, I’ve been busy doing a few other things. First, I shot some videos:

And then I did a little bit of travelling. Since the end of August I’ve been to:

  • Minneapolis
  • Houston
  • Atlanta
  • Victoria
  • Denver
  • Seattle
  • Yakima
  • Boston
  • Virginia
  • Philadelphia
  • Minneapolis (again!)
  • Detroit
  • Chicago
  • Kelowna
  • Summerland

In that time I’ve been to Hop and Brew School, done wine opportunity seminars for consumer beverage retailers, Limited Edition wine and food pairing events, shot many videos, attended the Great Canadian Beer Festival, helped plan catalogues, merchandised stores, drank beer and laughed a lot.

And now I’m typing this up in an airport lounge waiting to jet off to Winnipeg. I’ve had some exceptionally good luck with local weather on my travels, and had a lot of fun working with my friends in all of the cities I’ve visited, and I’m looking forward to the same over the next week.

I’ve got three or four blogs lined up, and soon I’ll have some very exciting news to share, but that’ll have to wait another few days: I’ve got some sales training to do, another couple of Limited Edition wine tastings and a webinar session for the members of the Canadian Craft Winemakers Association.

Uh-oh, it’s wheels-up. Hold the door, I’m coming!

Tim Vandergrift: Master Vintner and Midwest Supplies

midwest-announcement
I can’t remember why I was so mad at that wine glass . . .

The big news is finally here! Midwest Supplies and Tim Vandergrift are working together! I’m really happy with the fit between us and excited to introduce new products and to work on advancing home winemaking. I became an independent consultant early in 2014. My biggest concern about my new career was where I could apply myself to make a difference in the consumer-produced beverage industry (aka Homebrewing and Winemaking).

midwest-logo

While I connected with many small clients and really love the interaction I have with them, I looked around and realised that one of the most dynamic and exciting places in the industry was right in front of me, Midwest Supplies. I’ve worked with them for more than a decade on behalf of Winexpert and always loved how they ‘got’ the industry, understood home beer and winemakers, and generally felt they were my kind of folks. Of course, this didn’t keep me from thinking that they could probably use a guiding hand on the wine side, but I always had other priorities. Now that I’m their Technical Winemaking Advisor I feel incredibly fortunate to have the opportunity to work with them to introduce some new ideas to home winemaking and do educational and promotional activities as well. I’ve even got a couple of videos up to start, one on the benefits of using a floor corker,

And one on the savage joy of using a three-pronged stirring whip! The Great! Big! Deal! that I’m really happy about is some of the new products we’ll be bringing out in the future. No hints just yet, but I’m pretty stoked about sharing them, and won’t hide that light under a bushel. If you’re already a Midwest customer, thanks! If you’re not yet, check ‘em out, and check out My Ten Favorite Wine Kits—nine of which are on sale for a limited time! Use the secret coupon code (hint: it’s WINEGURU) at checkout and you’ll save 15%. How’s that for a hello? Lots more to come, and so much to do, and I couldn’t be happier or more proud.

Road Trip

Houston skyline
Nice little place . . .

After a relatively quiet summer at Chaos Manor it’s back on the road for a bit. I’m in Houston today, a city I’ve only been through once before. I’m giving a presentation on wine retailing here and I’m really looking forward to it. Not only do I get to meet Texas homebrew shop retailers (some of the friendliest folks you’ll ever meet) but also, Mexican food!

texmex
Come to Papa

If you’ve never been to Texas but you have been to Mexico, the food is different. It’s even called ‘Tex-Mex’. But it’s ridiculously good, and I’m looking forward to digging into some of it.

I’m only here for one day: tomorrow at o-dark thirty I’m off to Atlanta to catch up with some more retailers there. Just like Houston, I’m looking forward to meeting up with a great bunch of people and having a really detailed discussion of wine retailing in the USA.

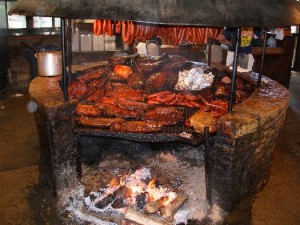
My lunch strategy might have to change there, but I’ve got a plan: barbecue. Canadians are woefully ignorant of real barbecue. Shamefully, we use that word to describe grilled food, which isn’t actually anything like barbecue, which actually centers around low-heat, long time cooking over smoky wood fires.

franklin-bbq-brisket-6
Now that’s a pit!

Before I started travelling in the USA I had no idea that there was so much regional variation–Texas does beef best while the Carolinas do pork but have fierce regional loyalties to different sauces. Memphis does chopped pork and fabulous ribs, while Kansas City barbecues any animal that holds still too long (barbecued lamb ribs are to die for). It was all confusing and I didn’t know what to order.

But I put in action a clever strategy: any place I go that has good barbecue, I ask for help, with a little twist. If I’m in Carolina I say, ‘I’ve had Texas barbecue–is this anything like that?’. Local pride swells like thunderheads, and folks are quick to guide the poor, misguided Canadian to ‘the good stuff’. Sure it’s  a wee bit of a fib, but I’ve had so much good barbecue from it that I can’t help myself.

Which reminds me of something my favorite food anthropologist, Margaret Visser put in her book, Much Depends On Dinner: people are the same everywhere: the only thing that changes is the dinner.

But it’s a long time until dinner–work first!

 Edited to Add . . .

barbecue
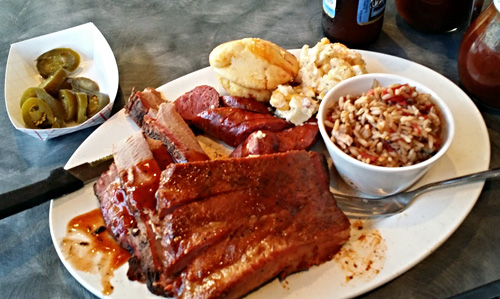
Ribs, brisket, spicy sausage, jalapeno corn muffin, heart-attack potatoes and dirty rice. Even the salad had barbecued meat in it.

That was some pretty good barbecue.

Cellaring: Digging a Hole

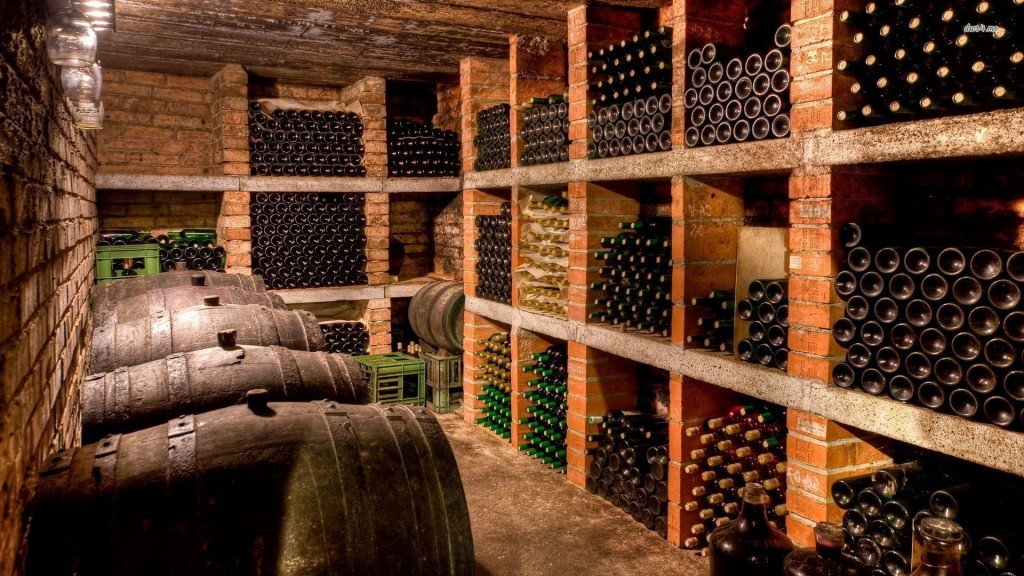
cellar 01
Looks like a great place to spend the weekend

One of the things that’s rarely discussed when the subject of cellaring comes up is the cellar itself. As the name implies, people used to put their wine in a hole in the ground, under their dwelling or winery. As long as human beings have striven to preserve food they’ve known that cool, steady temperatures, combined with moderate humidity would keep fruits, vegetables and meat from spoiling as quickly as it would in other conditions. Wine kept in these conditions not only lasts longer but also improves with time.

Cellars and caves work to conserve and age wine because they offer the perfect combination of environmental factors including:

  • Cool temperatures, usually in the 10-12C range (52-55F). Wine held here ages in a very slow and controlled manner. For every ten degree increase in the temperature, the speed of the chemical and biochemical reactions that govern ageing doubles, and some get out of control, causing the wine to die of old age while still young in years.
  • Steady temperatures. Variations of less than one degree per day, or five degrees between winter and summer are best. Every time a bottle of wine warms and cools, the wine inside it expands and contracts, alternately pushing and pulling on the cork. Some wine could leak out, or penetrate the cork, and air can enter the bottle. Obviously, neither of these is desirable.
  • Darkness—if not complete blackness then at least the absence of direct sources of UV radiation. While wine doesn’t go skunky in minutes like beer does in direct sunlight, it does age quicker and suffers from ‘photodegradation’.
  • Humidity—steady, around 70%. Any drier and corks can dry out. Once the end of a cork becomes dry, it wicks wine along just like the edge of a paper towel dipped in liquid. Eventually the wine level in the bottle drops, or the cork dries out completely and crumbles. Too much humidity and your corks will get mould, and your labels will disintegrate.
  • No vibration. Wine is a living thing, so constant jostling, thumping and vibrating unsettles it. Store a bottle of wine in an active paint-shaker and it will go bad in only a few minutes. Store it on top of the washing machine, and it won’t take many loads of delicates before it falls apart.
  • A ‘clean’ environment. Wine is a food product, and just like not storing angel-food cake next to garlic, you don’t want your precious wine snuggled up to paint thinner, compost or any other food or non-food item that could transfer flavours or aromas.

When asking how long wine will keep – that is, how long you can age it and still have it be drinkable – you’ll find that the answers can become quite complex. Most ageing recommendations tend to be very general, because there are so many variables to consider, including the type of wine, the storage conditions, and the quality of the cork (I’ll talk a lot about corks in an upcoming blog).

What is inside a bottle of wine often has less to do with how well it may age than the external conditions that it will be stored in. Under ideal conditions even inexpensive wines will age for years under a good cork. But those ‘ideal’ storage conditions include the absence of electromagnetic radiation (both visible and UV light), very high relative humidity, a temperature of 11C/52F, not varying by more than 1/10th of a degree over the course of one year, and an absence of any sort of vibration. Any divergence from these conditions could reduce a wine’s ageing potential.

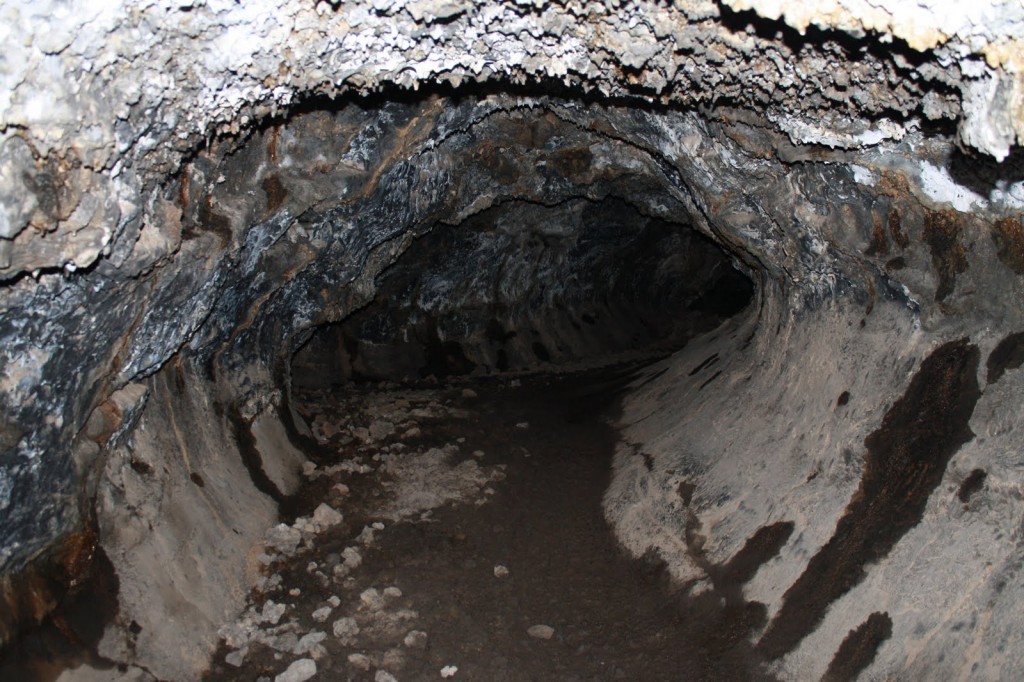
scary cave
And over here is the guest bedroom . . .

Cool, stable, quiet, humid, dark and clean—sounds pretty simple. But most of us aren’t going to be comfortable digging a big hole under the house, and if our home had all those attributes, it’s a pretty sure thing that we’re living in a cave or under a bridge with trolls. You could buy a fancy climate-controlled wine cabinet, but those can be expensive, especially if you’re making your own wine and building up a good collection. Alternatively, you can make do with what you’ve got on hand, and extend the life and cellaring potential of all of your wine. Easiest is to start by storing your wine in the coolest part of your home, away from direct light sources, off-odours or vibrations.

basement-cellar
Time to fill this place up!

You can minimize the impact of temperature changes by keeping the wine up against a north-facing wall. Sunlight striking a foundation or the earth around it can cause a temperature flux, so steer clear of south-facing walls. You might also want to build an enclosure around your wine rack if it’s out in the open: this can help diminish convection currents, and increase thermal inertia. The enclosure doesn’t have to be anything fancy; you can create it from things as simple as Tyvek (the foam-board house insulating material), duct-tape and corner brackets.

In colder, drier climates like the north and the midwest, humidity can drop quite low, especially in winter. Too low and your corks will dry out, allowing oxidation and, potentially, leakage. Humidifiers sold for home use are not a good answer; they work too well, and can cause a build-up of mold and mildew in places like the basement, where air circulation is low. It makes more sense to set up a passive humidifier. Essentially this is a pan of water, a clean dishcloth and a cinderblock. Set the pan of water on top of the cinderblock in your wine cellar, drape the dishcloth half-in and half-out of the pan, and tuck the bottom end on top of the block. This will allow the towel to wick the moisture out of the pan and increase the evaporation into the air. The cinder block will hold any excess moisture and release it slowly, helping keep the humidity steady, even in a cellaring area a large as a thousand cubic feet.

Some wines are more susceptible than others to poor storage conditions. In general, white wines–particularly off-dry wines and Champagne – are frailer than reds. Grape variety can also make a difference to how well the wine does in storage; so you would find that a robust variety like Cabernet Sauvignon is generally more resilient than delicate one like Pinot Noir.

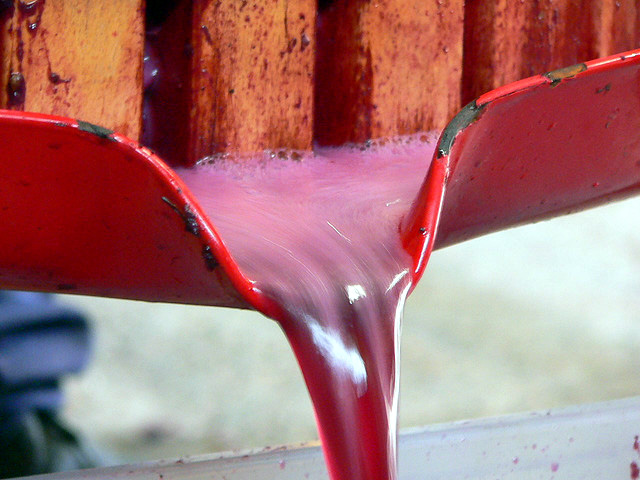
press-wine
Looks fine, but it could probably use a bit of ageing.

With a newly bottled wine, it’s tempting to start consuming it right after bottling. While there are many wines that can be consumed young and be everything you want them to be, if you really would prefer to maximize your wine’s potential, a little time in the bottle can make an enormous difference. Most red wines begin life with obvious fruity aromas and some degree of astringency or bite, but with ongoing ageing, they develop softer, gentler, more complex aromas and flavours. The wines become richer as the fruit mellows and as the astringent tannins relax and contribute to the body and character.

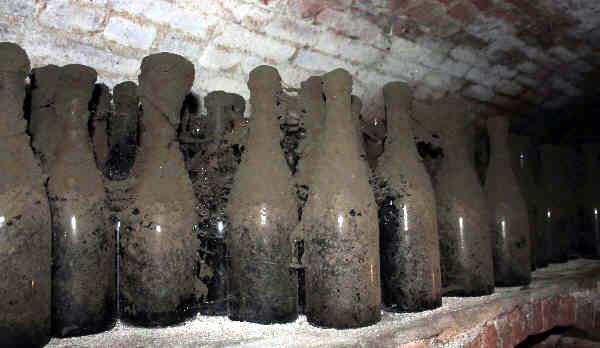
old-bottles
Maybe not this long . . .

Cellaring wine used to be a rich man’s game. In centuries past, only wine merchants storing stock for future sale, or the very wealthy could afford to purchase age-worthy wines in large volumes, and then wait as the years passed to sample them as they approached their peak. The French used to say that you didn’t buy Bordeaux for yourself, you bought it for your children, while you drank the wine your father had bought. Things are a little easier with modern wines. Most of them are designed to be more drinkable sooner and even a moderate amount of cellaring will help bring out their best.

Summertime, and the Livin’ is Busy

I’ve had a busy couple of weeks: between staying ahead of my garden and keeping up with writing projects and clients I haven’t had a lot of free time.

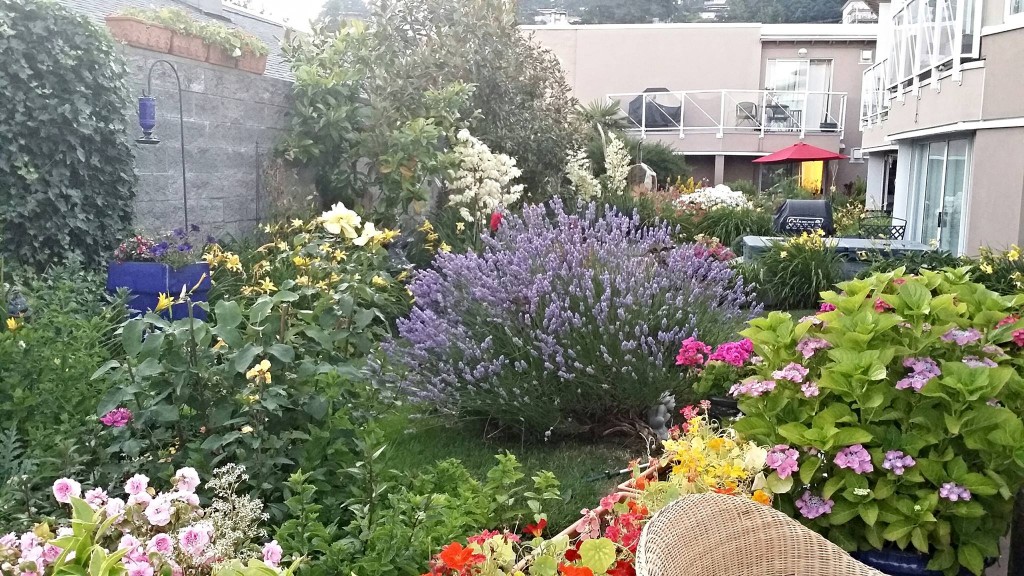
home garden
The Patio–not just decor, this garden supplies herbs to my kitchen.

Fortunately I’ve got a break: I’m flying off on an exciting big city adventure! Toronto here I come. Well, GTA, here I come . . . I like Toronto, but in 20 years of travelling there several times a year, I think I’ve only actually spent a total of four days in the city, so it still seems like a strange place to me, but business is business and travelling for pleasure never seems to take me to the exotic places in my own country.

On the other hand, all this will be waiting for me when I return!

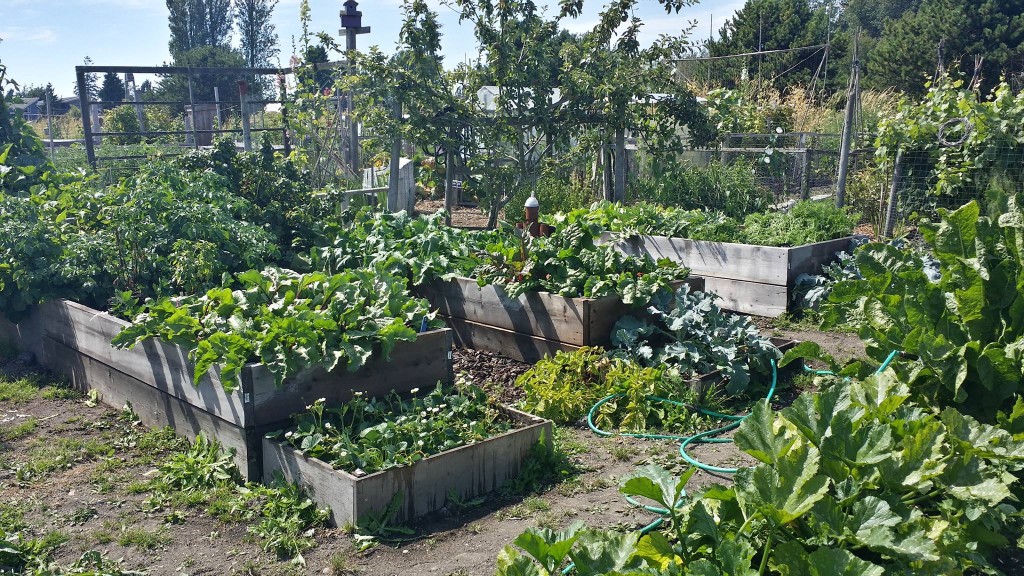
community garden
Raspberries, currants, apples, potatoes, basil, tomatoes, artichokes, beets, turnips, zucchini, squash, beans, broccoli, carrots, lettuces, cabbages, horseradish, celeriac . . . et cetera

I’ve got some cool new stuff in the pipeline: I’m shooting video, but while I’m great in front of the camera, I’m not as competent behind it. I hope I’ll have something better than a blooper reel next week.

I’m also bent on getting some all-grain brewing done. One of my current projects is to get my full brewing setup back on-line, and it’s happening. I’m drilling holes in pots, connecting mash screens and generally planning stuff up–wait until you see my new grain grinder (one of the video topics to come).

Beyond that, as always I’ve got a million words to write and many other promises to keep. Hurray for self-employment, my boss never lets up on me!

Whoops! Time to pack, and I’ve got to water the gardens before I leave.